AI Assistant
The Starfish AI Assistant enhances user experience across factor, strategy, and analytics. This page will introduce the deployment of the AI Assistant and provide several usage examples.
Deployment
Deploy Starfish first (refer to Deployment) and
execute the following command to change directory to
/server/web/starfish:
cd /home/dolphindb/server/web/starfish/starfish_ai_backendGrant execute permission:
chmod +x starfish_ai_backendExecute the following command to start Starfish AI (adjust the IP and port accordingly):
nohup ./starfish_ai_backend --host 192.168.100.77 --port 8669 > server.log 2>&1 &Get Started
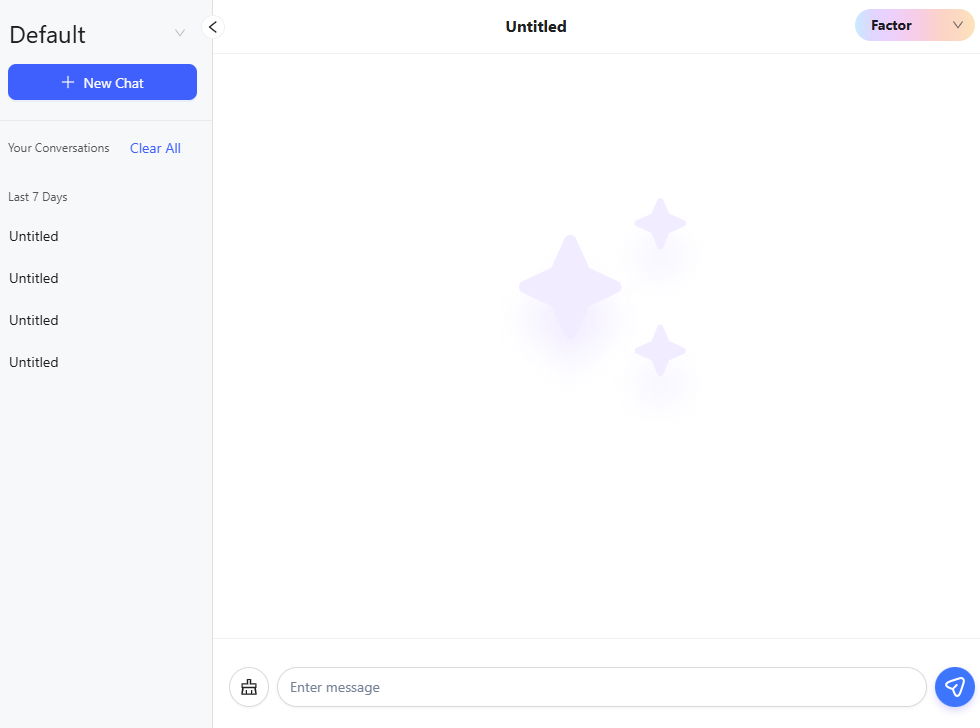
Click AI Assistant on the top toolbar to open the chat window and start new chats with the AI Assistant.

Settings
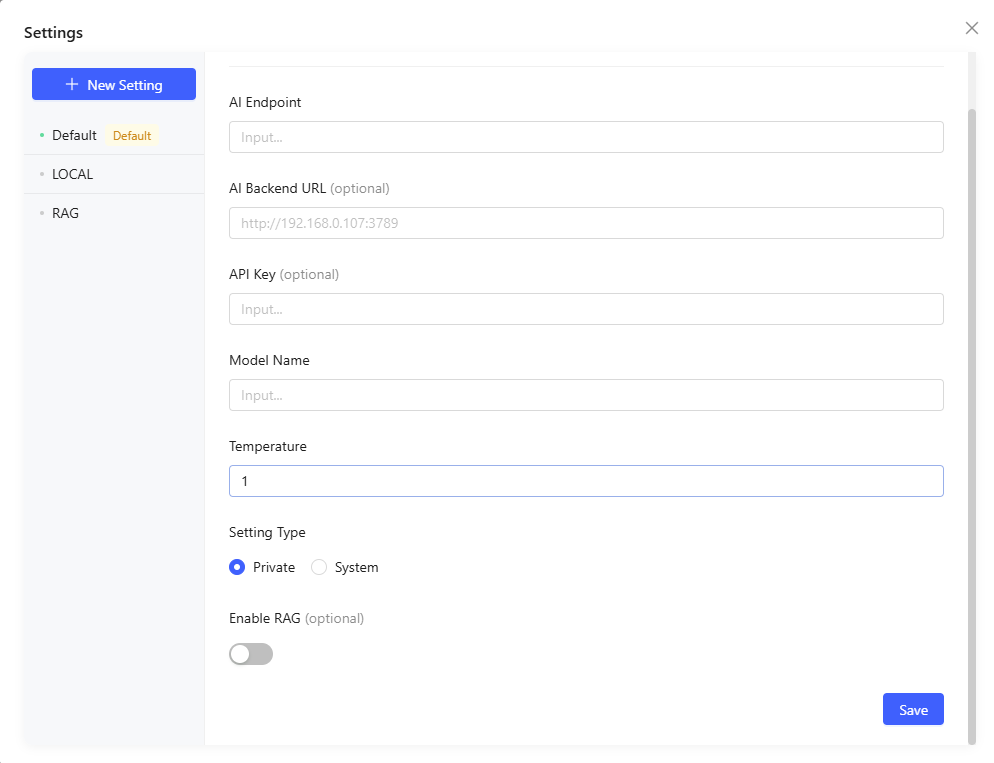
Click the top-left corner of the chat box to open the dropdown menu and click Manage Settings to open the setting page. You can create a new setting or modify existing settings here.
Create a New Setting
Click New Setting. Enter the parameters and click Save to complete. All users can create and manage their own settings.
| Parameter | Description |
|---|---|
| AI Endpoint | The API address of the AI service. For example: http://api.openai.com/v1/chat/completions. |
| AI Backend URL | The backend address deployed locally to forward AI requests. The default value is http://localhost:3789. |
| API Key | The authentication key to access the AI service. |
| Model Name | The name of the AI model. |
| Temperature | A parameter that controls randomness in the
generated content:
|
Setting Type
- System
Admin users can set the Setting Type as System, which shares the setting across all users.
- Private
All users can create Private settings for themselves and set any setting as default. The default setting will be automatically activated when the chat starts.
Note that the Agent supports streaming APIs with chunks formatted as follows:
interface ChatCompletionChunk {
  id: string;
  choices: Array<{
    delta: {
      content?: string | null;
      // The reasoning content must be placed within this field.
      reasoning_content?: string | null;
      // Some platforms, like OpenRouter, use "reasoning" instead.
      reasoning?: string | null
      function_call?: {
        arguments?: string;
        name?: string;
      };
      refusal?: string | null;
      role?: 'system' | 'user' | 'assistant';

    };
    finish_reason: 'stop' | 'length' | 'tool_calls' | 'content_filter' | 'function_call' | null;
    index: number;
  }>;
  model: string;
  usage?: {
    completion_tokens: number;
    prompt_tokens: number;
    total_tokens: number;
  } | null;
}
Switch Settings
Click the top-left corner of the chat box to open the dropdown menu and view available settings. The active setting is marked with a green dot. Click any setting to switch quickly.
Factor
Develop Factor
Input Description
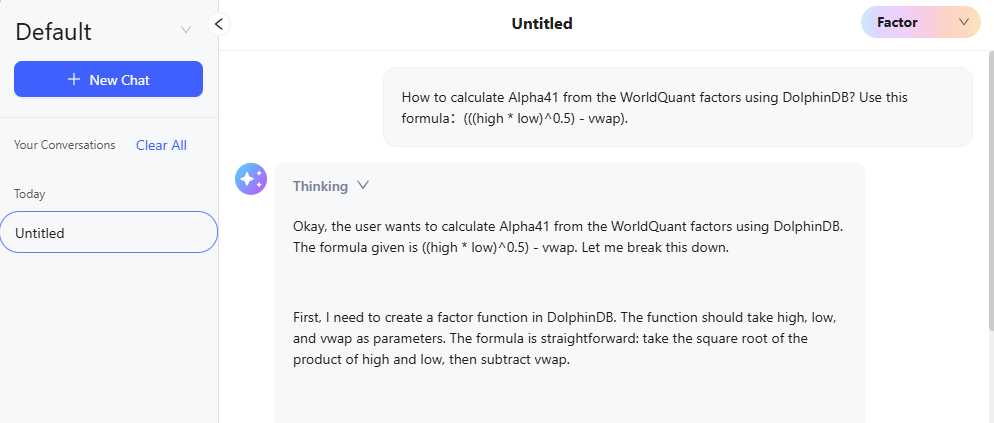
Switch to Factor mode via the dropdown in the top-right corner of the chat window. Enter the description of the desired factor. For example:
“How to calculate Alpha41 from the WorldQuant factors using DolphinDB? Use the formula: (((high * low)^0.5) - vwap).”
Generate Factor Code
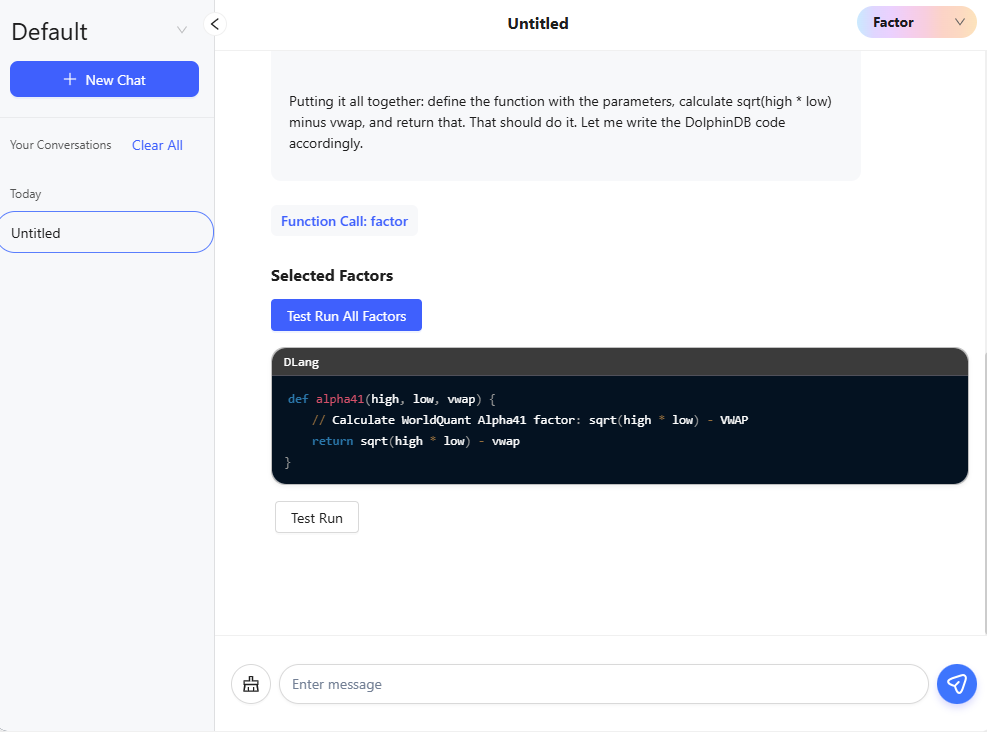
After submission, the AI Assistant will process the question and return the code as a complete script.
Select and Test Run
Check the factor codes and select the one that meets the requirements. Click Next Step.

Click Test Run or Test Run All Factors to execute the factor code.
Create Factor Module
Click Create Factor Based on Script after the test run has succeeded to create a new factor module containing the selected factors.

Factor Module Editing and Test & Evaluation Configuration
The system will jump to Factor Module editing page. You can set the compute and analysis configurations in the chat window.
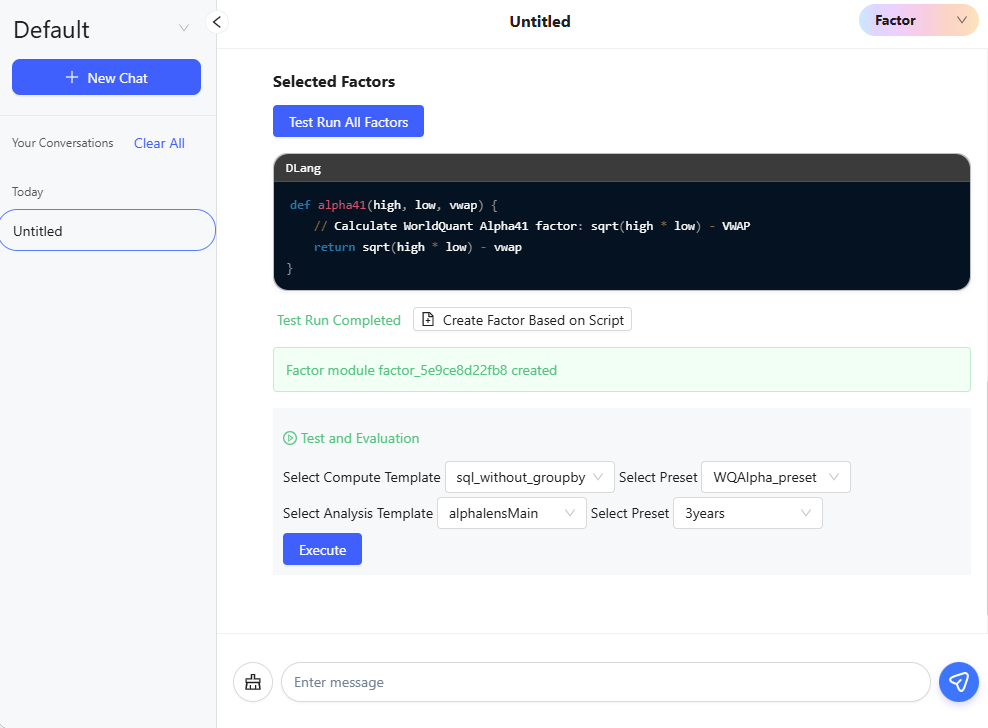
Execution and Results
Click Run to execute factor calculation and evaluation after configuration. A pop-up window in the upper-right corner will display the current status. Click View to check the detailed information, including performance, run result, and visualization report.
Advanced Operations
You can try the following operations:
- Batch Generation: Generate multiple factors at once.
- Derivation: Give new instructions based on the existing factors. For example: “Derive 4 factors from this factor”. The AI will return 4 new factors. You can select from them for further use.
Strategy
Input Description
Switch to Strategy mode. Enter the description of the your strategy with strategy type (stocks, futures, options) and data type (snapshot, minute frequency, daily frequency). For example:
“Generate a strategy in DolphinDB using snapshot market data of stock to buy 200 shares when the bid order volume is greater than twice the ask order volume, and sell 200 shares when the ask order volume is greater than twice the bid order volume. No need to consider complex position or subscribe to any indicator.”
Generate Strategy Code
The output typically includes:
- Strategy type
- Data type
- Callback function code
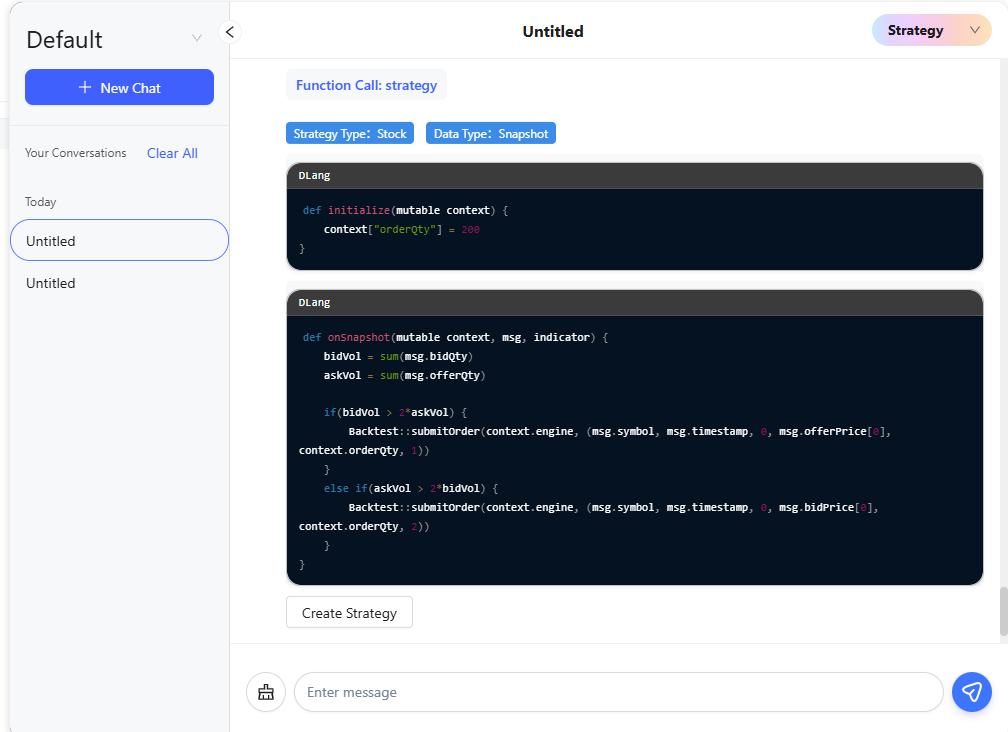
Confirm Strategy Logic
Click Create Strategy after confirming that the logic of the strategy code is correct. The system will generate the corresponding strategy based on the strategy type and data type, and automatically jump to the strategy editing page with the strategy code.
Test Run and Backtesting:
Click Run to start the backtest. You can check the report after completion, including trade records, performance, and visualization report.

Analytics
Switch to Analytics mode. Enter the description of the factor. For example:
“Calculate the standard deviation of trading volume per minute for each stock based on the 1-minute market data.”
The system will search all relevant databases and tables, return the script, and try to execute it.
- If succeeded, return the result.
- If failed, the system will submit error information for revision, and iterate until the script is error-free.