Querying Tables
In the DolphinDB web interface, users can query a table in two ways: Query Builder and Script Editor. After the query, users can preview and directly export the query result in CSV format.
-
Query Builder enables users to select columns from a table and set query conditions. Based on users' settings, it executes query conditions and dynamically generates the corresponding SQL scripts.
-
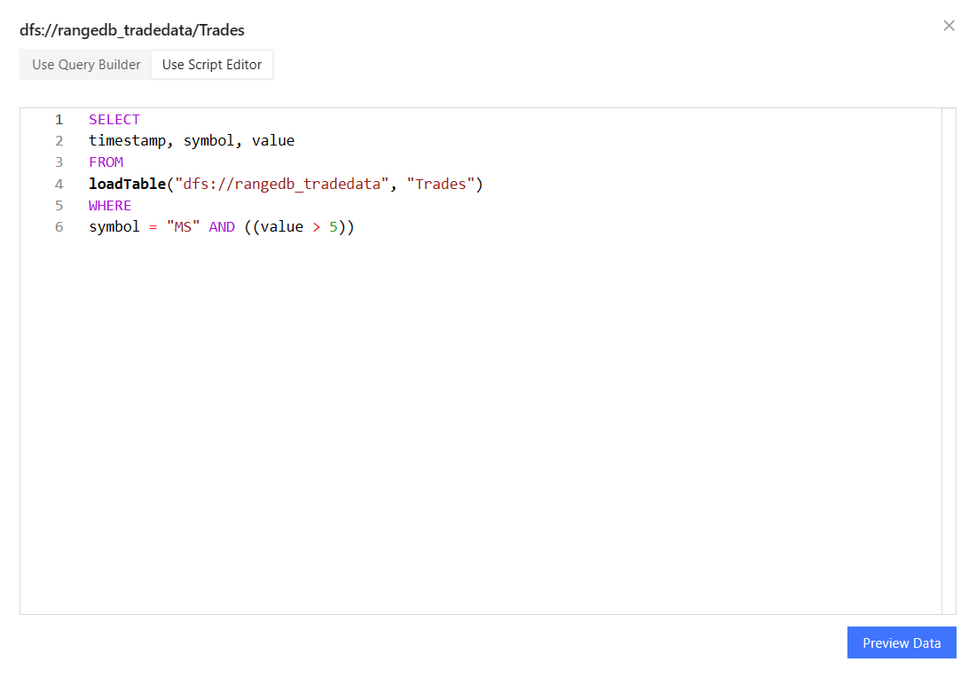
Script Editor enables users to query a table directly through the SQL scripts.
Note: This function is only supported in a standalone mode, or on the data node or compute node in a cluster.
Create Query
Click the  icon on the right of
the table name to open the query window.
icon on the right of
the table name to open the query window.
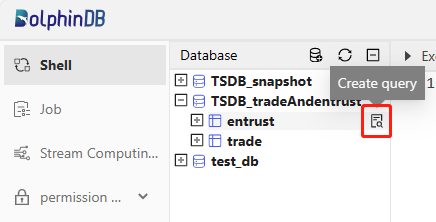
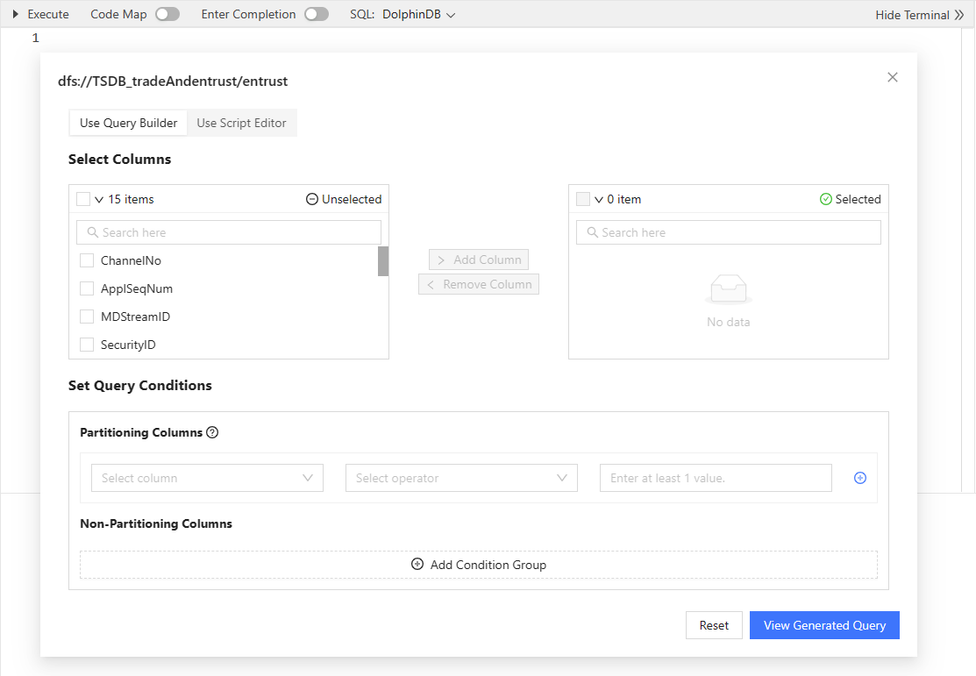
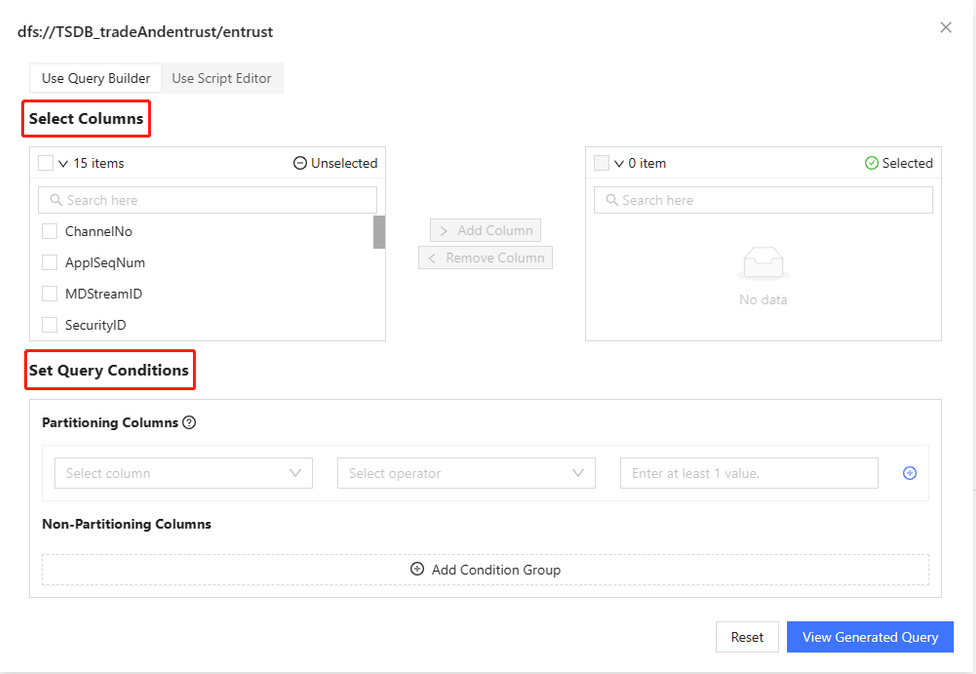
The query window is shown in the following figure.
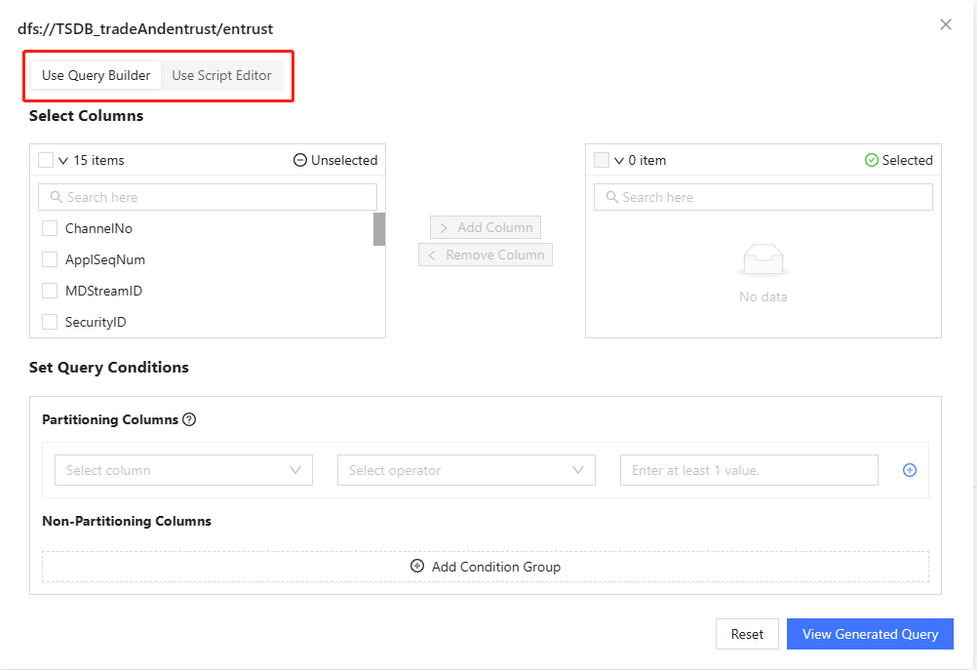
Click the tab shown in the upper left corner to switch to the corresponding query pattern.
Query Builder
Query Builder consists of two sections — Select Columns and Set Query Conditions.
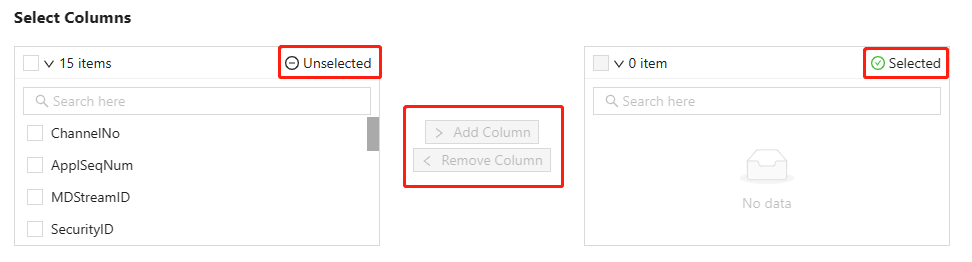
Select Columns
Select Columns section consists of two selection boxes and two operation buttons.
To add columns for queries, users can select one or multiple columns in the box of unselected columns on the left, then click Add Column; to remove columns for queries, users can select one or multiple columns in the box of selected columns on the right, then click Remove Column.
Set Query Conditions
In this section, users can set conditions on partitioning columns and combine them with conditions on non-partitioning columns using the AND operator. Users can set one or multiple conditions. A query condition consists of three required items — column name, operator, and value.
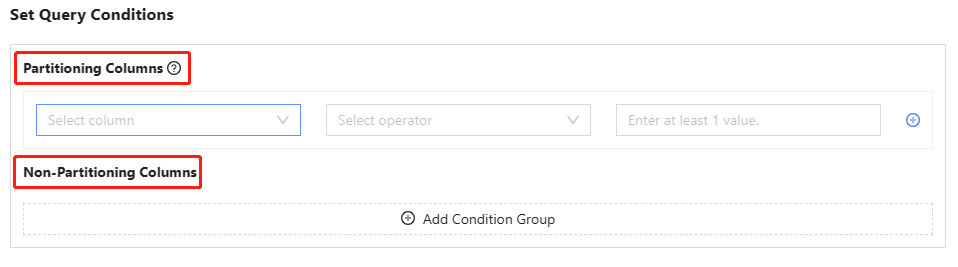
Partitioning Columns
If there is a partitioning column in the selected table, users should set at least 1 condition on the partitioning column. Conditions on partitioning columns are combined using the AND operator.
If there is no partitioning column in the selected table, the section of partitioning columns will not be displayed.
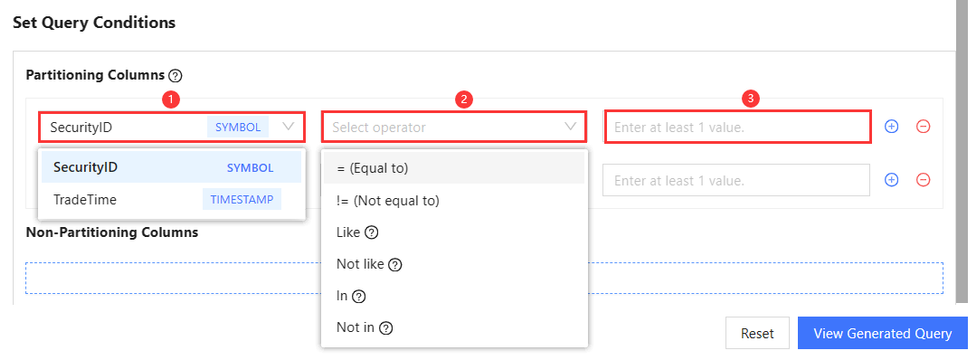
How to Set a Condition on a Partitioning Column
The following steps describe how to set a condition on a partitioning column.
-
Select a partitioning column from the Select column dropdown, which contains all partitioning columns available for query in the selected table. Note that most column types are supported by Query Builder. For details, refer to the section "Supported Column Types".
-
Select an operator from the Select operator dropdown, which contains all operators available for the selected partitioning column.
-
Enter at least 1 value in the value box. For different operators, the value box may be a dropdown, a date table, or a manual input box. For details, refer to the section "Column Types and Operators".
How to Add/Delete a Condition
To add a condition, click the  icon, which is combined with other conditions
using the AND operator. To delete a condition, click the
icon, which is combined with other conditions
using the AND operator. To delete a condition, click the  icon.
icon.
Non-Partitioning Columns
In this section, users can set conditions on non-partitioning columns and combine them using the AND or OR operators. Non-partitioning columns are those available for query in the selected table, excluding partitioning columns.
Non-Partitioning Columns section consists of condition items and condition groups.
Users can create one or multiple condition groups and combine them using the OR operator.
A condition group contains one or multiple condition items, combined using the AND operator.
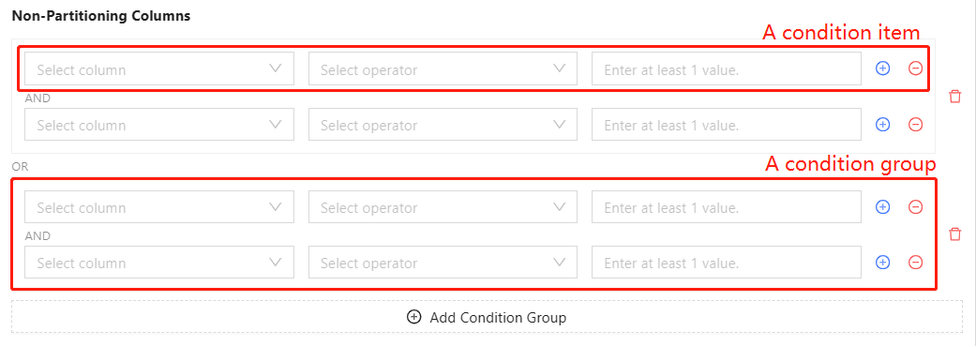
To set conditions on non-partitioning columns or add/delete a condition item, follow the same steps as in the Partitioning Columns section.
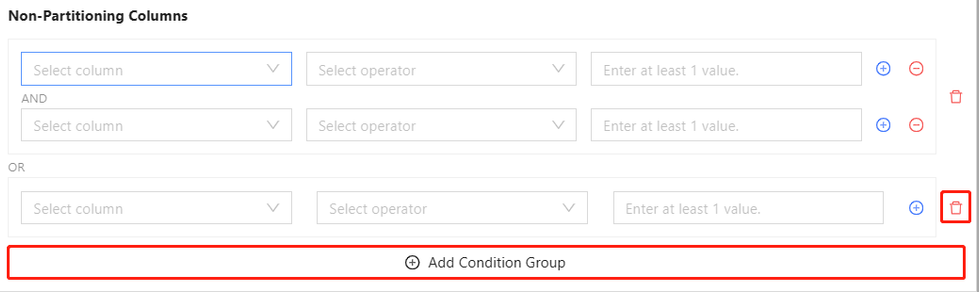
Click Add Condition Group to add a condition group, which is combined with other condition groups using the OR operator.
Click the  icon to
delete a condition group.
icon to
delete a condition group.
Column Types and Operators
Supported Column Types
| Column Type | Examples | Category | Range |
|---|---|---|---|
| BOOL | 1b, 0b, true, false | Logical | 0~1 |
| SHORT | 122h | Integral | -2 15 +1~2 15 -1 |
| INT | 21 | Integral | -2 31 +1~2 31 -1 |
| LONG | 22l | Integral | -2 63 +1~2 63 -1 |
| DATE | 2013.06.13 | Temporal | |
| MONTH | 2012.06M | Temporal | |
| TIME | 13:30:10.008 | Temporal | |
| MINUTE | 13:30m | Temporal | |
| SECOND | 13:30:10 | Temporal | |
| DATETIME | 2012.06.13 13:30:10 or 2012.06.13T13:30:10 | Temporal | [1901.12.13T20:45:53, 2038.01.19T03:14:07] |
| TIMESTAMP | 2012.06.13 13:30:10.008 or 2012.06.13T13:30:10.008 | Temporal | |
| NANOTIME | 13:30:10.008007006 | Temporal | |
| NANOTIMESTAMP | 2012.06.13 13:30:10.008007006 or 2012.06.13T13:30:10.008007006 | Temporal | [1677.09.21T00:12:43.145224193, 2262.04.11T23:47:16.854775807] |
| FLOAT | 2.1f | Floating | Sig. Fig. 06-09 |
| DOUBLE | 2.1 | Floating | Sig. Fig. 15-17 |
| SYMBOL | Literal | ||
| STRING | "Hello" or 'Hello' or `Hello | Literal | |
| DATEHOUR | 2012.06.13T13 | Temporal | |
| DECIMAL32(S) | 3.1415926$DECIMAL32(3) | Decimal | (-1*10^(9-S), 1*10^(9-S)) |
| DECIMAL64(S) | 3.1415926$DECIMAL64(3), , 3.141P | Decimal | (-1*10^(18-S), 1*10^(18-S)) |
| DECIMAL128(S) | 3.1415926$DECIMAL128(3) | Decimal | (-1*10^(38-S), 1*10^(38-S)) |
Note:
-
Avoid using single quotes (') when querying columns of SYMBOL/STRING type, otherwise the query may fail.
-
Filtering null values of columns is currently not supported by Query Builder and can only be achieved by Script Editor.
For more information, refer to Data Types.
Supported Operators
| Column Type | Supported Operators |
|---|---|
| Temporal, numeric | =, !=, >, <, >=, <= |
| SYMBOL, STRING | like, not like, in, not in, =, != |
| Others | =, != |
Instructions for LIKE/NOT LIKE pattern:
The LIKE/NOT LIKE pattern must include the wildcard character %, which represents zero, one, or multiple characters of any type or length. Note that it is case-sensitive. For example:
-
688% matches strings starting with "688", like "688101".
-
%SZ% matches strings that contain "SZ", such as "001SZ".
-
%6 matches strings ending with "6", like "abcd6".
For more information, refer to like.
Instructions for IN/NOT IN operators:
The value dropdown shows a subset of available values with a brief delay. Alternatively, enter one or more values manually in the field, pressing 'Enter' after each. For more information, refer to in.
For details about other operators, refer to Operator Summary.
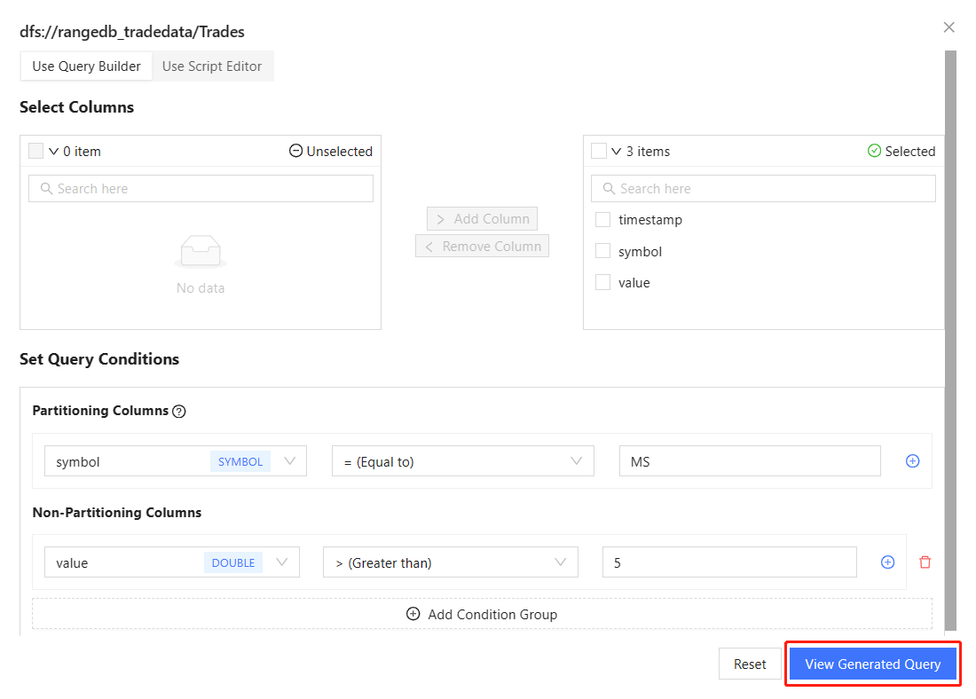
View Generated Query
After column selection and condition setting, users can click View Generated Query to dynamically generate corresponding SQL scripts. To set the settings, users can click Reset.
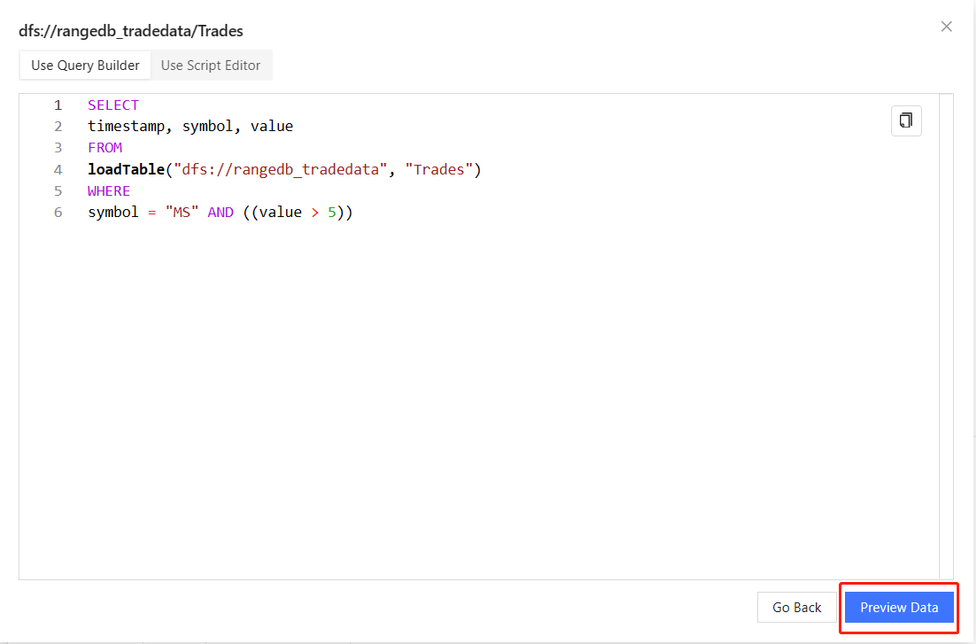
The generated SQL scripts are as follows. Click Go Back to return to the
Query Builder page to modify settings. Click the  icon to copy the SQL scripts.

Preview Data
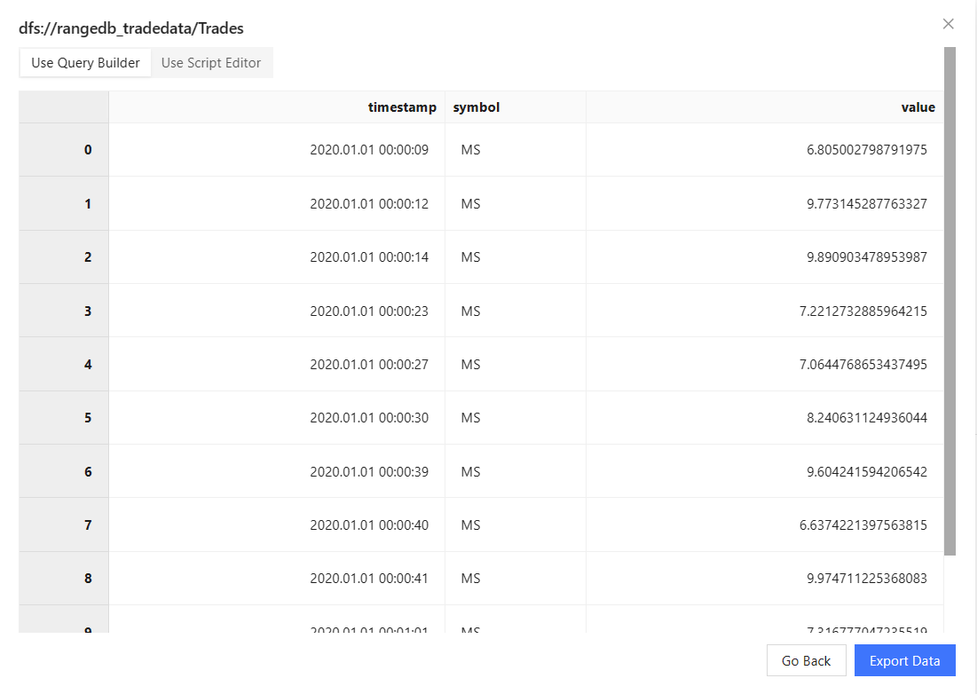
Click Preview Data to preview the result.
The result will be previewed in table form, as shown below.
Note: The preview page can display up to 20 million rows of data. If the full dataset exceeds 20 million rows, a partial preview will be displayed.
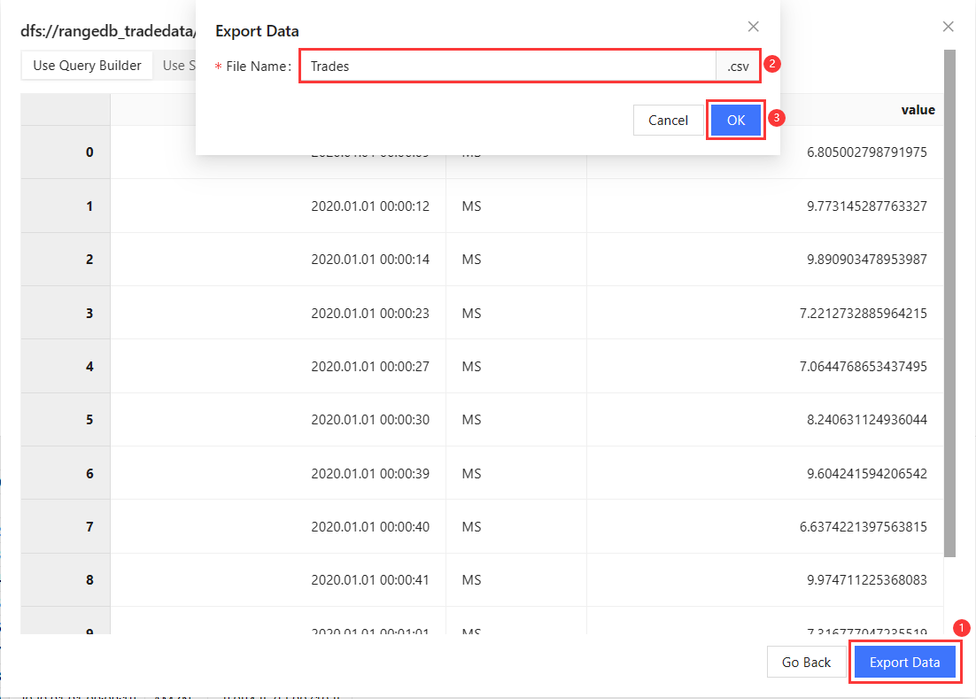
Export Data
Click Export Data and enter the file name in the pop-up window to export the result in CSV format.
Note: If the query returns no data or a dataset exceeding 500,000 rows, the export fails.
After the export, an "Export successfully" prompt pops up. Users can view the exported file in the browser's download queue.

Script Editor
Users can also directly enter SQL scripts in the Script Editor tab to create a query. By default, an example script of the selected table will be automatically generated and displayed in the Script Editor tab.
After entering executable SQL scripts, click Preview Data > Export Data to export the result.