Data Acquisition Platform
DolphinDB Data Acquisition Platform is a high-performance tool supporting MQTT and Kafka protocols. With an intuitive and user-friendly interface, the platform enables seamless protocol integration and streamlines the configuration and management of data acquisition.
Prerequisite
- Required server version: DolphinDB 2.00.14/3.00.2 or higher.
- When using the platform, plugins MQTT and Kafka are loaded by default. It is
recommended to specify the preloadModules parameter as
plugins::mqtt,plugins::kafkain cluster.cfg for preloading.
Log in to the web interface and click the Data Acquisition tab to use the platform.
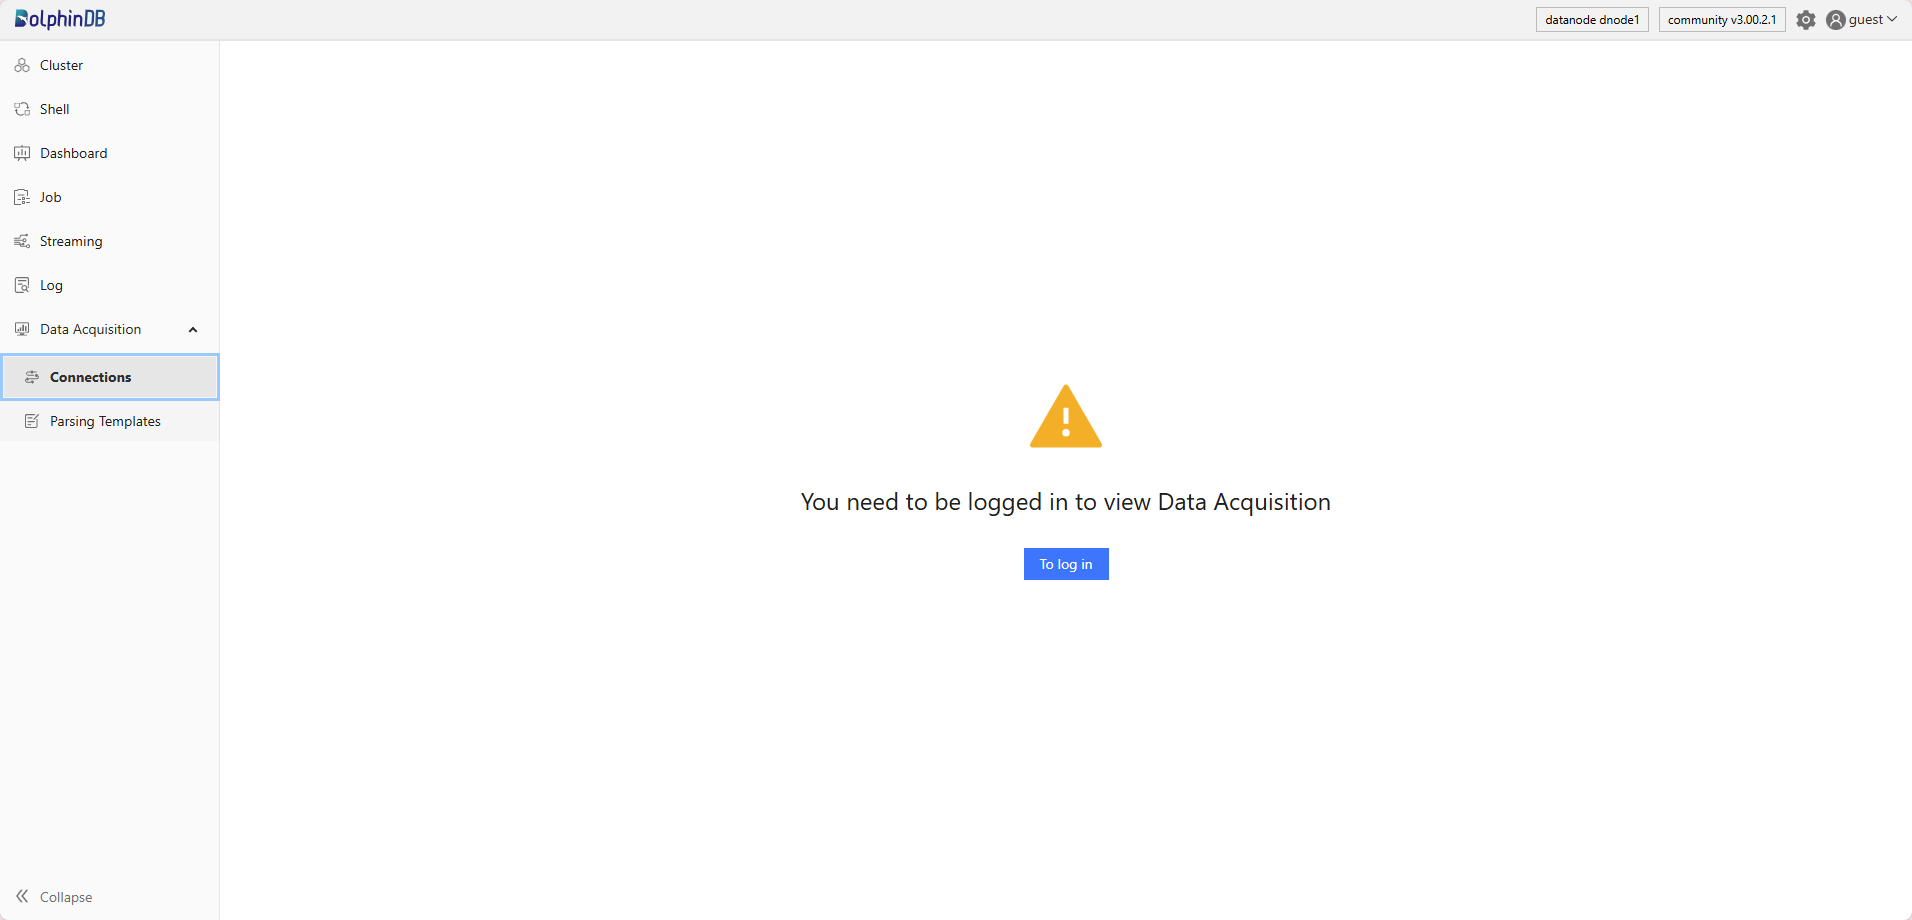
Connections
The connections page contains two parts — connection management and subscription management.
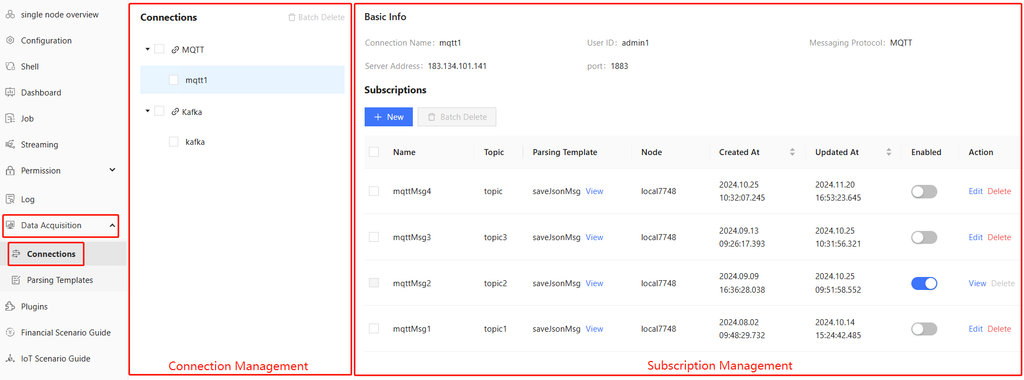
Connection Management
This part manages MQTT and Kafka connections, allowing users to view, create, edit, (batch) delete connections and view debug logs.
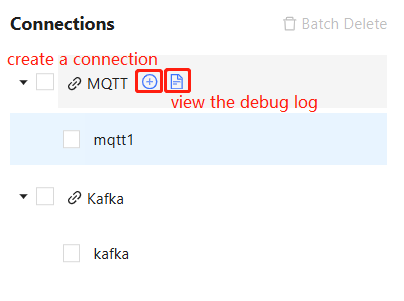
Create Connections
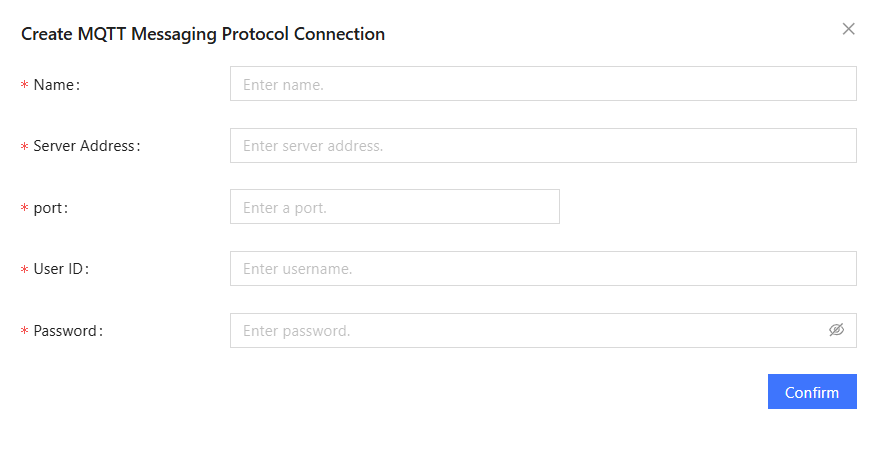
Connect to MQTT
Click ➕ next to MQTT and fill in the following required fields:
- Name: A unique name of the MQTT connection (no spaces, up to 50 characters).
- Server Address: IP address or domain name of the MQTT server to connect to.
- Port: Port number of the MQTT server with a valid range of 1-65535. The default is 1883 (non-encrypted connection)
- User ID: Username of the MQTT server.
- Password: Password of the MQTT server in either plain text or encrypted format.
Connect to Kafka
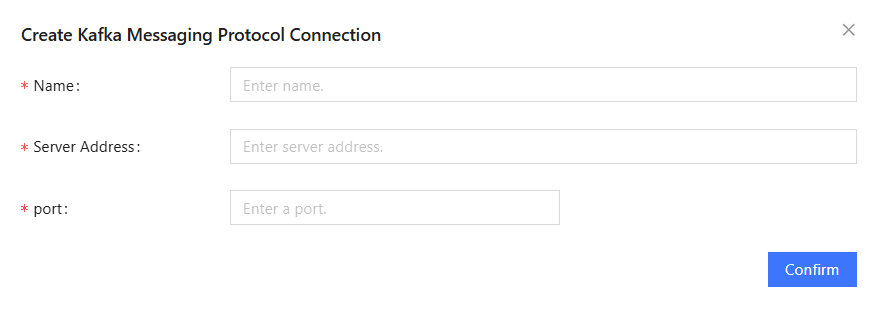
Click ➕ next to Kafka and fill in the name, address, and port (valid range: 0-65535) of the Kafka server to connect to. The username and password of the server are configured later in the subscription parameters.
View Logs
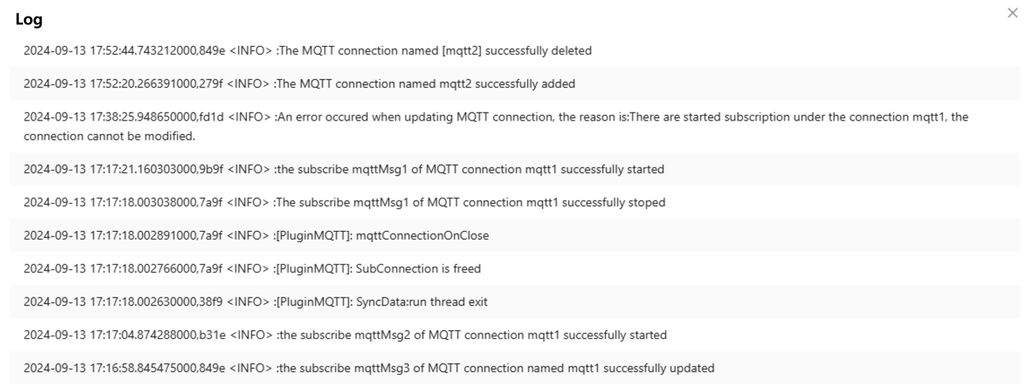
Click 🗎 next to MQTT or Kafka to view related information from the latest 5 million bytes of the log data.
Edit/Delete Connections
Click the icons next to the specified connection for editing/deleting.
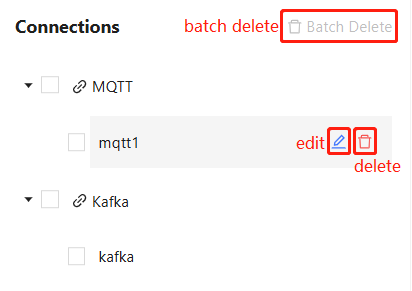
Click 🖉 next to a specified connection to edit its configuration.
Click 🗑︎ to delete a specified connection. To delete connections in batch, select several connections and click Batch Delete. You can choose to destroy the stream tables associated with the subscriptions under the connection.

Subscription Management
This part manages the subscriptions under connections, allowing users to view, create, edit, (batch) delete, and enable/disable subscriptions.
In the interface, you can see:
- Basic information on the selected connection, including name, user ID, messaging protocol, server address, and port.
- Specific information on the subscriptions under the selected connection, including name, topic, parsing template, node, creation time, update time, status, and available operations (view, edit, and delete). Subscriptions can be sorted by creation or update time.
Create Subscriptions
Subscribe to MQTT
Click New and fill in the following fields:
- Name: A unique name of the MQTT subscription.
- Topic: A topic on the MQTT server, based on which the server filters and distributes messages to subscribers.
- Node (optional): A specified node for processing messages. Defaults to the current node if unspecified. In a multi-node environment, this allows users to flexibly assign message processing tasks to different nodes.
- Enable Message Parsing (optional): Choose whether to parse received
messages based on specific rules or templates to extract useful data
points or fields and store them in stream tables for further
analysis.
- Disabled: The default template saveJsonMsg is used. Enter
the name of a stream table and the system will automatically
create this table and store the subscribed messages as strings
in the table without parsing messages into JSON format.
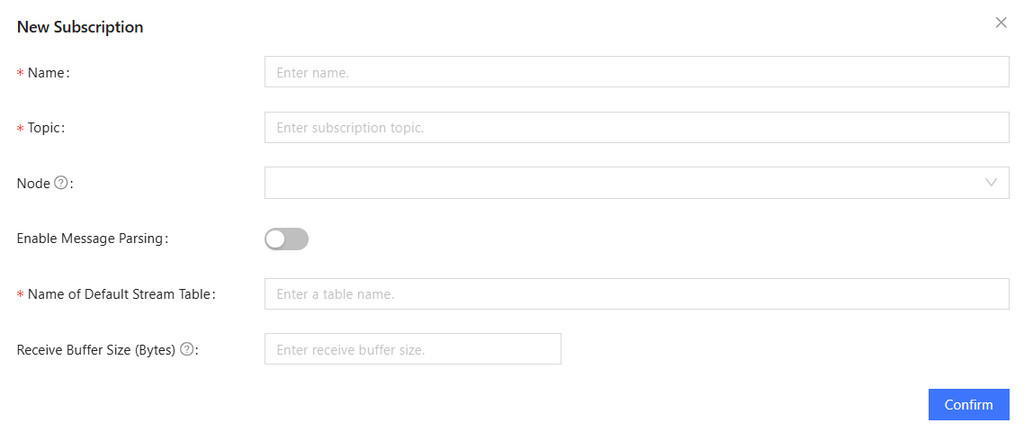
Figure 9. Figure 2-8 Disable Message Parsing - Enable: Select a built-in or custom parsing template and
configure template parameters. For custom templates, the output
stream table must be manually created.
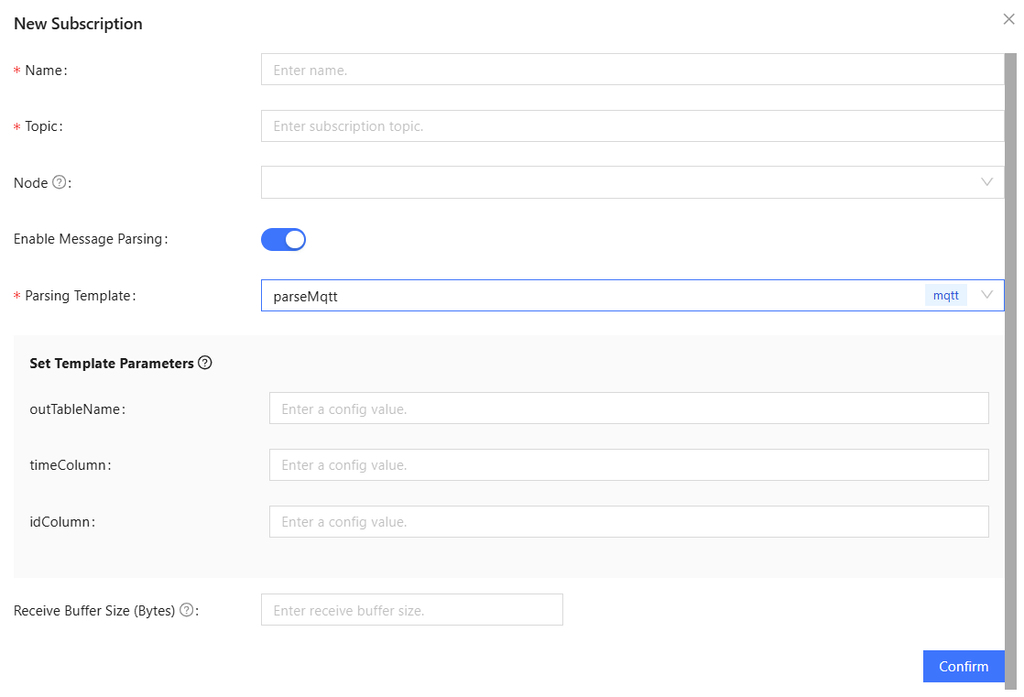
Figure 10. Figure 2-9 Enable Message Parsing
- Disabled: The default template saveJsonMsg is used. Enter
the name of a stream table and the system will automatically
create this table and store the subscribed messages as strings
in the table without parsing messages into JSON format.
- Receive Buffer Size (optional): The buffer size specifying the maximum amount of data received per message batch. Defaults to 20480 bytes if unspecified.
Subscribe to Kafka
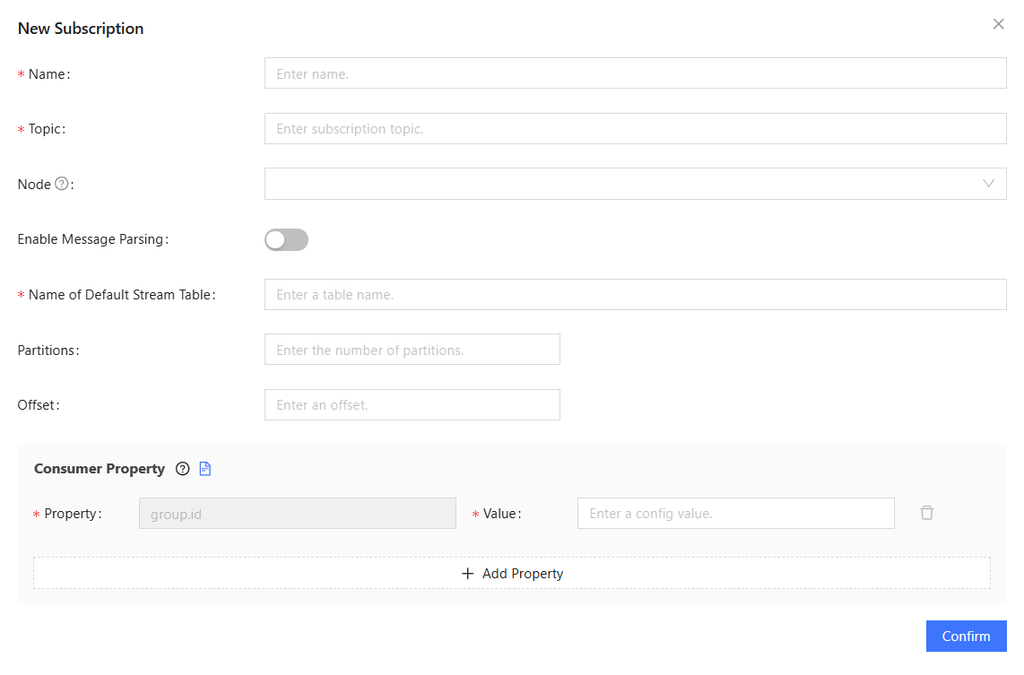
Compared to MQTT, the creation of Kafka subscriptions includes additional configuration for partition, offset, and consumer properties.
- Partitions/Offset: Must be both set or unset. Accepts only non-negative integers.
- Consumer Properties: User-defined properties and values. For details,
refer to Configuration properties.
- group.id is a required property to identify the consumer group, which is ignored when partitions and offset are manually specified.
- Click Add Property to configure other properties and values.
Supported Operations
- Enable/Disable: Disabled subscriptions can be edited or deleted,
while enabled subscriptions are view-only.

Figure 12. Figure 2-11 Enable/Disable a Subscription - Edit: Click Edit next to a disabled subscription to modify its configurations. Modified subscriptions are sorted by update time.
- Delete: Click Delete or select several disabled subscriptions and click Batch Delete. You can choose to destroy associated stream tables.
Parsing Templates
The Parsing Templates tab allows users to:
- View information on all parsing templates, including name, message protocol, comment, active subscription references, references, creation time, and update time.
- Create, edit, and (batch) delete parsing templates.
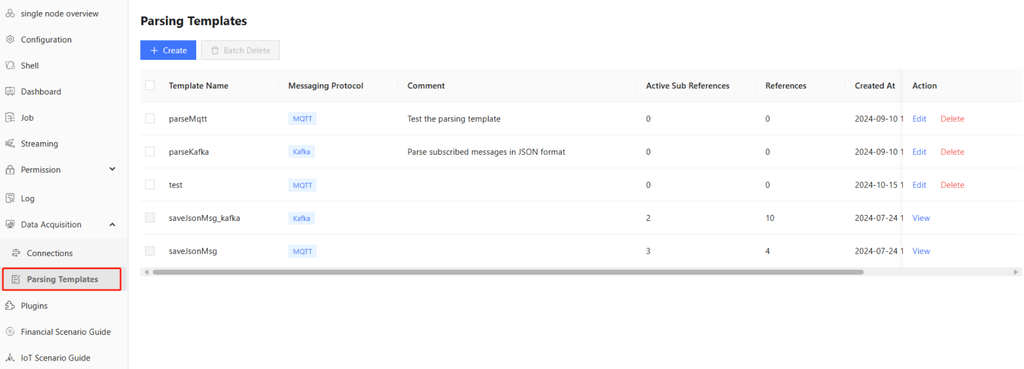
DolphinDB provides built-in templates, saveJsonMsg_Kafka and saveJsonMsg, to store JSON-format data into specified stream tables.
Create Templates
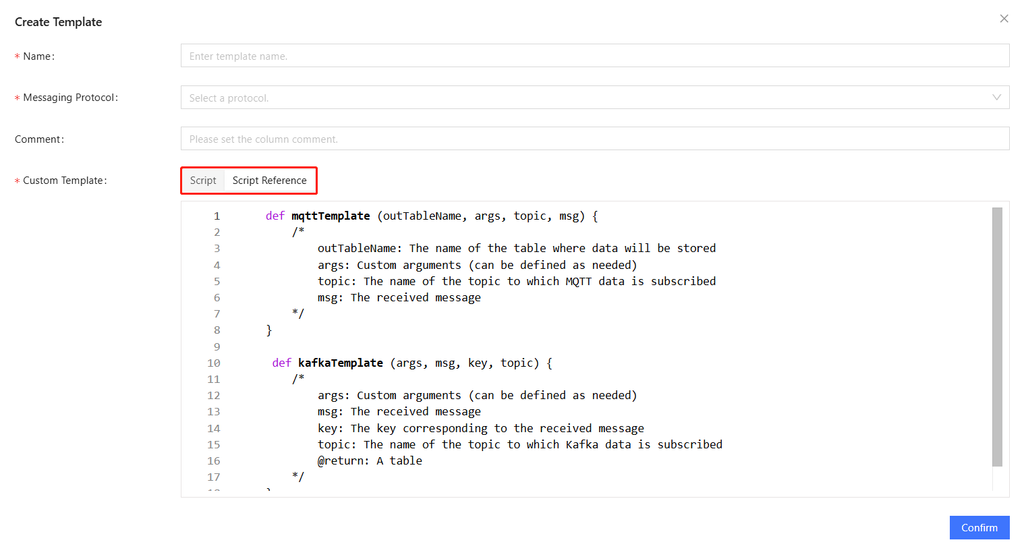
Click Create and fill in template name, messaging protocol (currently supports MQTT and Kafka), comment (optional), and template script.
For template script, you can directly enter the custom script or click Script Reference to modify the predefined script.
Edit/Delete Templates
Click Edit to modify template configurations. Click Delete or select several templates and click Batch Delete to delete templates.

