Multi-Machine Cluster Deployment
This tutorial describes how to deploy the DolphinDB multi-machine cluster, and update the cluster and license file on Linux OS Distros. It serves as a quick start guide for you.
Deploy Multi-machine Cluster on Linux Distros
The cluster architecture in this tutorial is as follows:
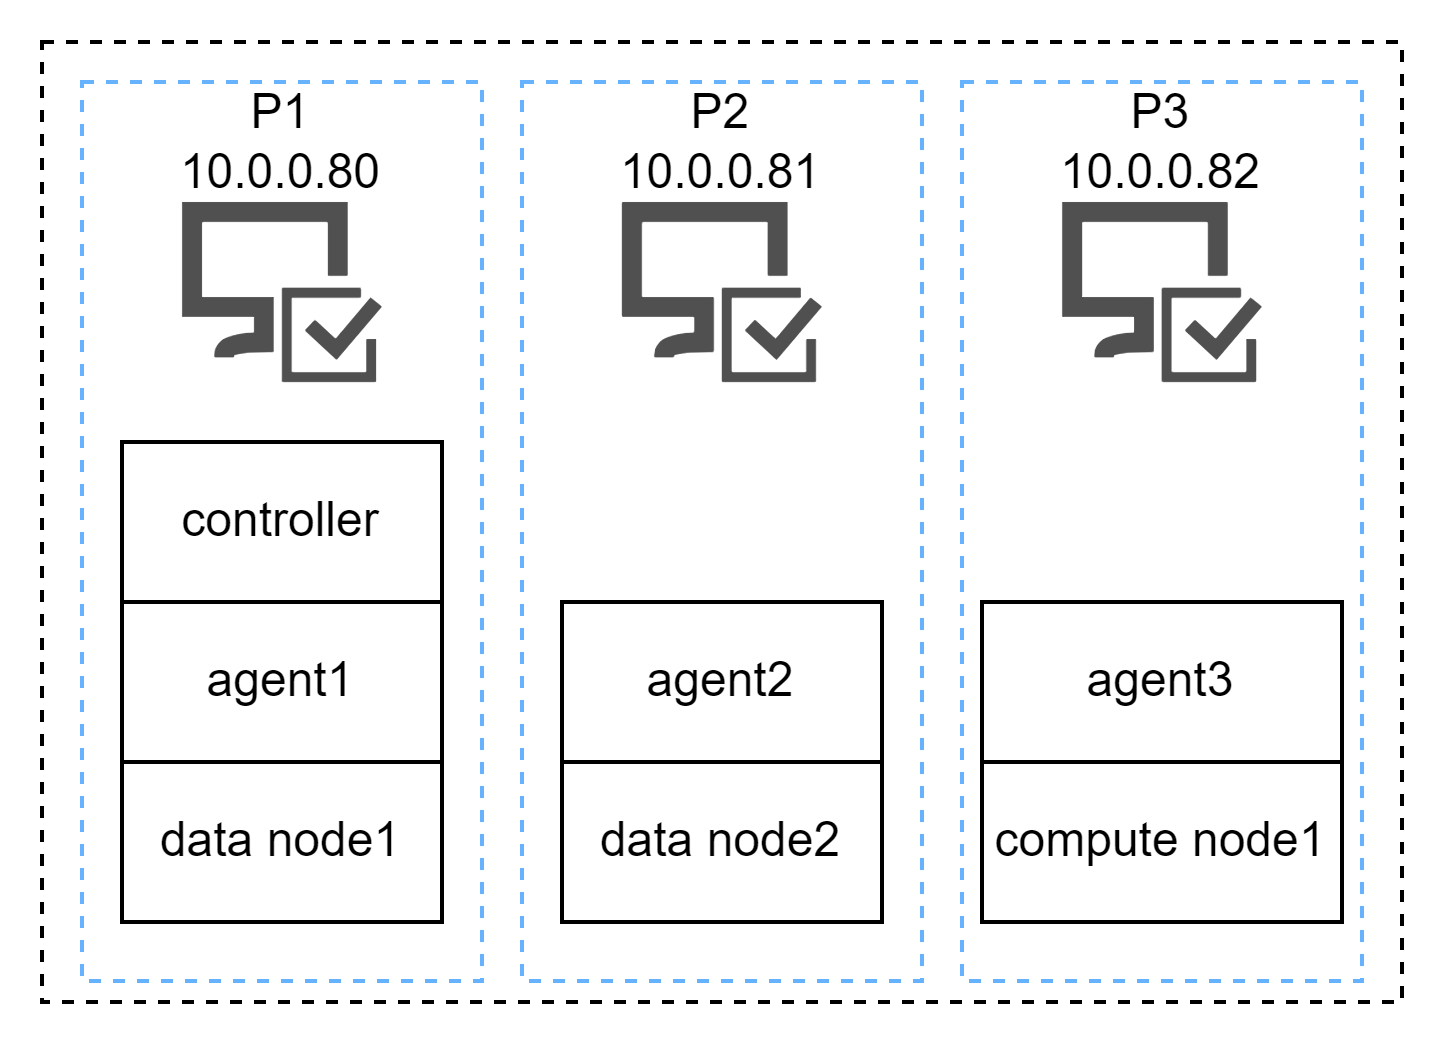
The internal IP addresses of the 3 servers are:
P1: 10.0.0.80
P2: 10.0.0.81
P3: 10.0.0.82
Requirements and preparation before deployment:
- The number of nodes in the sample cluster of this tutorial exceeds the limit of the Community Edition License. So you must apply for Enterprise Edition License and update the license as described in Step 2: Update License File.
- The IP address of nodes should be an internal address with 10 Gigabit Ethernet. Using an external address may have an impact on the network communication between nodes.
- A DolphinDB cluster can only have one controller.
- Each server must have an agent to start or close the local data nodes.
Step 1: Download
Download DolphinDB installation package and unzip it on each physical server.
- Official website: DolphinDB
- Or you can download DolphinDB with a shell command:
wget https://www.dolphindb.com/downloads/DolphinDB_Linux64_V${release}.zip -O dolphindb.zip${release} refers to the version of DolphinDB server. For example, you can download Linux64 server 2.00.11.3 with the following command:
wget https://www.dolphindb.com/downloads/DolphinDB_Linux64_V2.00.11.3.zip -O dolphindb.zipTo download the ABI or JIT version of DolphinDB server, add "ABI" or "JIT" after the version number (linked with an underscore). For example, you can download Linux64 ABI server 2.00.11.3 with the following command:
wget https://www.dolphindb.com/downloads/DolphinDB_Linux64_V2.00.11.3_ABI.zip -O dolphindb.zipDownload Linux64 JIT server 2.00.11.3 with the following command:
wget https://www.dolphindb.com/downloads/DolphinDB_Linux64_V2.00.11.3_JIT.zip -O dolphindb.zip- Then extract the installation package to the specified directory (
/path/to/directory):
unzip dolphindb.zip -d </path/to/directory>Note: The directory name cannot contain any space characters, otherwise the startup of the data node will fail.
Step 2: Update License File
With a license for Enterprise edition, you can deploy DolphinDB across multiple nodes with more CPU cores and memory. If you have an Enterprise License, please use it to replace the following license file on each physical server.
/DolphinDB/server/dolphindb.licStep 3: Configure a DolphinDB Cluster
(1) Configuration Files of P1 Server
Log in the P1 server and then navigate to /DolphinDB/server/clusterDemo/config.
- controller.cfg
Execute the following shell command to modify controller.cfg:
vim ./controller.cfgmode=controller
localSite=10.0.0.80:8900:controller8900
dfsReplicationFactor=1
dfsReplicaReliabilityLevel=2
dataSync=1
workerNum=4
localExecutors=3
maxConnections=512
maxMemSize=8
lanCluster=0Parameter localSite must be configured to specify IP address, port number, and alias of the controller. All other parameters can be modified as needed.
- cluster.nodes
cluster.nodes stores detailed configuration details about agents, data nodes and compute nodes. The cluster configuration file in this tutorial contains 3 agents, 2 data nodes and 1 compute node. You can configure the number of nodes as required. This configuration file specifies localSite and mode. The parameter localSite contains the node IP address, port number and alias, which are separated by colons ":". The parameter mode specifies the node type.
Note: Node aliases are case sensitive and must be unique in a cluster.
Execute the following shell command to modify cluster.nodes of servers P1, P2, and P3:
vim ./cluster.nodeslocalSite,mode
10.0.0.80:8901:P1-agent,agent
10.0.0.80:8902:P1-datanode,datanode
10.0.0.81:8901:P2-agent,agent
10.0.0.81:8902:P2-datanode,datanode
10.0.0.82:8901:P3-agent,agent
10.0.0.82:8902:P3-computenode,computenode- cluster.cfg
Execute the following shell command to modify cluster.cfg:
vim ./cluster.cfgmaxMemSize=32
maxConnections=512
workerNum=4
localExecutors=3
maxBatchJobWorker=4
chunkCacheEngineMemSize=2
TSDBCacheEngineSize=1
newValuePartitionPolicy=add
maxPubConnections=64
subExecutors=4
lanCluster=0
enableChunkGranularityConfig=trueThese configuration parameters apply to each data node and compute node in the cluster. You can customize them based on your own device, following our recommendataions:
maxMemSize: Set to the minimum value between (available memory / number of nodes) and (memory limit in license) multiplied by 0.85.
workerNum: Set to the minimum value between available logical cores and logical core limits in the license.
volumes: multiple SSDs
agent.cfg
Execute the following shell command to modify agent.cfg:
vim ./agent.cfgmode=agent
localSite=10.0.0.80:8901:P1-agent
controllerSite=10.0.0.80:8900:controller8900
workerNum=4
localExecutors=3
maxMemSize=4
lanCluster=0The controllerSite in agent.cfg must match the localSite parameter in controller's controller.cfg file. This is how the agent locates the cluster controller. Any changes to localSite in controller.cfg must be reflected in agent.cfg. The localSite parameter specifies the IP address, port number, and agent node alias. Except for localSite and controllerSite, other parameters in agent.cfg are optional and can be modified as needed based on specific requirements.
Login to the proxy node is only permitted after the sites parameter is properly set in agent.cfg. The sites parameter should include information about both the current agent and the controller in the cluster, detailing their IP addresses, port numbers, and node aliases. For example:
sites=10.0.0.82:8901:P3-agent:agent,10.0.0.80:8900:controller8900:controller(2) Configuration Files of P2 Server
Log in the P2 server and then navigate to /DolphinDB/server/clusterDemo/config.
- agent.cfg
Execute the following shell command to modify agent.cfg:
vim ./agent.cfgmode=agent
localSite=10.0.0.81:8901:P2-agent
controllerSite=10.0.0.80:8900:controller8900
workerNum=4
localExecutors=3
maxMemSize=4
lanCluster=0The controllerSite in agent.cfg must match the localSite parameter in controller's controller.cfg file. This is how the agent locates the cluster controller. Any changes to localSite in controller.cfg must be reflected in agent.cfg. The localSite parameter specifies the IP address, port number, and agent node alias. Except for localSite and controllerSite, other parameters in agent.cfg are optional and can be modified as needed based on specific requirements.
Login to the proxy node is only permitted after the sites parameter is properly set in agent.cfg. The sites parameter should include information about both the current agent and the controller in the cluster, detailing their IP addresses, port numbers, and node aliases. For example:
sites=10.0.0.82:8901:P3-agent:agent,10.0.0.80:8900:controller8900:controller(3) Configuration Files of P3 Server
Log in the P3 server and then navigate to /DolphinDB/server/clusterDemo/config.
- agent.cfg
Execute the following shell command to modify agent.cfg:
vim ./agent.cfgmode=agent
localSite=10.0.0.82:8901:P3-agent
controllerSite=10.0.0.80:8900:controller8900
workerNum=4
localExecutors=3
maxMemSize=4
lanCluster=0The controllerSite in agent.cfg must match the localSite parameter in controller's controller.cfg file. This is how the agent locates the cluster controller. Any changes to localSite in controller.cfg must be reflected in agent.cfg. The localSite parameter specifies the IP address, port number, and agent node alias. Except for localSite and controllerSite, other parameters in agent.cfg are optional and can be modified as needed based on specific requirements.
Login to the proxy node is only permitted after the sites parameter is properly set in agent.cfg. The sites parameter should include information about both the current agent and the controller in the cluster, detailing their IP addresses, port numbers, and node aliases. For example:
sites=10.0.0.82:8901:P3-agent:agent,10.0.0.80:8900:controller8900:controllerStep 4: Start DolphinDB Cluster
Log in the servers P1, P2, and P3 and then navigate to /DolphinDB/server of each server. The file permissions need to be modified for the first startup. Execute the following shell command:
chmod +x dolphindb- Start Controller
Navigate to /DolphinDB/server/clusterDemo of P1. Execute the following shell command:
sh startController.shStart the controller on P1 since it is only deployed on this server.
To check whether the node was started, execute the following shell command:
ps aux|grep dolphindbThe following information indicates a successful startup:

- Start Agent
Navigate to /DolphinDB/server/clusterDemo of each server. Execute the following shell command:
sh startAgent.shTo check whether the node was started, execute the following shell command:
ps aux|grep dolphindbThe following information indicates a successful startup:

- Start Data Nodes and Compute Nodes
You can start or stop data nodes and compute nodes, and modify cluster configuration parameters on DolphinDB cluster management web interface. Enter the IP address and port number of the controller in the browser to navigate to the DolphinDB Web. The server address (ip:port) used in this tutorial is 10.0.0.80:8900. Below is the web interface. Log in with the default administrator account (username: admin, password: 123456). Then select the required data nodes and compute nodes, and click on the execute/stop button.
Click on the refresh button to check the status of the nodes. The following green check marks mean all the selected nodes have been turned on:

Step 5: Create Databases and Partitioned Tables on Data Nodes
Data nodes can be used for data storage, queries and computation. The following example shows how to create databases and write data on data nodes.
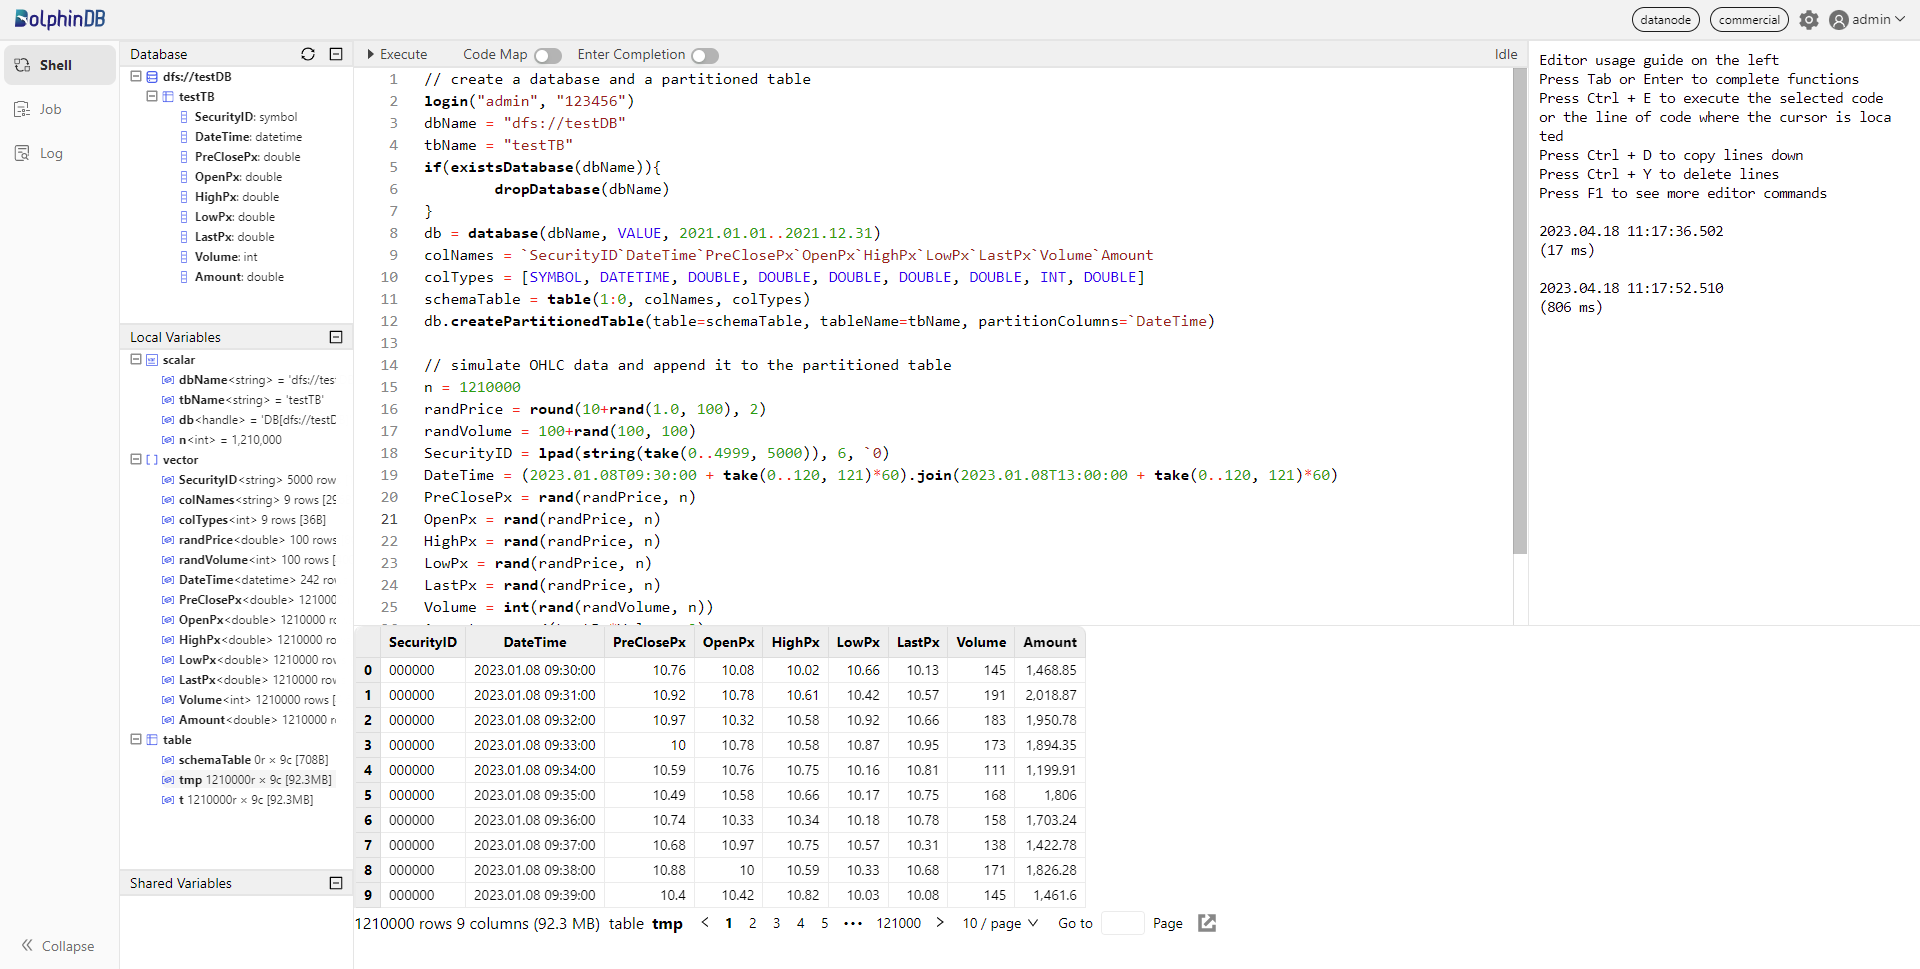
First, open the web interface of the Controller, and click on the corresponding Data node to open its Shell interface (e.g. P1-datanode):

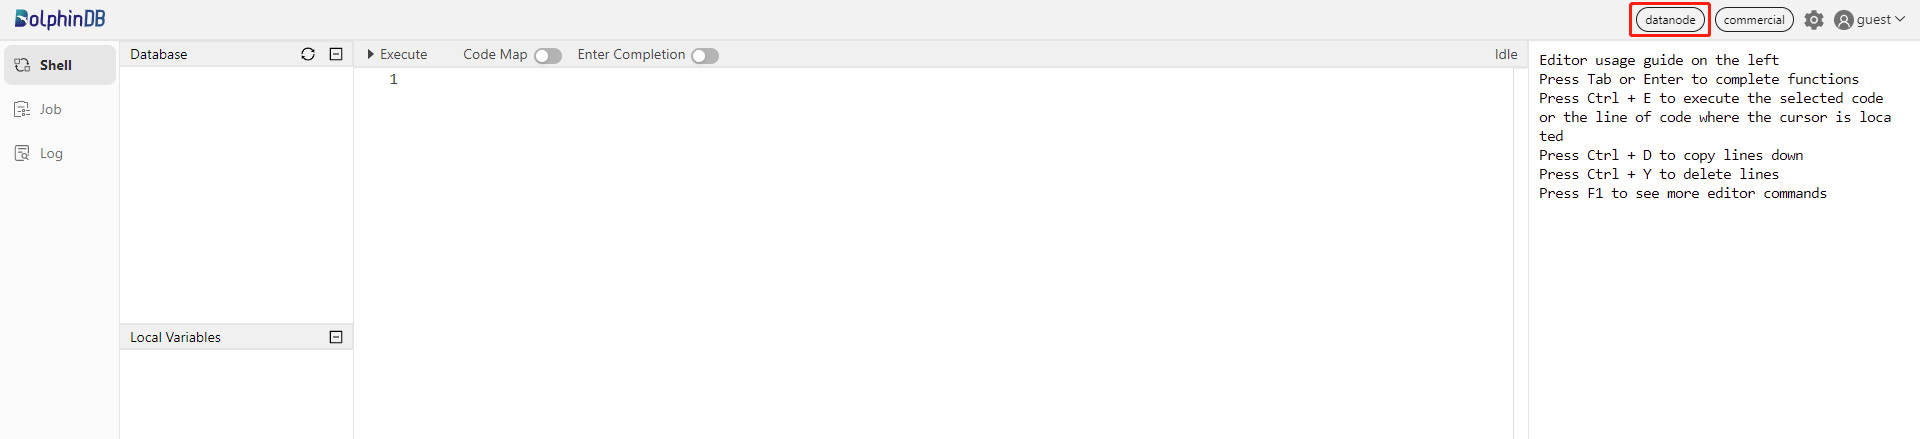
You can also enter IP address and port number of the data nodes in your browser to navigate to the Shell interface.
Execute the following script to create a database and a partitioned table:
// create a database and a partitioned table
login("admin", "123456")
dbName = "dfs://testDB"
tbName = "testTB"
if(existsDatabase(dbName)){
        dropDatabase(dbName)
}
db = database(dbName, VALUE, 2021.01.01..2021.12.31)
colNames = `SecurityID`DateTime`PreClosePx`OpenPx`HighPx`LowPx`LastPx`Volume`Amount
colTypes = [SYMBOL, DATETIME, DOUBLE, DOUBLE, DOUBLE, DOUBLE, DOUBLE, INT, DOUBLE]
schemaTable = table(1:0, colNames, colTypes)
db.createPartitionedTable(table=schemaTable, tableName=tbName, partitionColumns=`DateTime)
Then, run the following scripts to generate 1-minute OHLC bars and append the data to the created partitioned table "tbName":
// simulate OHLC data and append it to the partitioned table
n = 1210000
randPrice = round(10+rand(1.0, 100), 2)
randVolume = 100+rand(100, 100)
SecurityID = lpad(string(take(0..4999, 5000)), 6, `0)
DateTime = (2023.01.08T09:30:00 + take(0..120, 121)*60).join(2023.01.08T13:00:00 + take(0..120, 121)*60)
PreClosePx = rand(randPrice, n)
OpenPx = rand(randPrice, n)
HighPx = rand(randPrice, n)
LowPx = rand(randPrice, n)
LastPx = rand(randPrice, n)
Volume = int(rand(randVolume, n))
Amount = round(LastPx*Volume, 2)
tmp = cj(table(SecurityID), table(DateTime))
t = tmp.join!(table(PreClosePx, OpenPx, HighPx, LowPx, LastPx, Volume, Amount))
dbName = "dfs://testDB"
tbName = "testTB"
loadTable(dbName, tbName).append!(t)
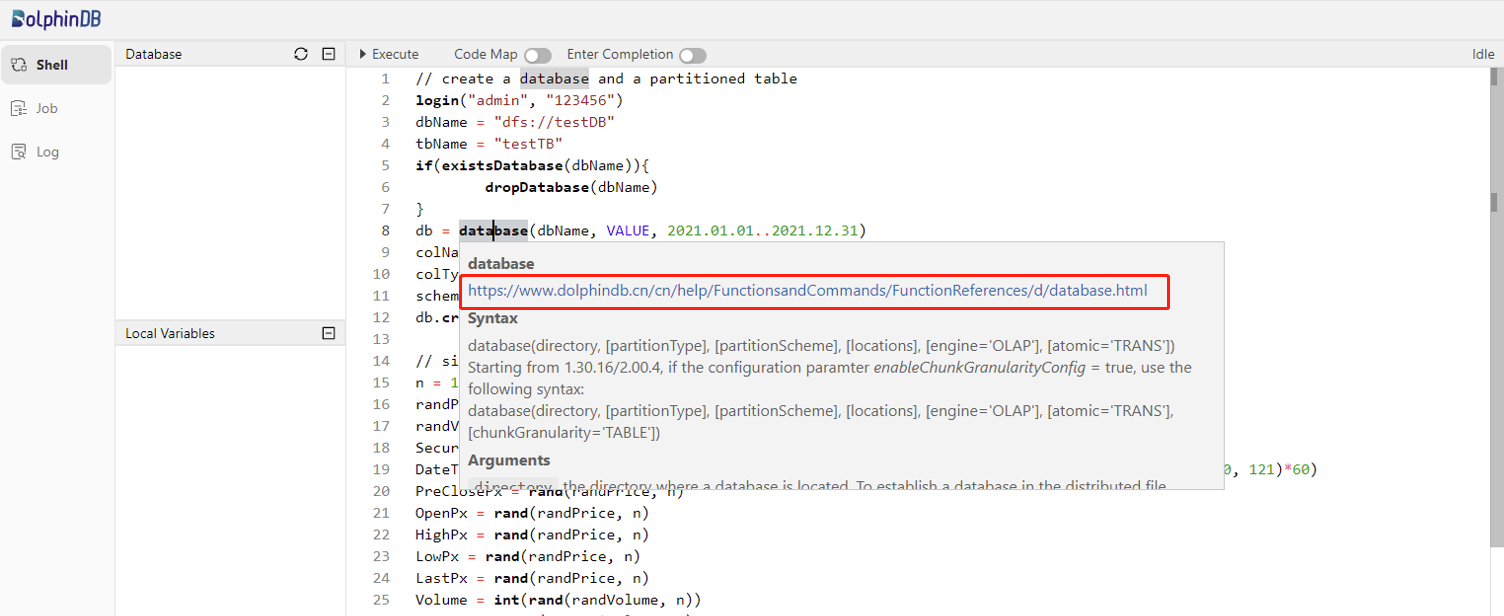
For more details about the above functions, see Function References or the function documentation popup on the web interface.
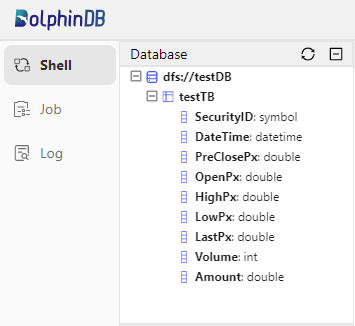
You can check the created database and table in the Database on the left side of the web interface.
Variables you created can be checked in Local Variables. You can click on the corresponding variable name to preview the related information (including data type, size, and occupied memory size).
Step 6: Perform Queries and Computation on Compute Nodes
Compute nodes are used for queries and computation. The following example shows how to perform these operations in partitioned tables on a compute node.
First, open the web interface of the Controller, and then click the corresponding Compute node to open its Shell interface:

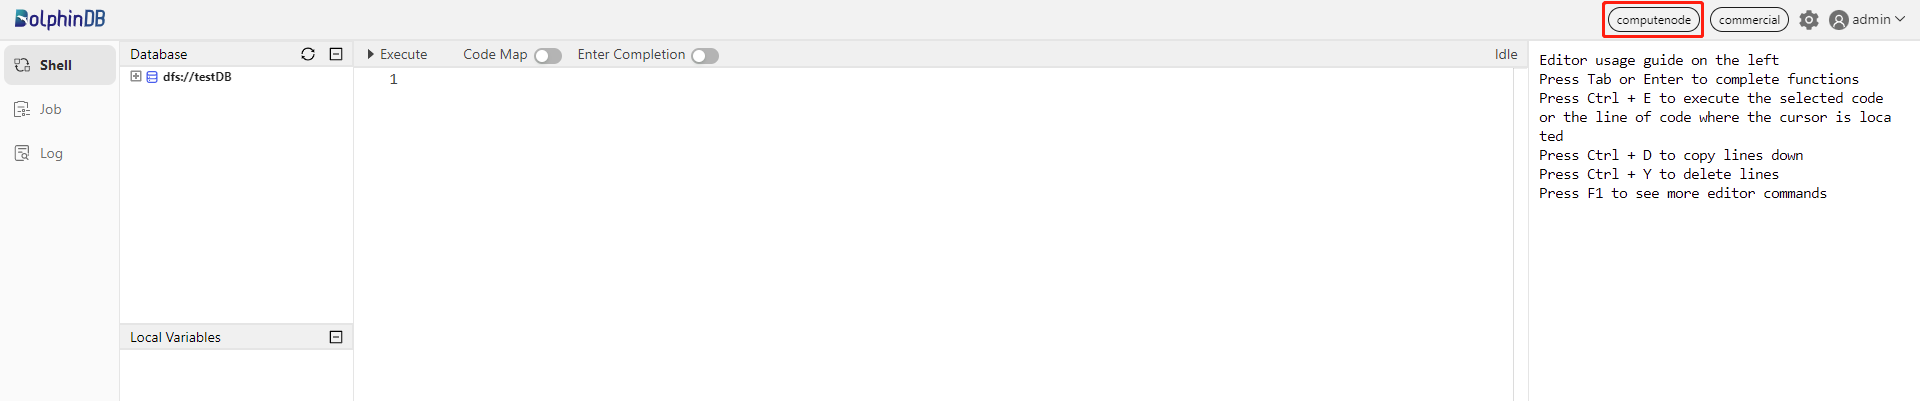
You can also enter IP address and port number of a compute node in your browser to navigate to the Shell interface.
Execute the following script to load the partitioned table:
// load the partitioned table
pt = loadTable("dfs://testDB", "testTB")
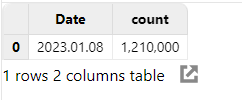
Note: Only metadata of the partitioned table is loaded here. Then execute the following script to count the records for each day in table "pt":
// If the result contains a small amount of data, you can download it to display on the client directly.
select count(*) from pt group by date(DateTime) as Date
The result will be displayed at the bottom of the web interface:
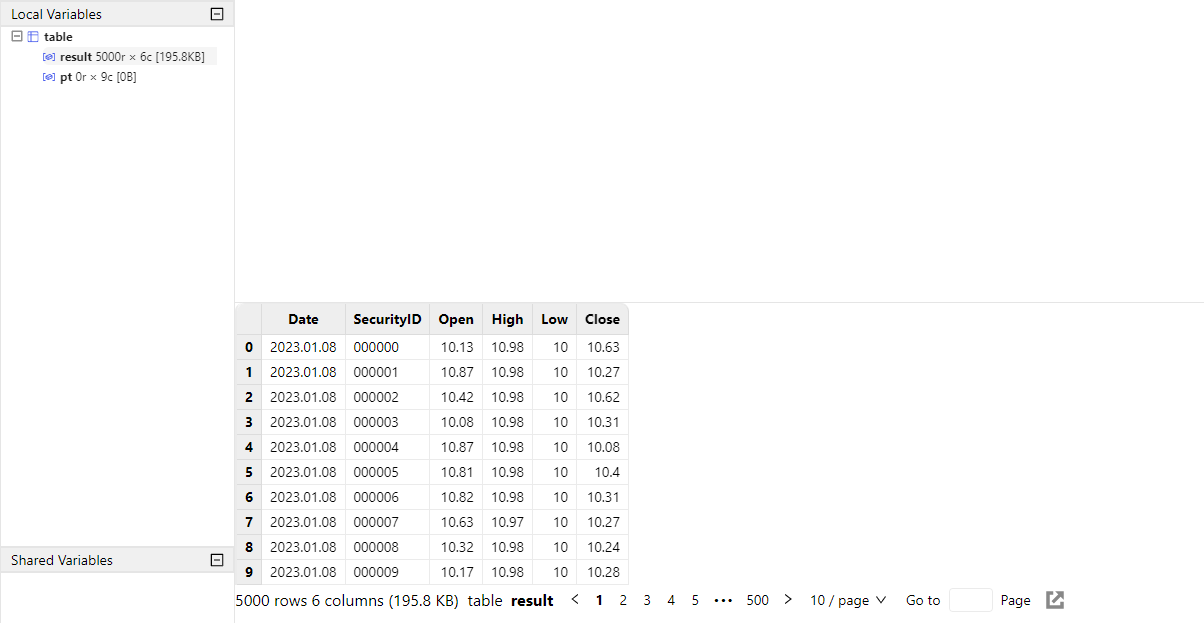
Execute the following script to caculate OHLC bars for each stock per day:
// If the result contains a large amount of data, you can assign it to a variable that occupies the server memory, and download it to display in separate pages on the client.
result = select first(LastPx) as Open, max(LastPx) as High, min(LastPx) as Low, last(LastPx) as Close from pt group by date(DateTime) as Date, SecurityID
The result is assigned to the variable result. It will not be displayed on the client directly, thus reducing the memory of the client. To check the results, click result in the Local Variables.
Web-Based Cluster Management
After completing the deployment, you can modify the cluster configuration through the Web interface of the controller.
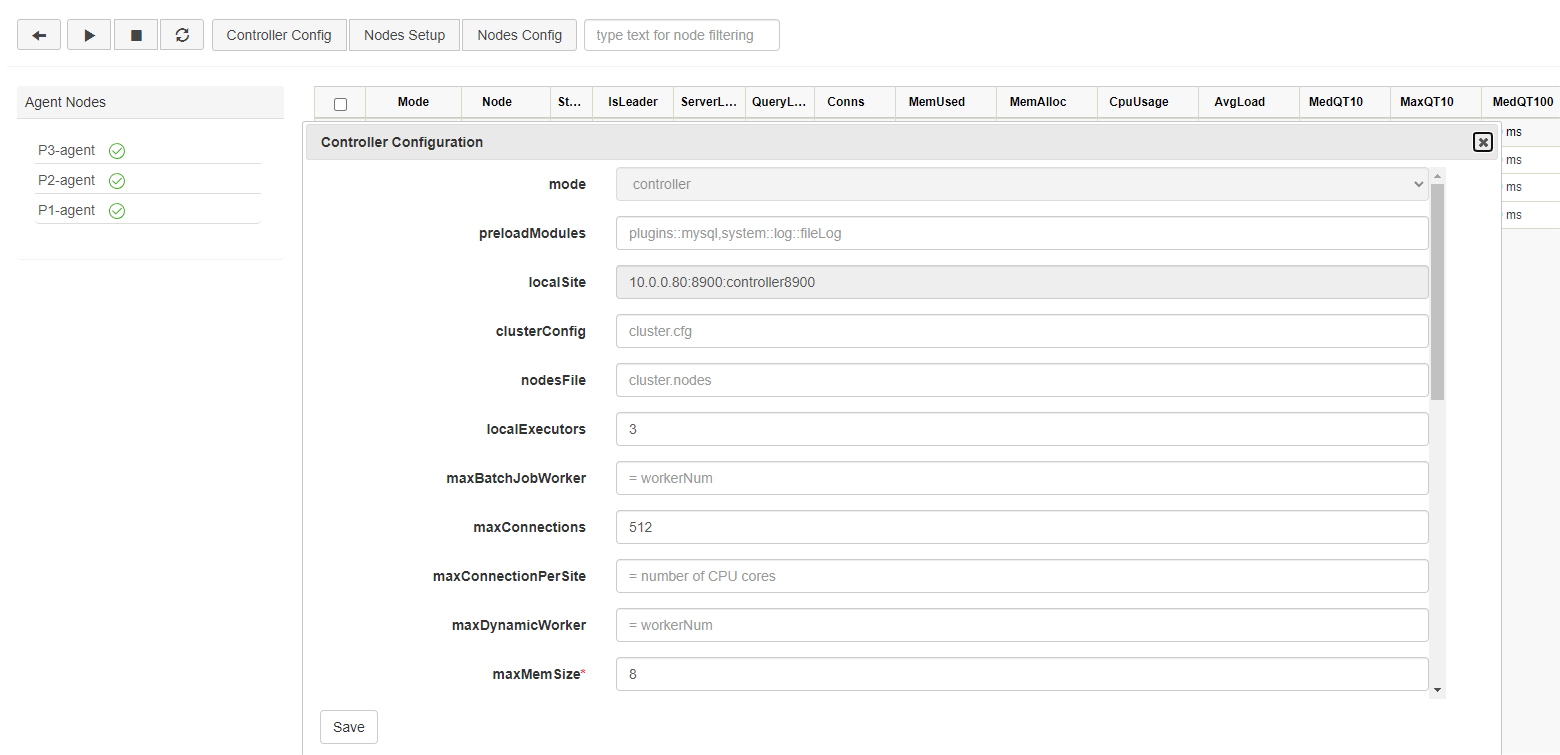
Controller Configuration
Click Controller Config to modify the configuration parameters of controller. The following parameters are specified in controller.cfg. You can add, remove, and modify them in this web interface, and they will take effect after the controller is restarted.
Note: If the parameter localSite of the controller is modified, the parameter controllerSite in all agent.cfgs must be changed accordingly. Otherwise, the cluster will fail to run.
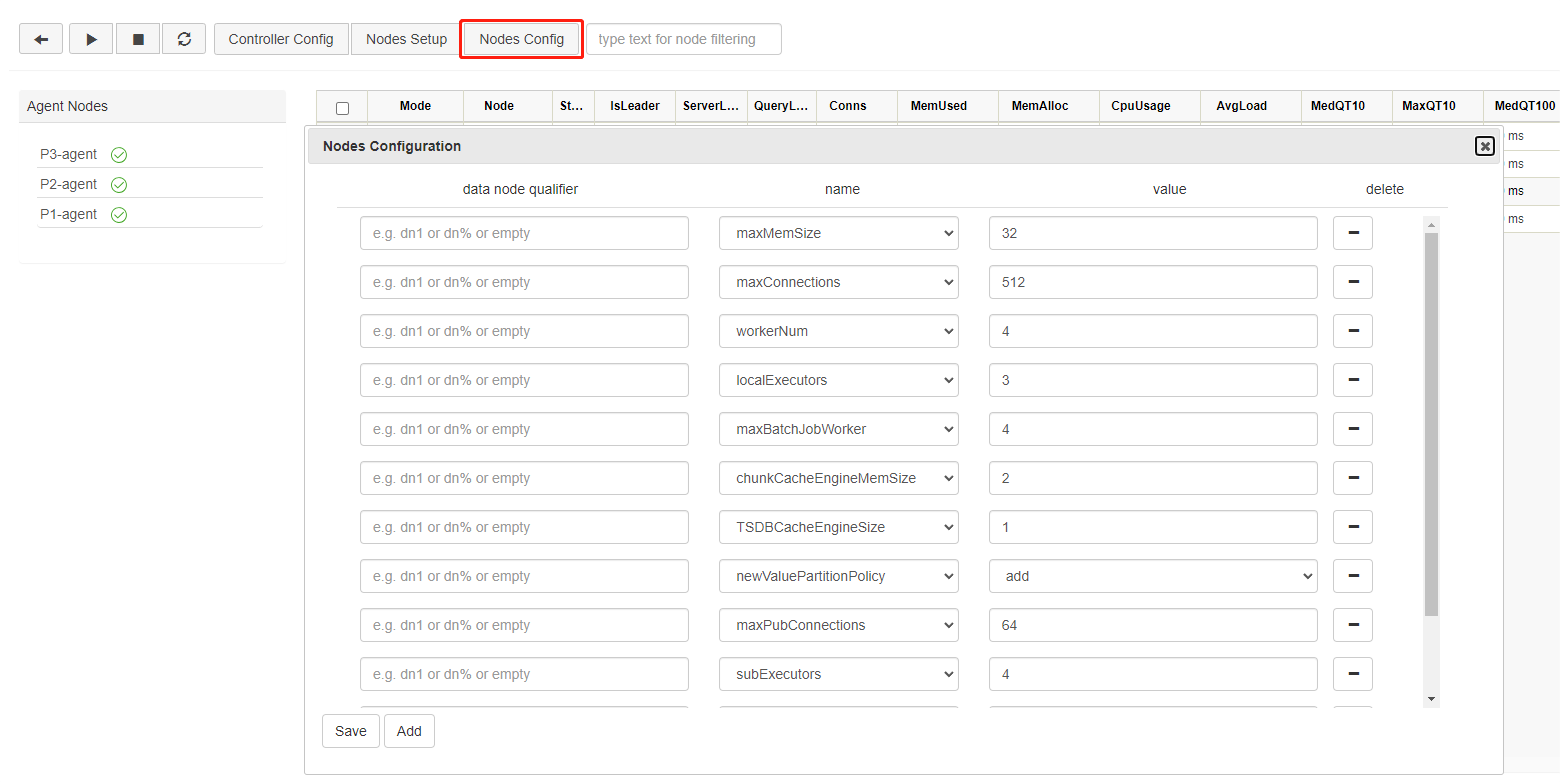
Data Nodes and Compute Nodes Configuration
Click Nodes Config to modify the configuration parameters of data nodes and compute nodes. The following parameters are specified in cluster.cfg. You can add, remove, and modify them, and they will take effect after the data nodes and compute nodes are restarted.
Access Cluster Manager via External Address
If the nodes in a cluster are located within the same LAN, set the site information to the internal IP address for optimal network communication. To access the cluster manager via an external address, configure the publicName of the controller with an external IP address, or a domain name for HTTPS. The following script in cluster.cfg sets up the external addresses of all nodes on P1, P2, and P3, where % is a wildcard for the node alias.
P1-%.publicName=19.56.128.21
P2-%.publicName=19.56.128.22
P3-%.publicName=19.56.128.23
You also need to add the corresponding external domain name or IP address in controller.cfg.
publicName=19.56.128.21Upgrade DolphinDB Cluster
Step 1: Close all nodes
Log in the servers P1, P2, and P3. Navigate to /DolphinDB/server/clusterDemo to execute the following shell command:
./stopAllNode.shStep 2: Back up the Metadata
The metadata file is created only when data is written to the multi-machine cluster. Otherwise, you can just skip this step.
- Back up the Metadata of Controller
By default, the metadata of controller is stored in the DFSMetaLog.0 file under /DolphinDB/server/clusterDemo/dfsMeta:
/DolphinDB/server/clusterDemo/dfsMetaIf the metadata exceeds certain size limits, a DFSMasterMetaCheckpoint.0 file will also be generated.
Log in the server P1. Then navigate to /DolphinDB/server/clusterDemo/dfsMeta to execute the following shell commands:
mkdir backup
cp -r DFSMetaLog.0 backup
cp -r DFSMasterMetaCheckpoint.0 backup- Back up the Metadata of Data Nodes
By default, the metadata of data nodes is stored in /DolphinDB/server/clusterDemo/data/<data node alias>/storage/CHUNK_METADATA. The default storage directory in this tutorial is:
/DolphinDB/server/clusterDemo/data/dnode1/storage/CHUNK_METADATALog in the server P1. Then navigate to the above directory to execute the following shell command:
cp -r CHUNK_METADATA ../../backupNote: If the backup files are not in the above default directory, check the directory specified by the configuration parameters dfsMetaDir and chunkMetaDir. If the two parameters are not modified but the configuration parameter volumes is specified, then you can find the CHUNK_METADATA under the volumes directory.
Step 3: Upgrade
Note: When the server is upgraded to a certain version, the plugin should also be upgraded to the corresponding version.
- Online Upgrade
Log in the servers P1, P2, and P3. Navigate to /DolphinDB/server/clusterDemo to execute the following command:
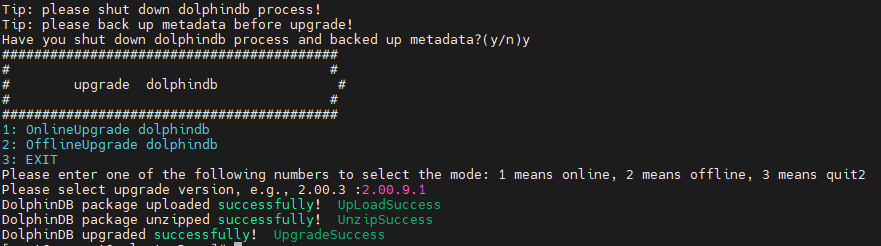
./upgrade.shThe following prompt is returned:

Type y and press Enter:

Type 1 and press Enter:

Type a version number and press Enter. To upgrade to version 2.00.9.1, for example, type 2.00.9.1 and press Enter. The following prompt indicates a successful upgrade.

- Offline upgrade
Download a new version of server package from DolphinDB website.
Upload the installation package to /DolphinDB/server/clusterDemo of the servers P1, P2, and P3. Take version 2.00.9.1 as an example.
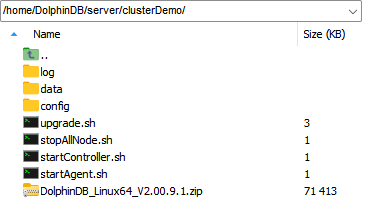
Log in the servers P1, P2, and P3. Navigate to /DolphinDB/server/clusterDemo to execute the following command:
./upgrade.shThe following prompt is returned:

Type y and press Enter:

Type 2 and press Enter:

Type a version number and press Enter. To upgrade to version 2.00.9.1, for example, type 2.00.9.1 and press Enter. The following prompt indicates a successful upgrade.
If the required update version is a JIT or ABI version, the version number should match the installation package. For example, if the installation package is named "DolphinDB_Linux64_V2.00.9.1_JIT.zip", the version number to be entered should be "2.00.9.1_JIT".
Step 4: Restart the Cluster
- Start Controller
Execute the following shell command in /DolphinDB/server/clusterDemo of P1 to start the controller:
sh startController.shNote: Start the controller on P1 since it is only deployed on this server.
- Start Agent
Execute the following shell command in /DolphinDB/server/clusterDemo of each server:
sh startAgent.sh- Start Data Nodes and Compute Nodes
You can start or stop data nodes and compute nodes, and modify cluster configuration parameters on the web interface. Enter the deployment server IP address and controller port number in the browser to navigate to the DolphinDB Web. The server address (ip:port) used in this tutorial is 10.0.0.80:8900. Below is the web interface. Log in with the default administrator account (username: admin, password: 123456). Then select the required data nodes and compute nodes, and click on the execute/stop button.

Click on the refresh button to check the status of the nodes. The following green check marks mean all the selected nodes have been turned on:

Open the web interface and execute the following script to check the current version of DolphinDB.
version()Update License File
Before updating, open the web interface of any node and execute the following code to check the expiration time:
use ops
getAllLicenses()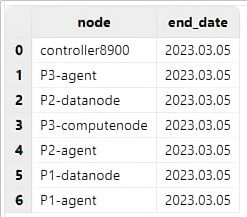
Check the "end_date" to confirm whether the update is successful.
Step 1: Replace the License File
Log in the servers P1, P2, and P3. Replace an existing license file with a new one.
License file path on Linux:
/DolphinDB/server/dolphindb.licStep 2: Update License File
- Online Update
Open the web interface of any node to execute the following script:
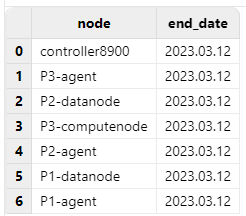
use ops
updateAllLicenses()
The "end_date" is updated:
Note:
The client name of the license cannot be changed.
The number of nodes, memory size, and the number of CPU cores cannot be smaller than the original license.
The update takes effect only on the node where the function is executed. Therefore, in a cluster mode, the function needs to be run on all controllers, agents, data nodes, and compute nodes.
The license type must be either commercial (paid) or free.
- Offline Update
Restart DolphinDB cluster to complete the updates.
FAQ
Q1: Common causes of node startup failure
- Port is occupied.
If you cannot start the server, you can first check the log file of nodes under /DolphinDB/server/clusterDemo/log.
If the following error occurs, it indicates that the specified port is occupied by other programs.
<ERROR> :Failed to bind the socket on port 8900 with error code 98In such case, you can change to another free port in the config file.
- The first line in cluster.nodes is empty
If you cannot start the server, you can first check the log file of nodes under /DolphinDB/server/clusterDemo/log.
If the following error occurs, it means the first line in the file cluster.nodes is empty.
<ERROR> :Failed to load the nodes file [/home/DolphinDB/server/clusterDemo/config/cluster.nodes] with error: The input file is empty.In this case, remove the empty line from the file and restart the node.
- The macro variable <ALIAS> has no effect when the node is specified.
In cluster.cfg, if the macro variable <ALIAS> is used when a node is specified, e.g., P1-datanode.persistenceDir = /hdd/hdd1/streamCache/<ALIAS>, the node will not start.
P1-datanode.persistenceDir = /hdd/hdd1/streamCache/<ALIAS>In this case, replace <ALIAS> with a specific node alias. For example:
P1-datanode.persistenceDir = /hdd/hdd1/streamCache/P1-datanodeTo use macro variables for all nodes, try the following script:
persistenceDir = /hdd/hdd1/streamCache/<ALIAS>Q2: Use the systemd command to start DolphinDB cluster
First, create the script files controller.sh and agent.sh in the DolphinDB/server/clusterDemo directory on each server with the following scripts:
vim ./controller.sh#!/bin/bash
#controller.sh
workDir=$PWD
start(){
cd ${workDir} && export LD_LIBRARY_PATH=$(dirname "$workDir"):$LD_LIBRARY_PATH
nohup ./../dolphindb -console 0 -mode controller -home data -script dolphindb.dos -config config/controller.cfg -logFile log/controller.log -nodesFile config/cluster.nodes -clusterConfig config/cluster.cfg > controller.nohup 2>&1 &
}
stop(){
ps -o ruser=userForLongName -e -o pid,ppid,c,time,cmd |grep dolphindb|grep -v grep|grep $USER|grep controller| awk '{print $2}'| xargs kill -TERM
}
case $1 in
start)
start
;;
stop)
stop
;;
restart)
stop
start
;;
esacvim ./agent.sh#!/bin/bash
#agent.sh
workDir=$PWD
start(){
cd ${workDir} && export LD_LIBRARY_PATH=$(dirname "$workDir"):$LD_LIBRARY_PATH
nohup ./../dolphindb -console 0 -mode agent -home data -script dolphindb.dos -config config/agent.cfg -logFile log/agent.log > agent.nohup 2>&1 &
}
stop(){
ps -o ruser=userForLongName -e -o pid,ppid,c,time,cmd |grep dolphindb|grep -v grep|grep $USER|grep agent| awk '{print $2}'| xargs kill -TERM
}
case $1 in
start)
start
;;
stop)
stop
;;
restart)
stop
start
;;
esacThen, execute the following shell command to configure the daemon for the controller:
vim /usr/lib/systemd/system/ddbcontroller.serviceThe following parameters should be configured:
[Unit]
Description=ddbagent
Documentation=https://www.dolphindb.com/

[Service]
Type=forking
WorkingDirectory=/home/DolphinDB/server/clusterDemo
ExecStart=/bin/sh agent.sh start
ExecStop=/bin/sh agent.sh stop
ExecReload=/bin/sh agent.sh restart
Restart=always
RestartSec=10s
LimitNOFILE=infinity
LimitNPROC=infinity
LimitCORE=infinity

[Install]
WantedBy=multi-user.targetNote: Specify WorkingDirectory as /DolphinDB/server/clusterDemo.
Execute the following shell command to configure the daemon for the agent:
vim /usr/lib/systemd/system/ddbagent.serviceThe following parameters should be configured:
[Unit]
Description=ddbagent
Documentation=https://www.dolphindb.com/

[Service]
Type=forking
WorkingDirectory=/home/DolphinDB/server/clusterDemo
ExecStart=/bin/sh agent.sh start
ExecStop=/bin/sh agent.sh stop
ExecReload=/bin/sh agent.sh restart
Restart=always
RestartSec=10s
LimitNOFILE=infinity
LimitNPROC=infinity
LimitCORE=infinity

[Install]
WantedBy=multi-user.targetNote: Specify WorkingDirectory as /DolphinDB/server/clusterDemo.
Finally, execute the following shell command to start the controller:
systemctl enable ddbcontroller.service   #enable the service
systemctl start ddbcontroller.service    #start the service
systemctl stop  ddbcontroller.service    #stop the service
systemctl status  ddbcontroller.service  #check the status
Execute the following shell command to start the agent:
systemctl enable ddbagent.service   #enable the service
systemctl start ddbagent.service    #start the service
systemctl stop  ddbagent.service    #stop the service
systemctl status  ddbagent.service  #check the status
Q3: Failed to access the web interface
Despite the server running and the URL being correct, the web interface remains inaccessible.
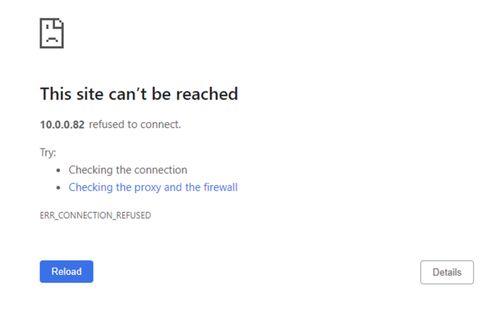
A common reason for the above problem is that the browser and DolphinDB are not deployed on the same server, and a firewall is enabled on the server where DolphinDB is deployed. You can solve this issue by turning off the firewall or by opening the corresponding port.
Q4: Roll back a failed upgrade on Linux
If you cannot start DolphinDB multi-machine cluster after upgrade, you can follow steps below to roll back to the previous version.
Step 1: Restore metadata files
- Restore metadata files of controller
Log in the server where controller is deployed. Navigate to /DolphinDB/server/clusterDemo/dfsMeta to restore metadata files from backup with the following commands:
cp -r backup/DFSMetaLog.0 ./
cp -r backup/DFSMasterMetaCheckpoint.0 ./- Restore metadata files of data nodes
Log in the server where data nodes are deployed (e.g. P1). Navigate to /DolphinDB/server/clusterDemo/data to restore metadata files from backup with the following command:
cp -r backup/CHUNK_METADATA ./P1-datanode/storageStep 2: Restore program files
Download the previous version of server package from the official website. Replace the server that failed to update with all files (except dolphindb.cfg, clusterDemo and dolphindb.lic) just downloaded.
Q5. Failed to update license file online
Updating the license file online requires meeting the requirements described in Step 2: Update License File. Otherwise, you can update offline or apply for an Enterprise Edition License.
Q6: Failed to start nodes on a cloud server
A DolphinDB cluster can be deployed on a LAN, or on cloud environment. By default, the DolphinDB cluster is deployed within a LAN (lanCluster=1) and uses UDP to monitor the heartbeats of nodes. However, the nodes on a cloud server are not necessarily located within the same LAN, and the cluster may not support UDP. On a cloud server, you must specify lanCluster=0 in controller.cfg and agent.cfg to implement communication between nodes in a non-UDP mode. Otherwise, the cluster may malfunction due to the possible failure to detect the heartbeat of a node.
Q7: Specify volume path
A volume is a folder on a data node that holds data in a DFS database in DolphinDB. A node can have multiple volumes. For optimal performance, each volume represents a unique hard disk.
The volume path can be specified in cluster.cfg. If it is not specified, the system will use the data node alias as the path name. For example, if the node alias is P1-datanode, the system automatically creates a subdirectory P1-datanode under the home directory /DophinDB/server/clusterDemo/data of the node to store data. Note that only an absolute path can be used to specify a volume.
Note: It is recommended not to mount a remote NAS volume, which may affect the performance. If the partitions have been mounted with NFS protocol, please switch user to root to access the database. A database process started by a regular user is not allowed to read or write to the NAS disk, whereas a process started by a sudo user will cause access errors.
There are 3 ways to specify the volume path:
- Specify separately for each node
P1-datanode.volumes=/DFS/P1-datanode
P2-datanode.volumes=/DFS/P2-datanode
- Specify with wildcard characters
%and?
? represents a single character; % can represent 0, 1 or more characters.
To store the data of all the nodes ending with "-datanode" to /VOL1:
%-datanode.volumes=/VOL1This is equivalent to:
P1-datanode.volumes=/VOL1
P2-datanode.volumes=/VOL1
- Specify with symbol ALIAS
If each volume path contains a node alias, you can use <ALIAS> to specify the volume paths. For example, to configure 2 volumes (/VOL1 and /VOL2) on each node:
volumes=/VOL1/<ALIAS>,/VOL2/<ALIAS>This is equivalent to:
P1-datanode.volumes=/VOL1/P1-datanode,/VOL2/P1-datanode
P2-datanode.volumes=/VOL1/P2-datanode,/VOL2/P2-datanode
Q8: Change configuration
For more details on configuration parameters, refer to Configuration.
If you encounter performance problems, you can contact our team on Slack for technical support.