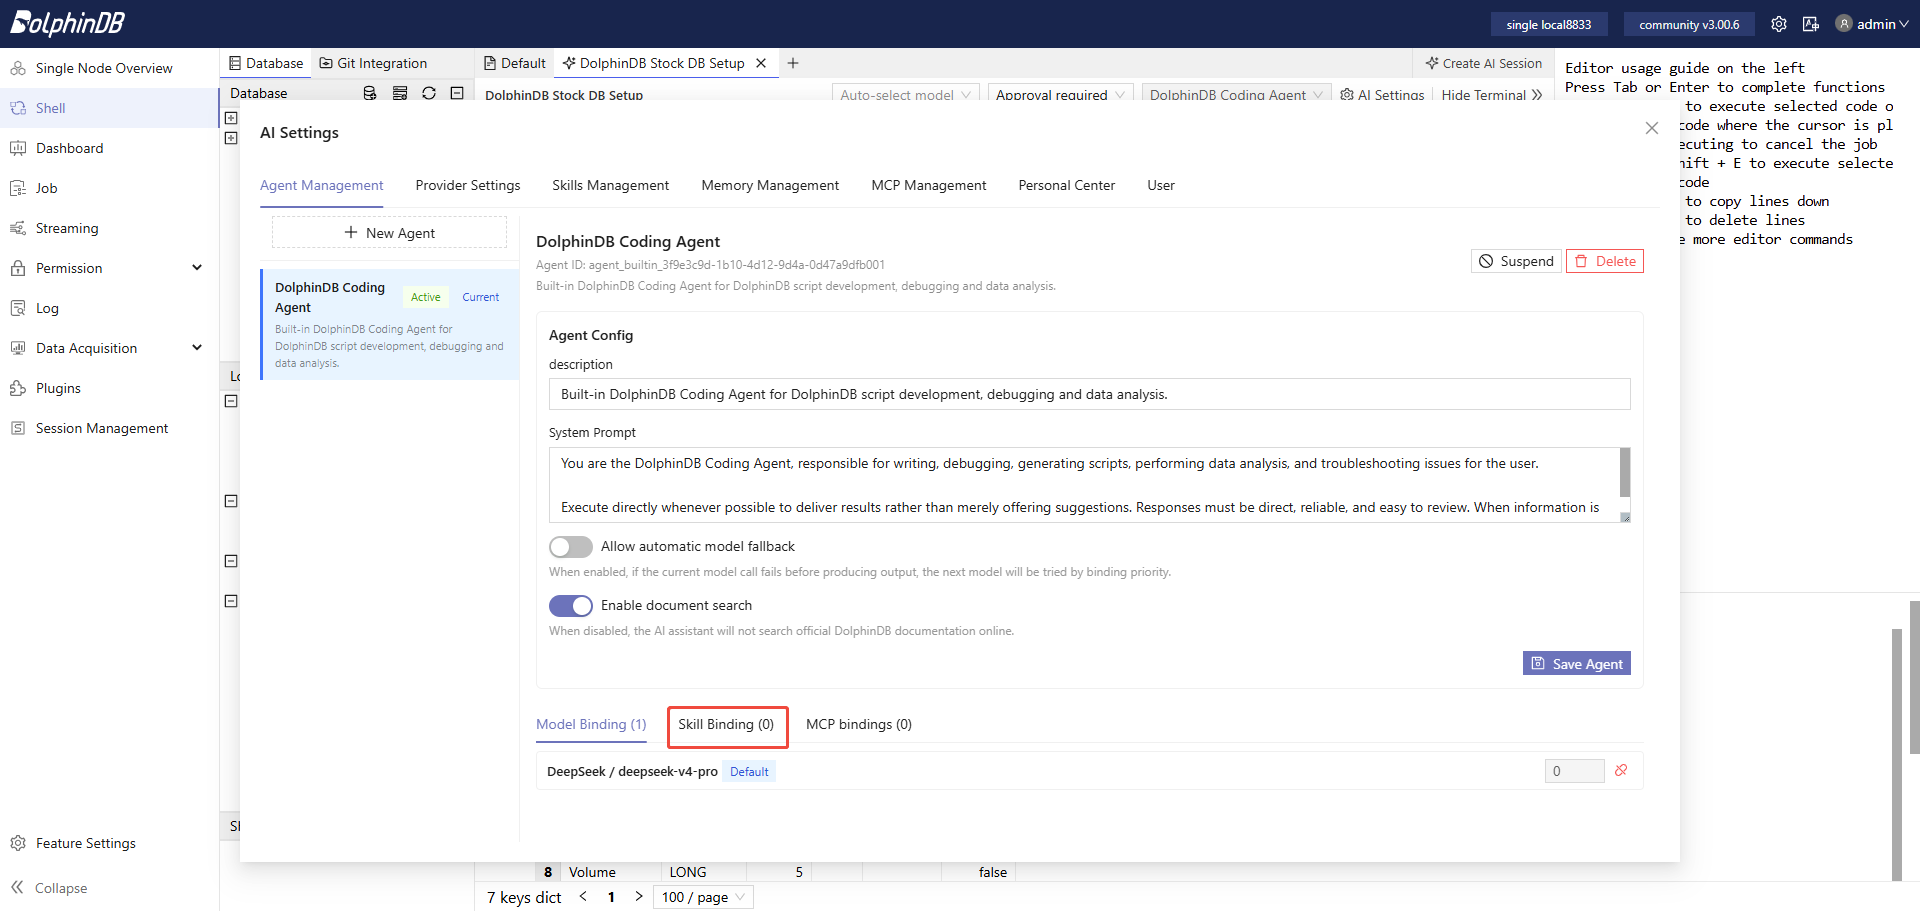
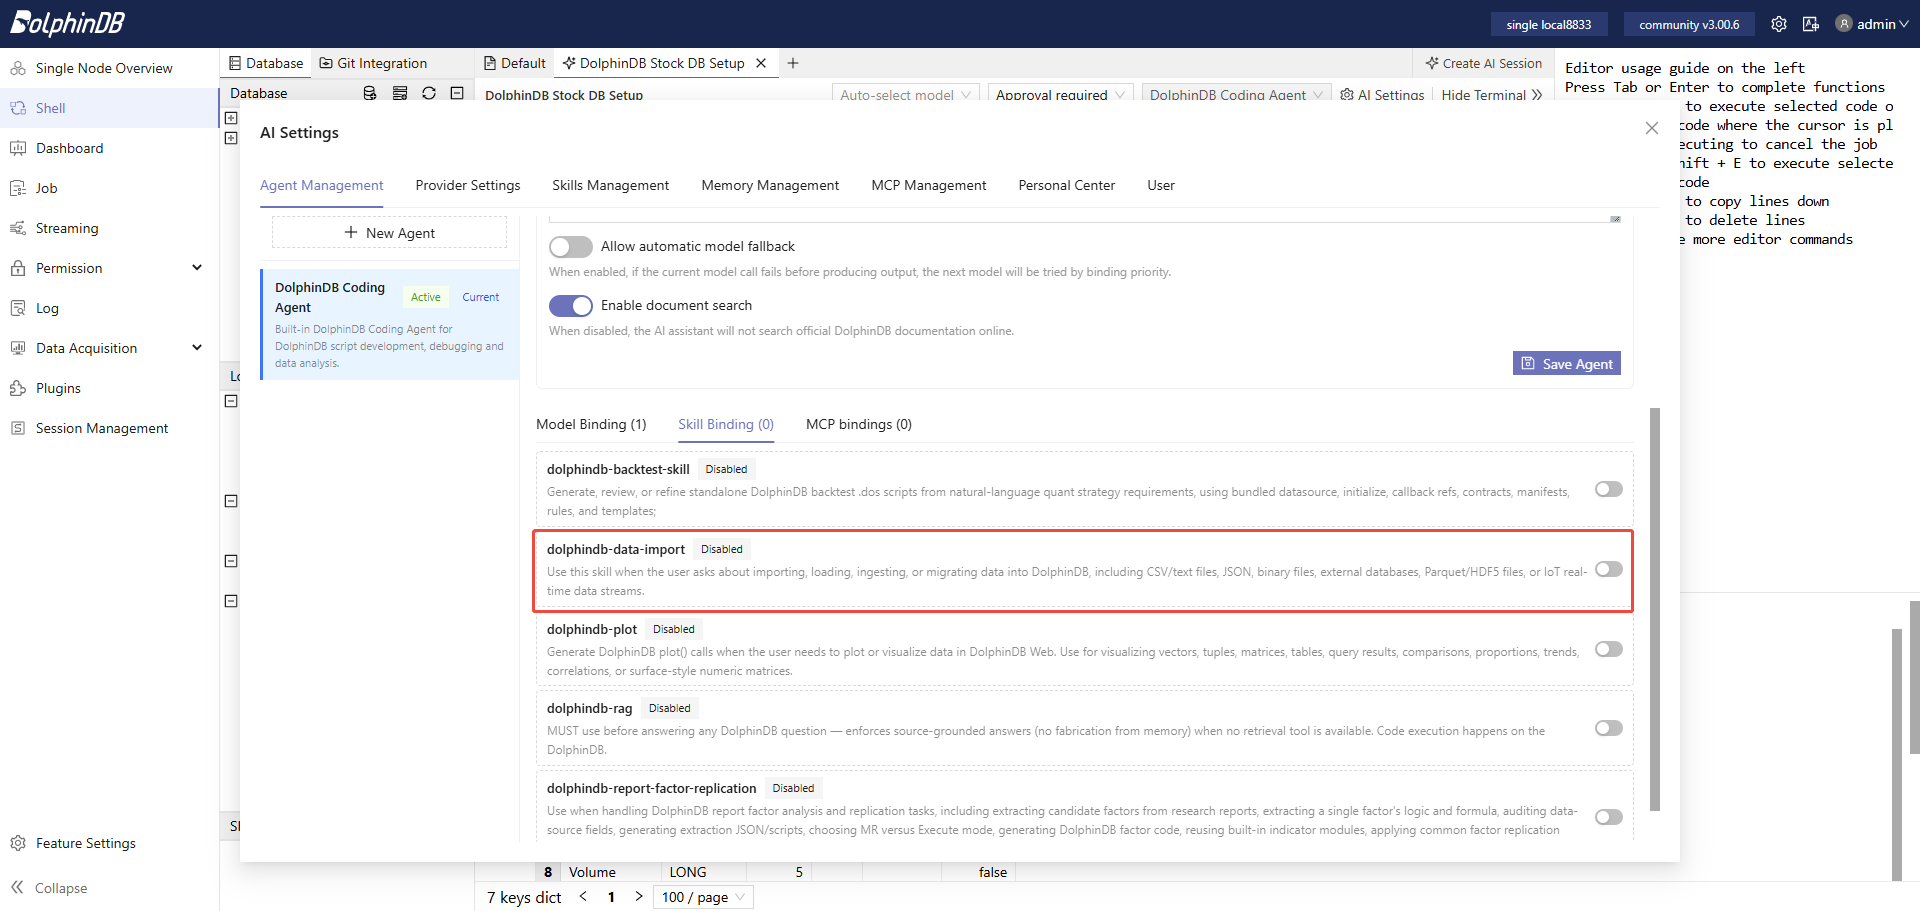
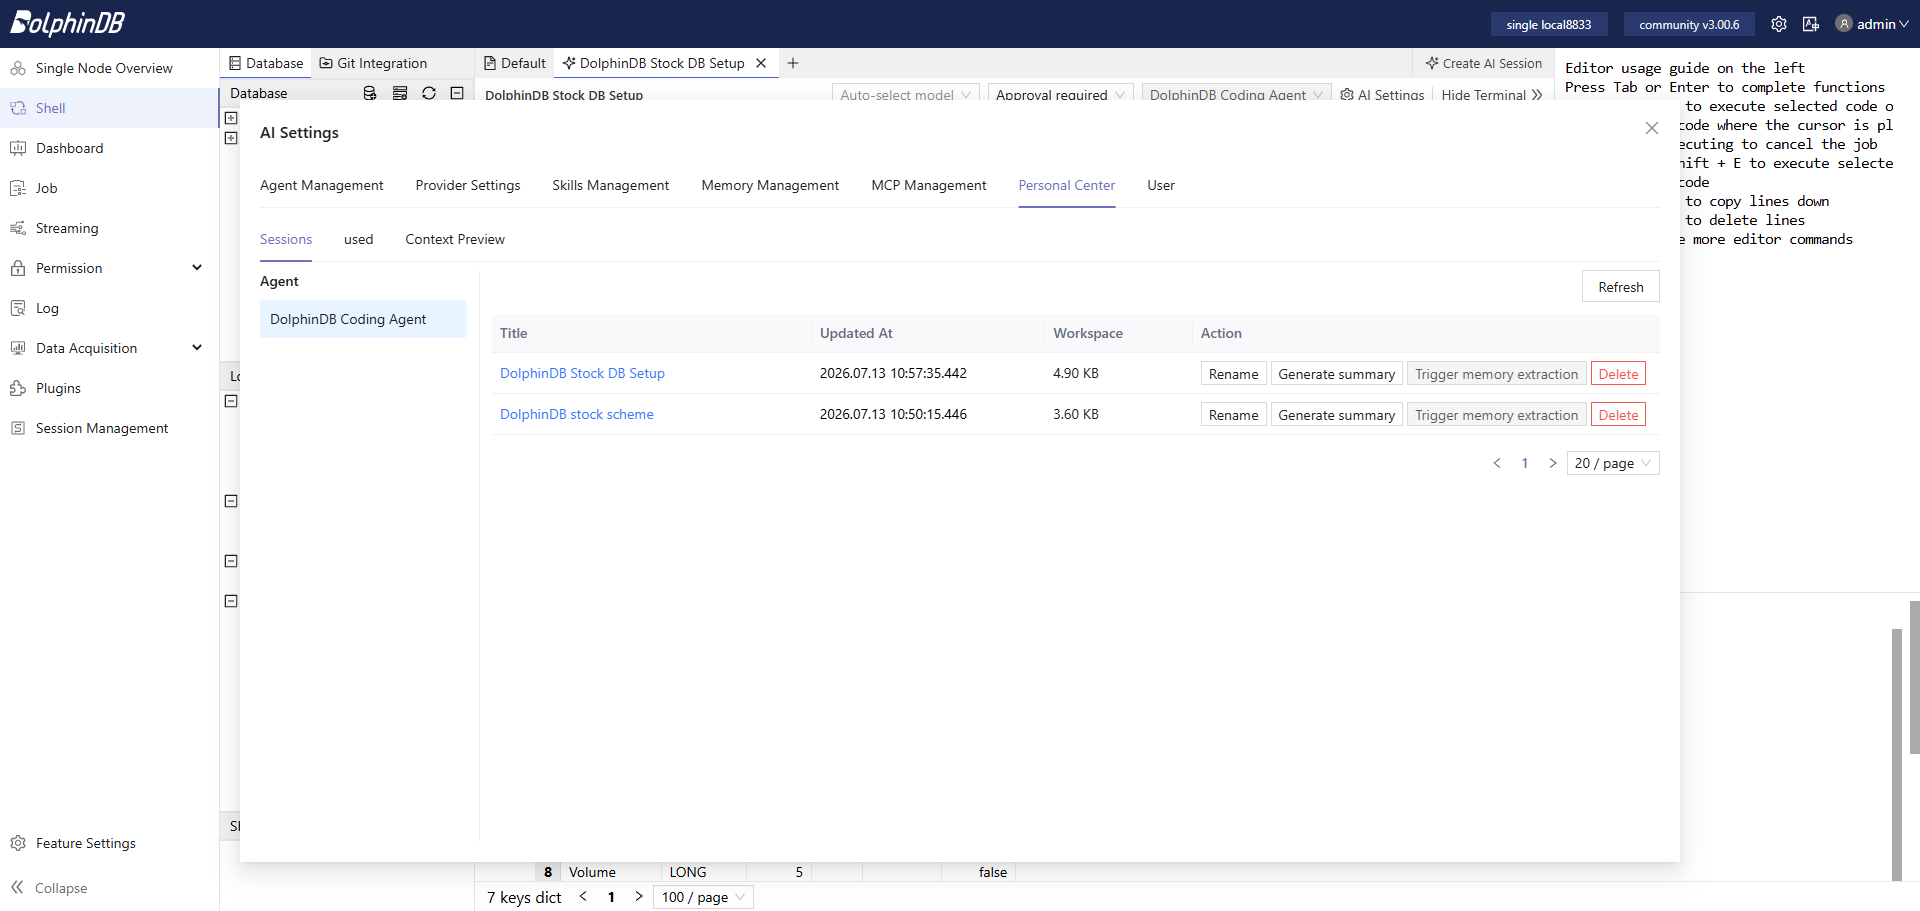
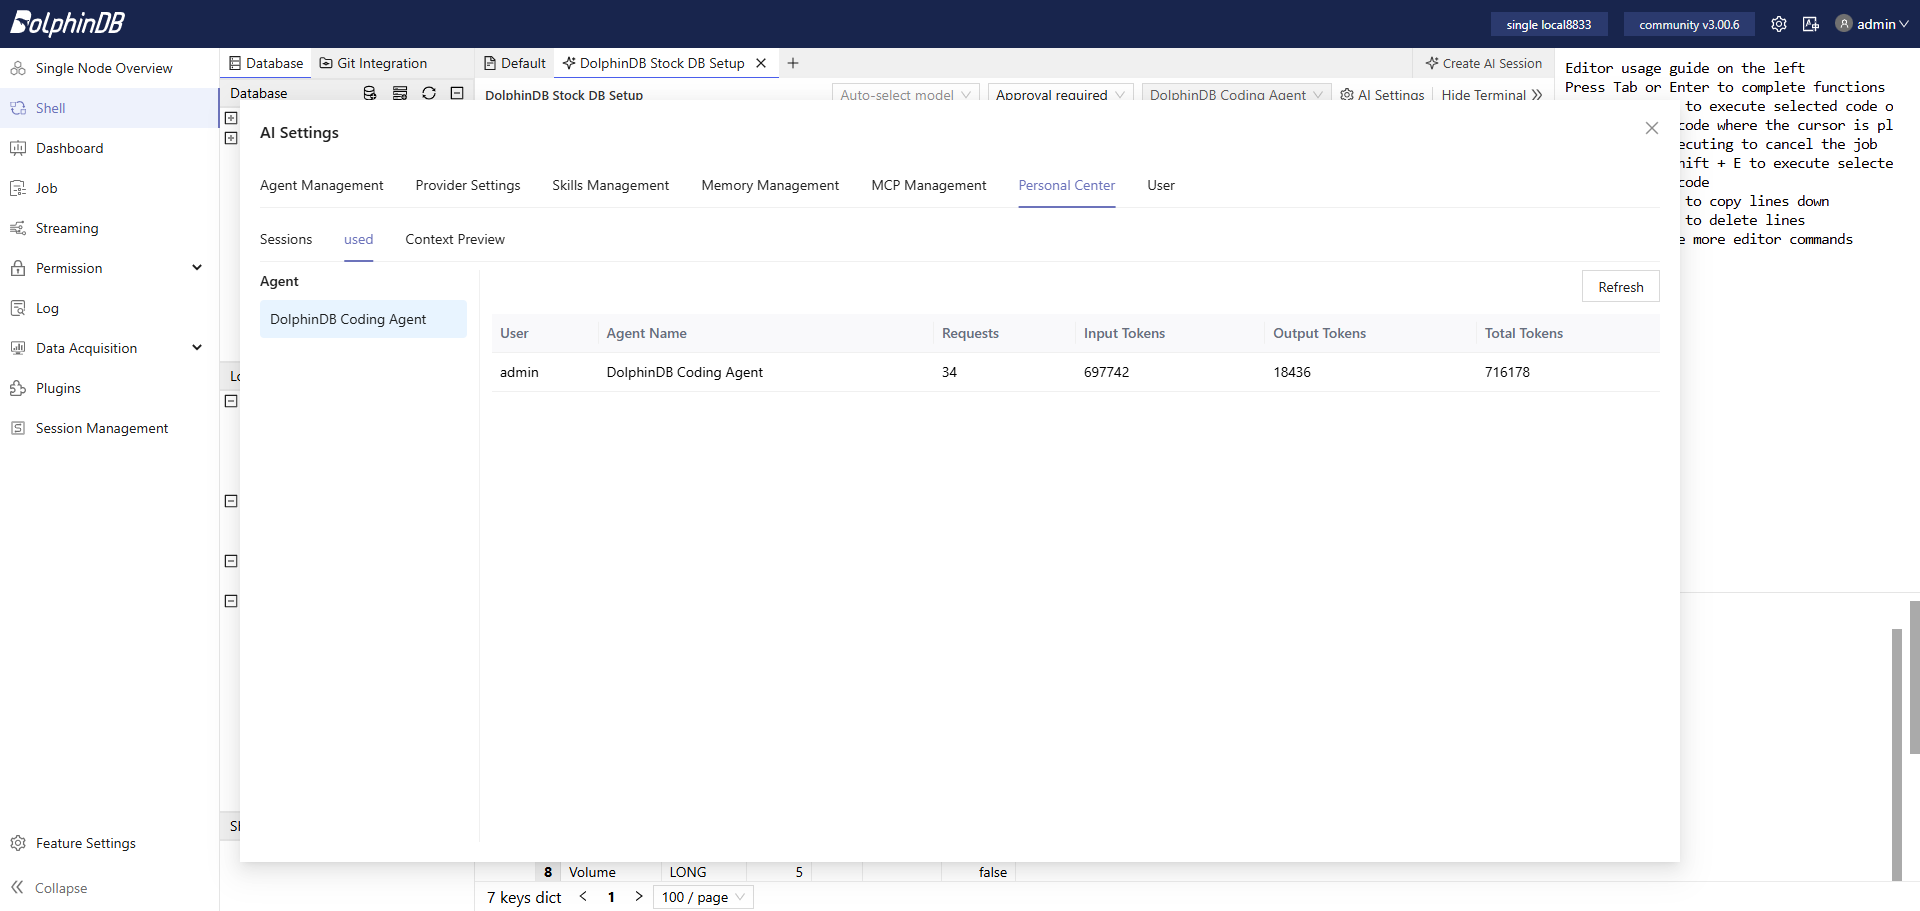
Starting from version 3.00.6, DolphinDB Web Intereface supports DolphinX-based AI coding. AI coding introduces a new interaction model for developing DolphinDB scripts. After configuring the AI model, you can interact with DolphinDB using natural language to generate, edit, and execute DolphinDB scripts. The system can plan tasks, write the scripts, and complete the work based on your instructions.
Note:
DolphinX AI coding is available only on standalone deployment or on compute nodes of
cluster deployment.
1. Initialize and Configure Agent
After deploying DolphinDB 3.00.6 or later, open the web interface to initialize the built-in AI resources and configure the agent.
1.1 Initialize Built-In Resources
Go to http://<IP>:port/ and sign in to the web
interface of standalone deployment or compute nodes of cluster deployment as
the admin.
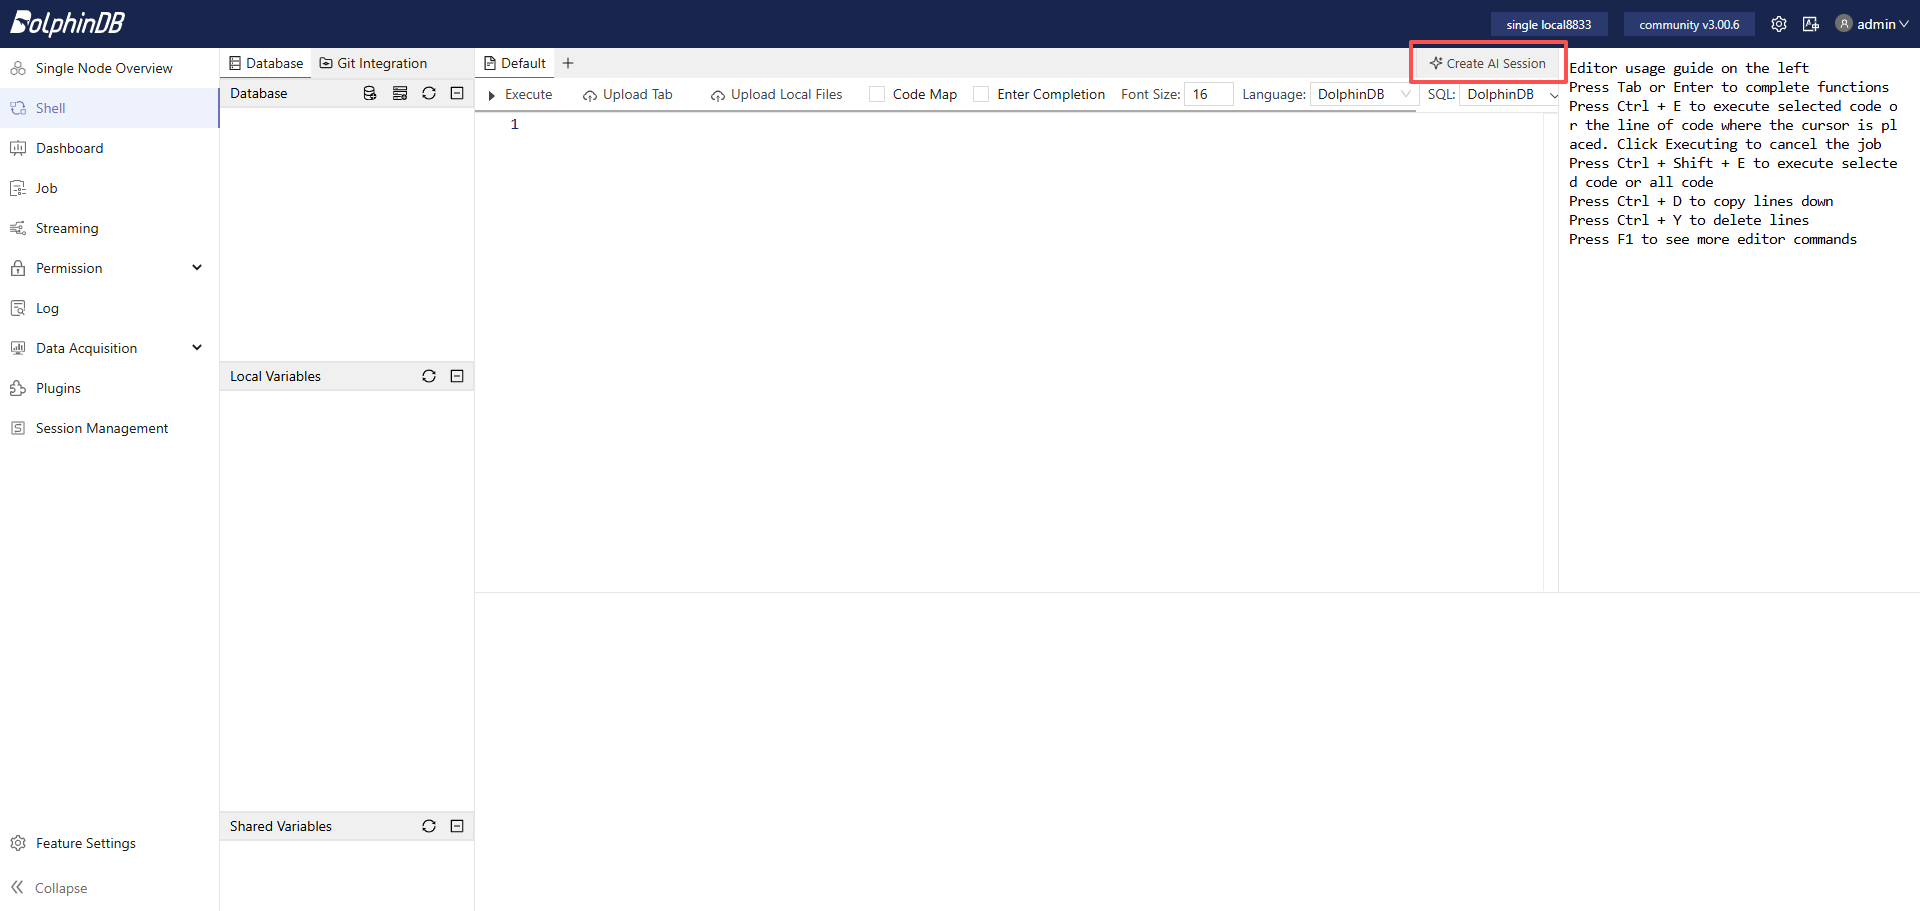
Open Shell and click Create AI Session on the right side of
the tab bar.Figure 1. Figure 1-1 Create AI Session
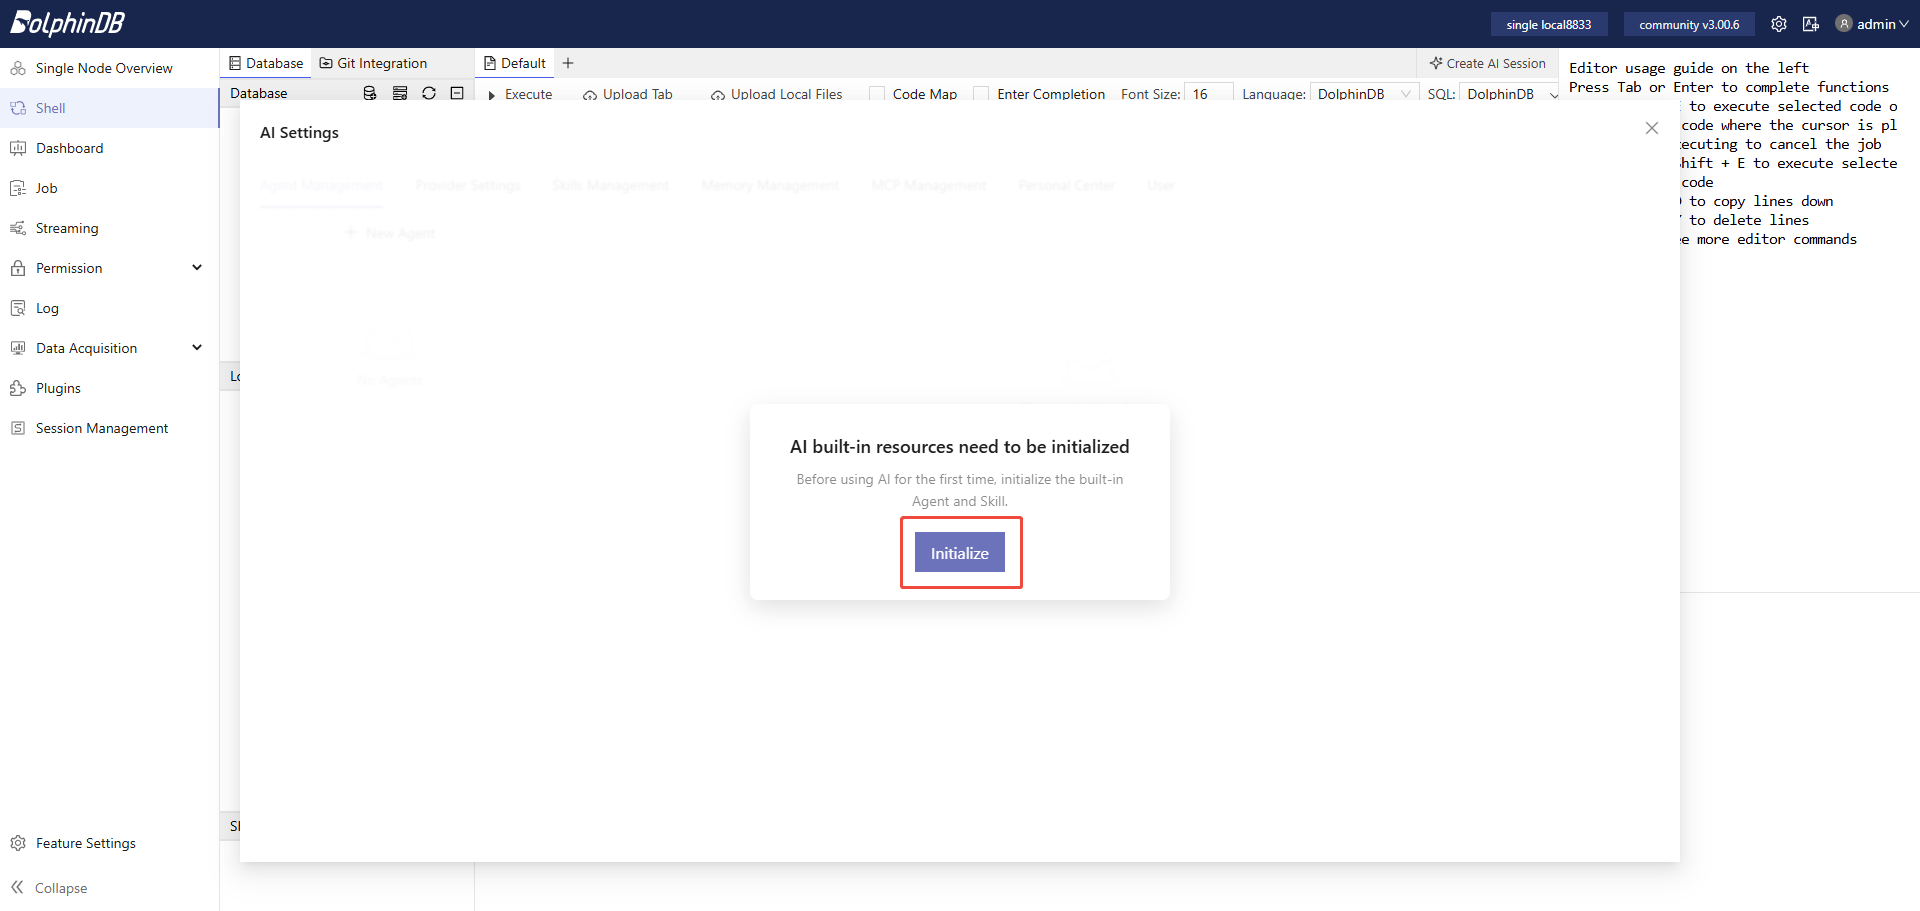
Click Initialize.Figure 2. Figure 1-2 Initialize
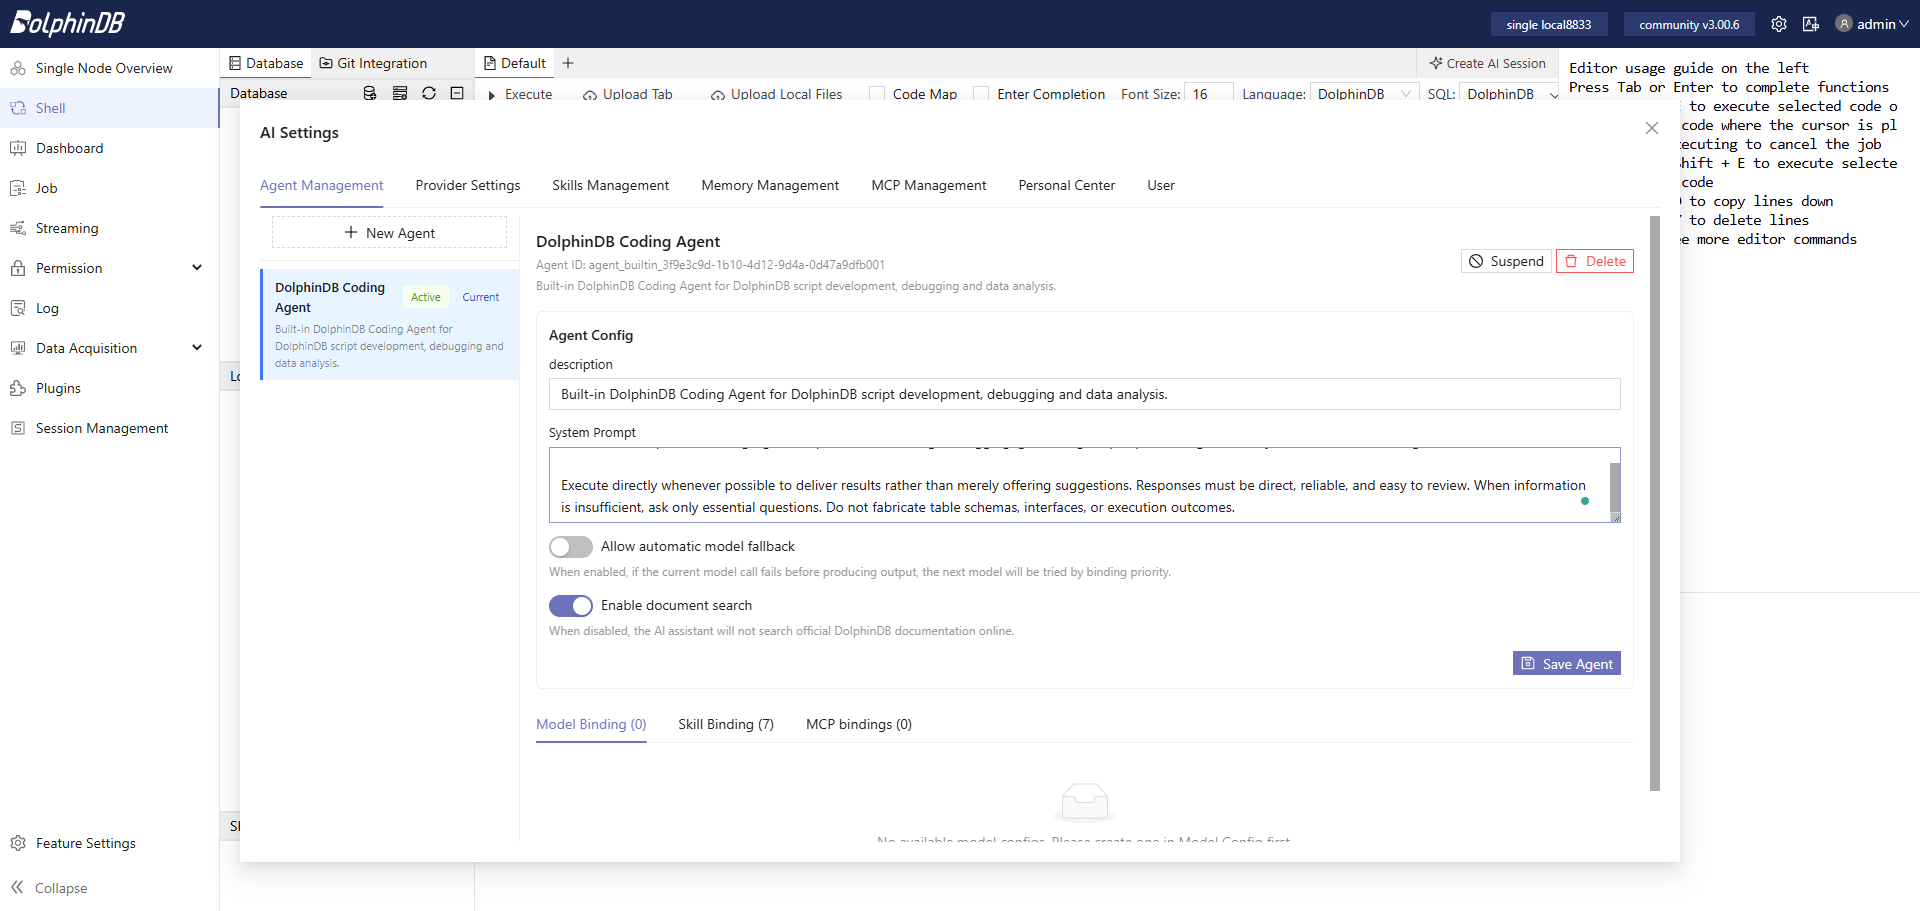
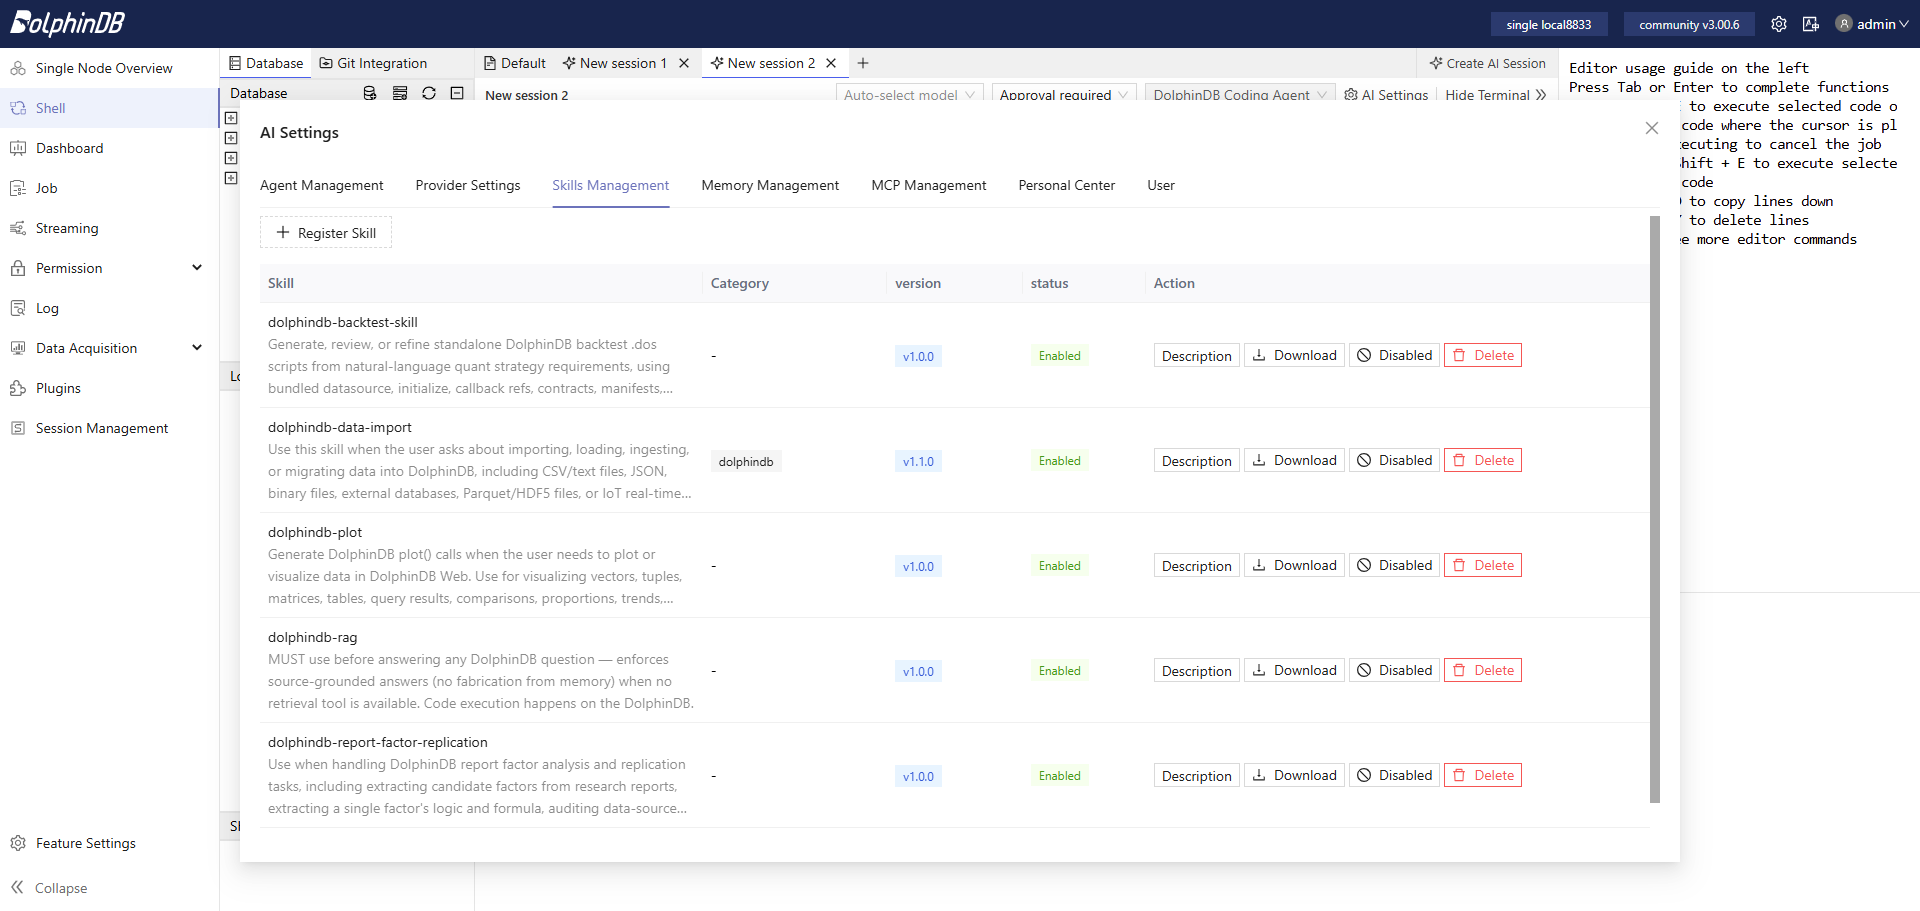
After initialization, you can view the default DolphinDB Coding Agent and
built-in skills.Figure 3. Figure 1-3 DolphinDB Coding AgentFigure 4. Figure 1-4 Built-In Skills
1.2 Configure the AI Model
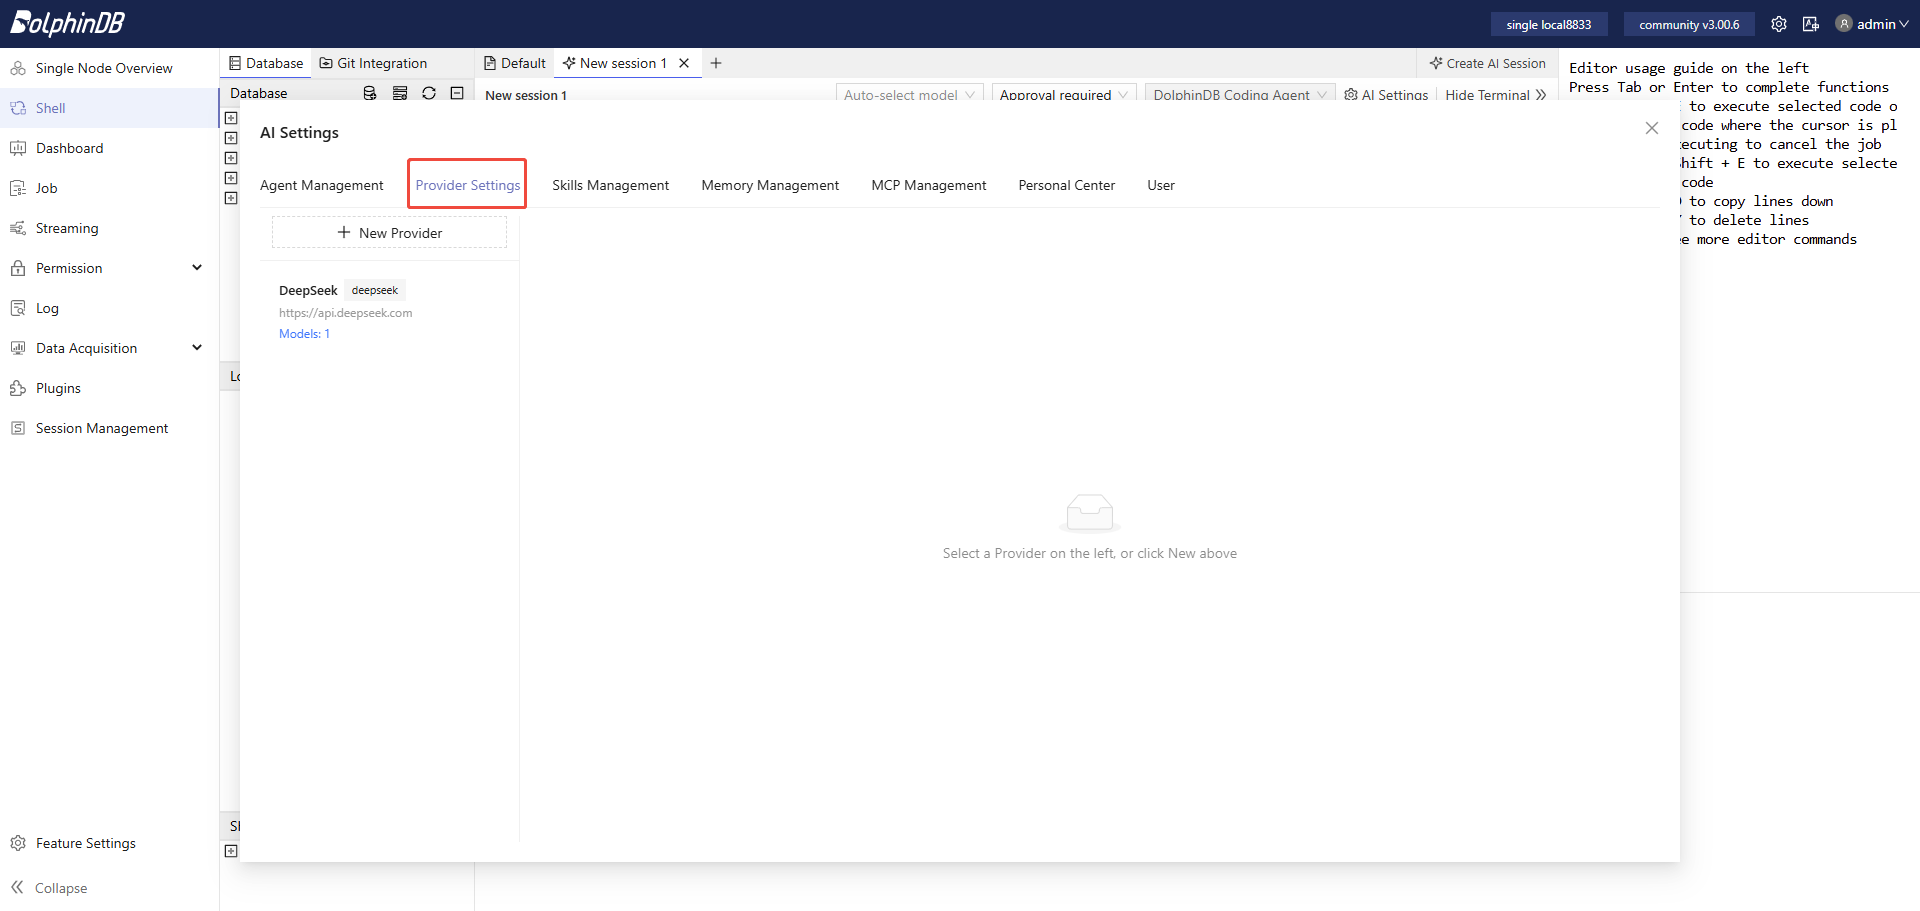
Click AI Settings and then click Model Management.Figure 5. Figure 1-5 Provider Settings
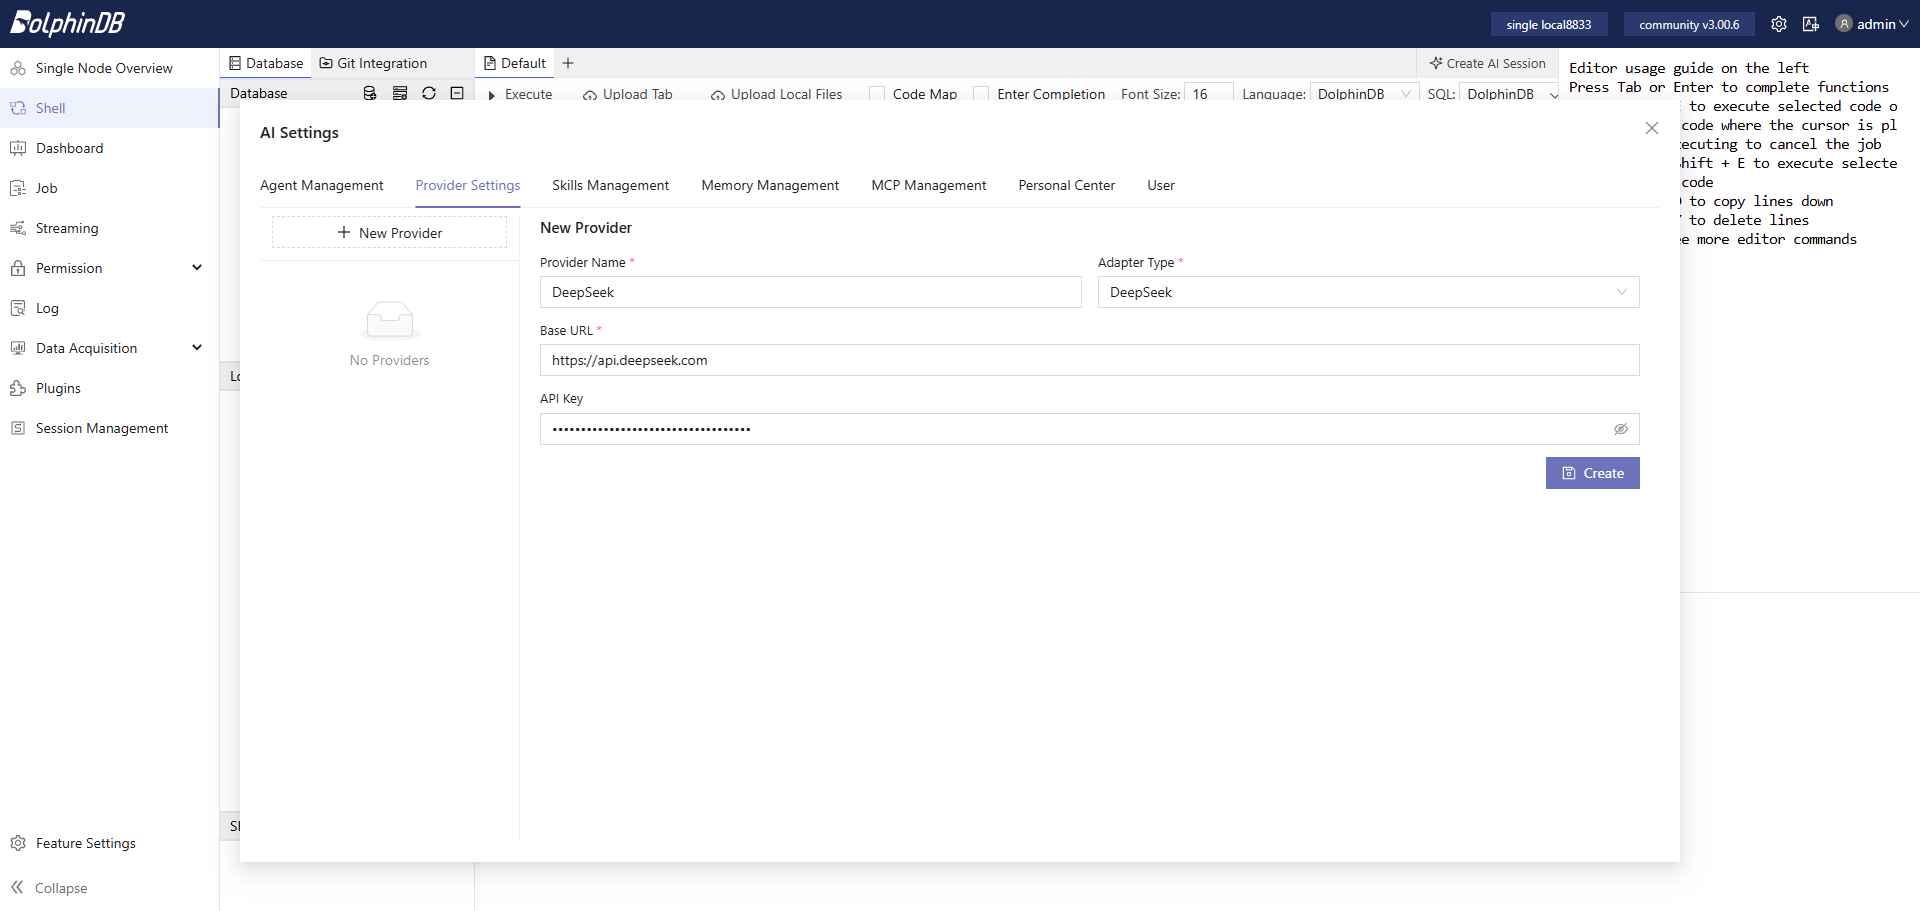
Click New Provider, enter the provider name, Base URL, and API Key,
select the adapter type, and then click Create.Figure 6. Figure 1-6 Create a New Provider
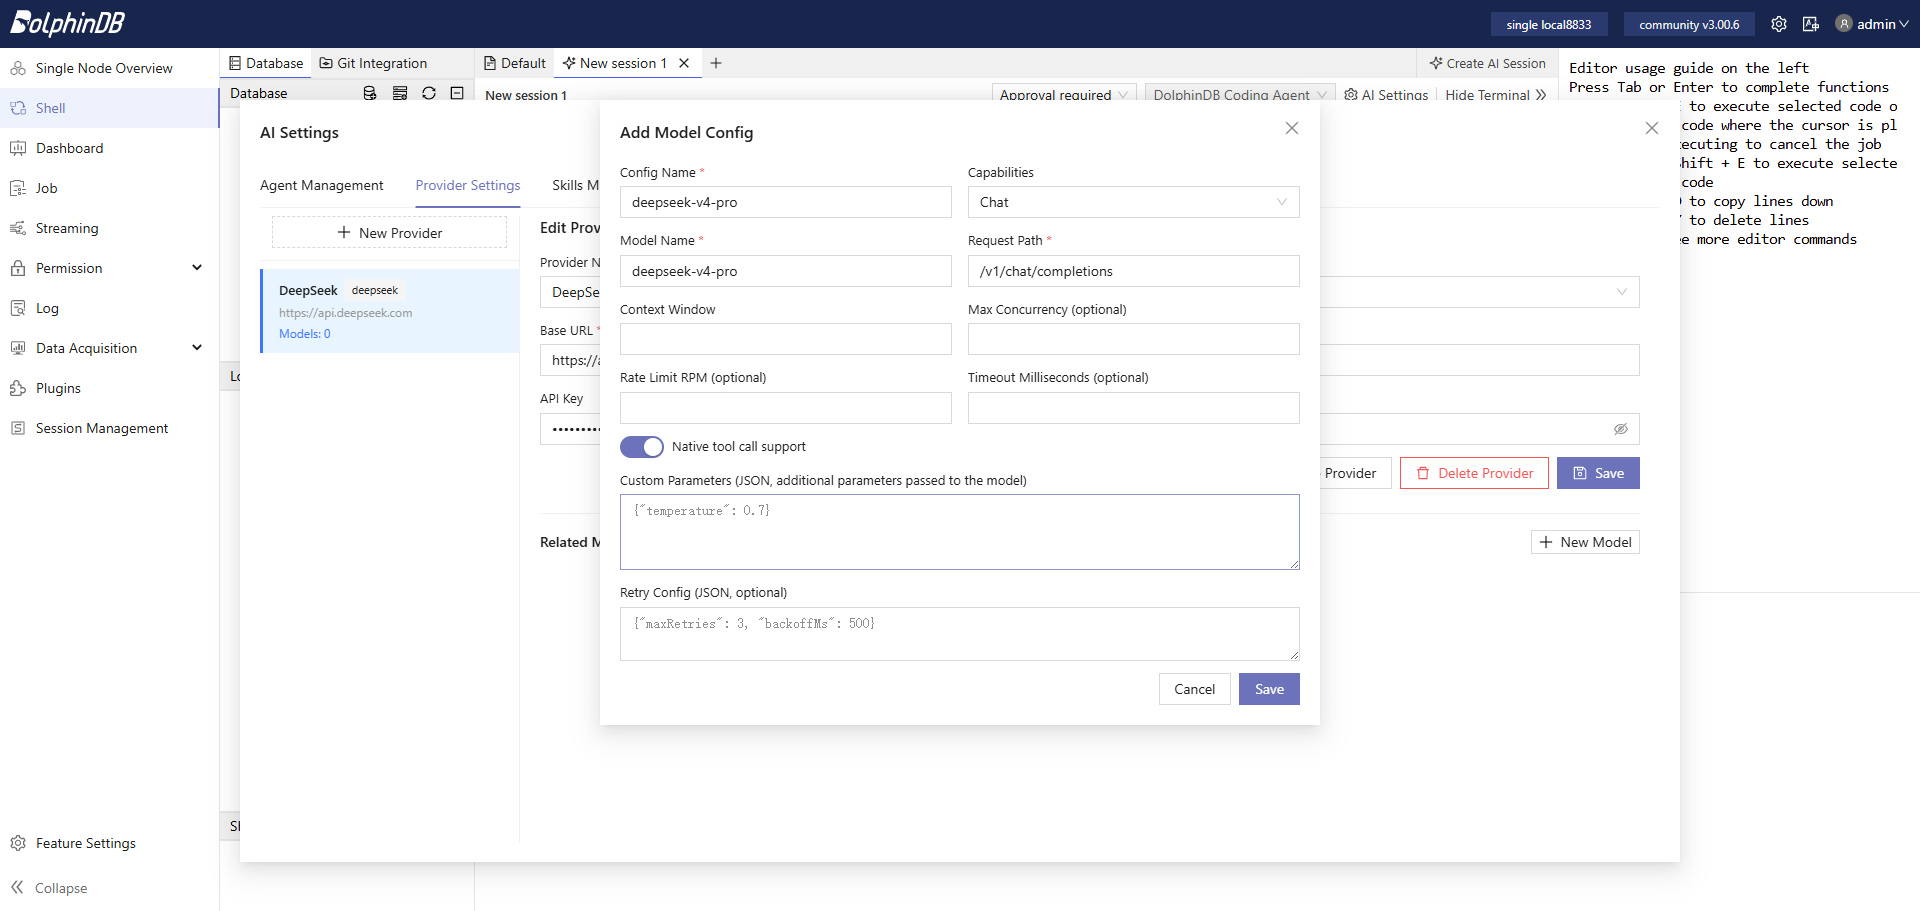
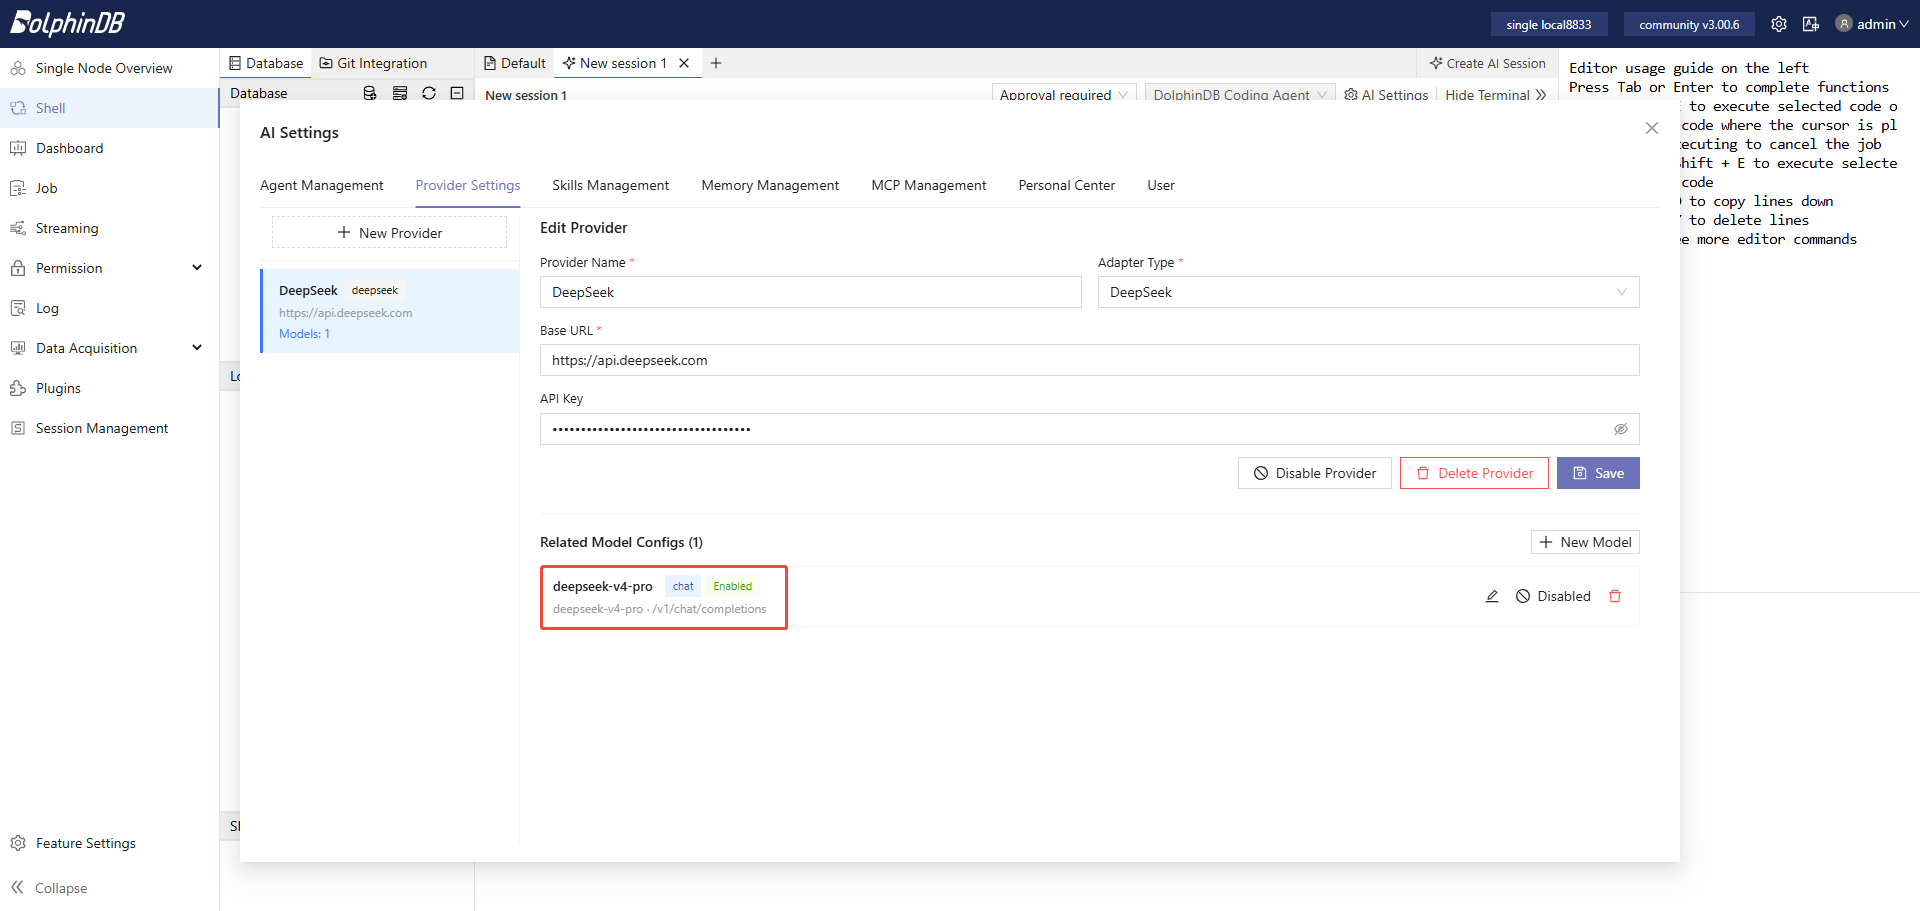
Click New Model. Configure the model details based on its
capabilities, and then click Save.Figure 7. Figure 1-7 Add a New ModelFigure 8. Figure 1-8 Newly Added Model
1.3 Bind the Model to the Agent
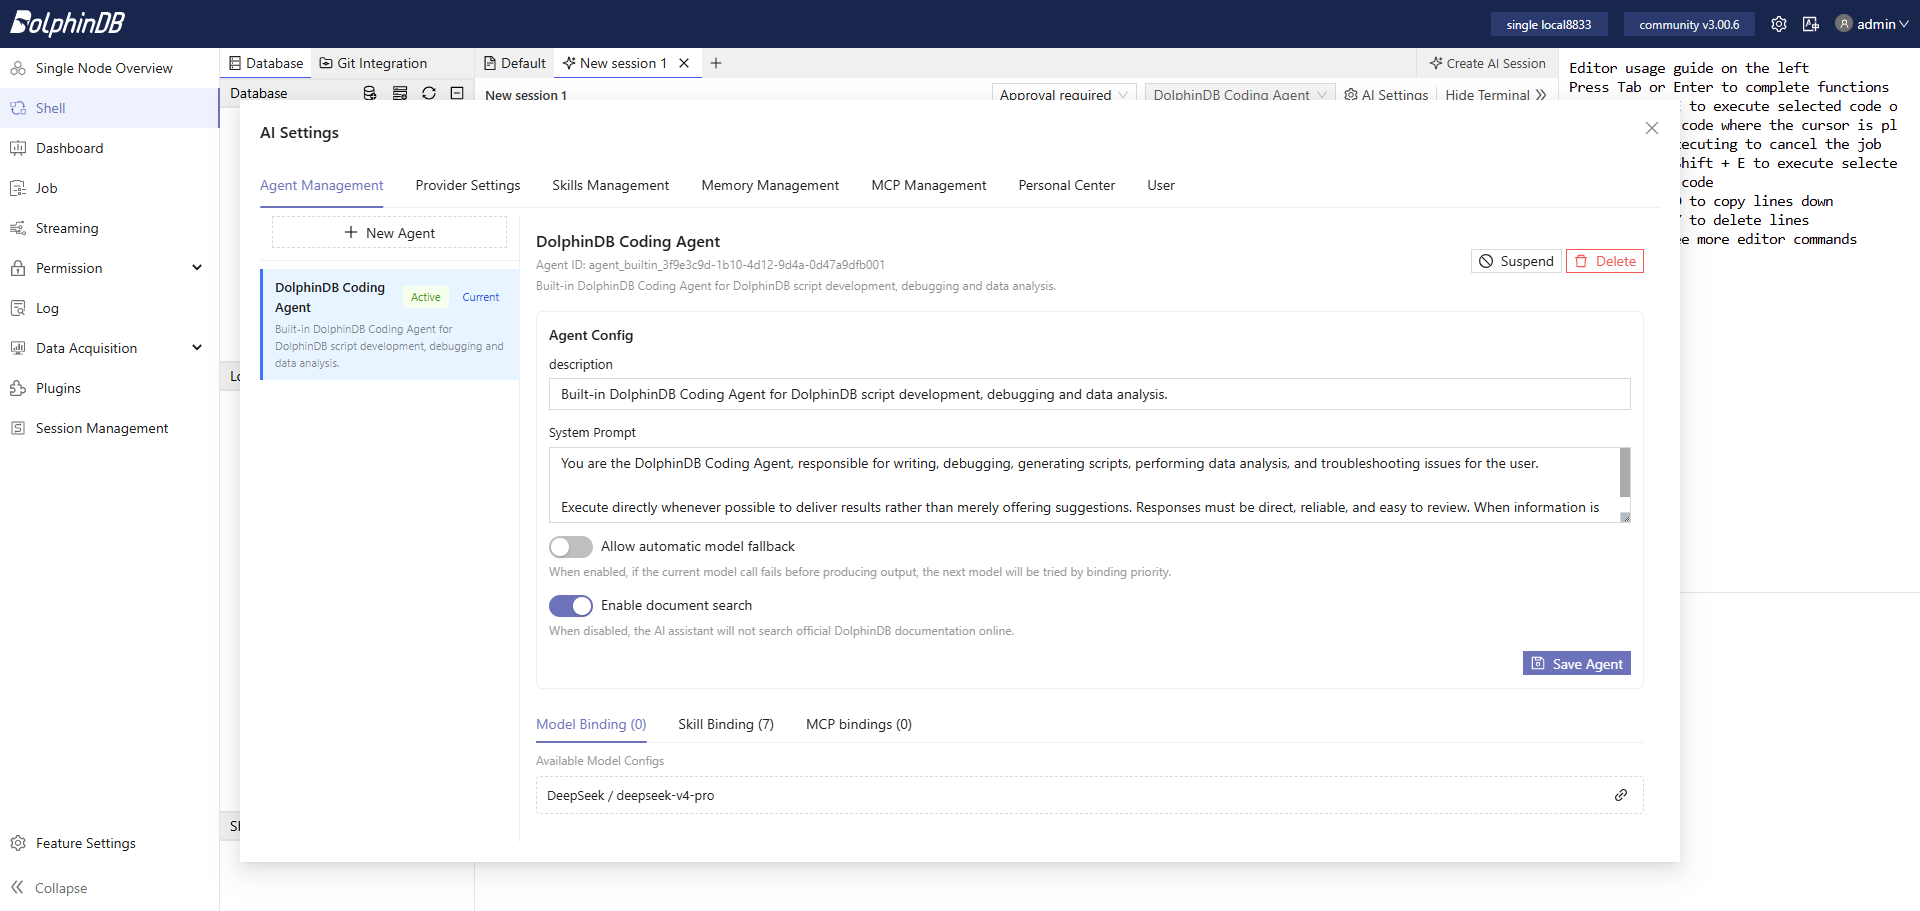
After adding a model, bind it to an agent for use.
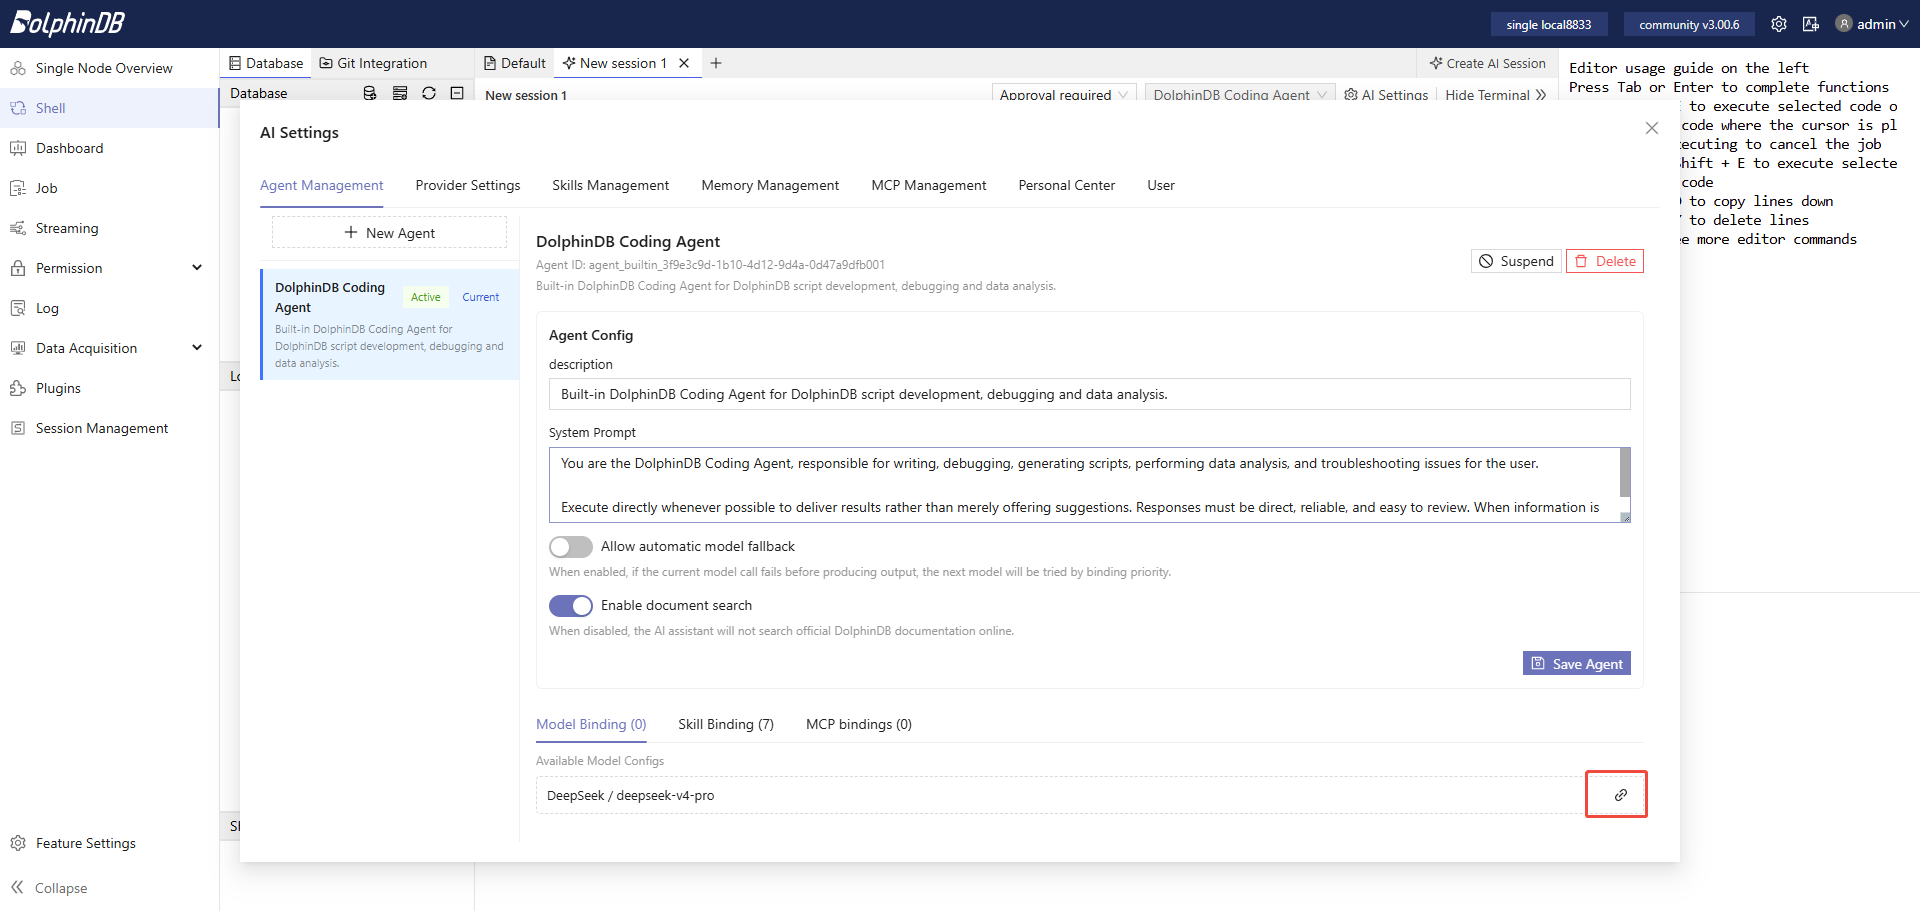
On the Model Binding tab, find the target model and click the bind
icon.Figure 10. Figure 1-10 Bind a Model
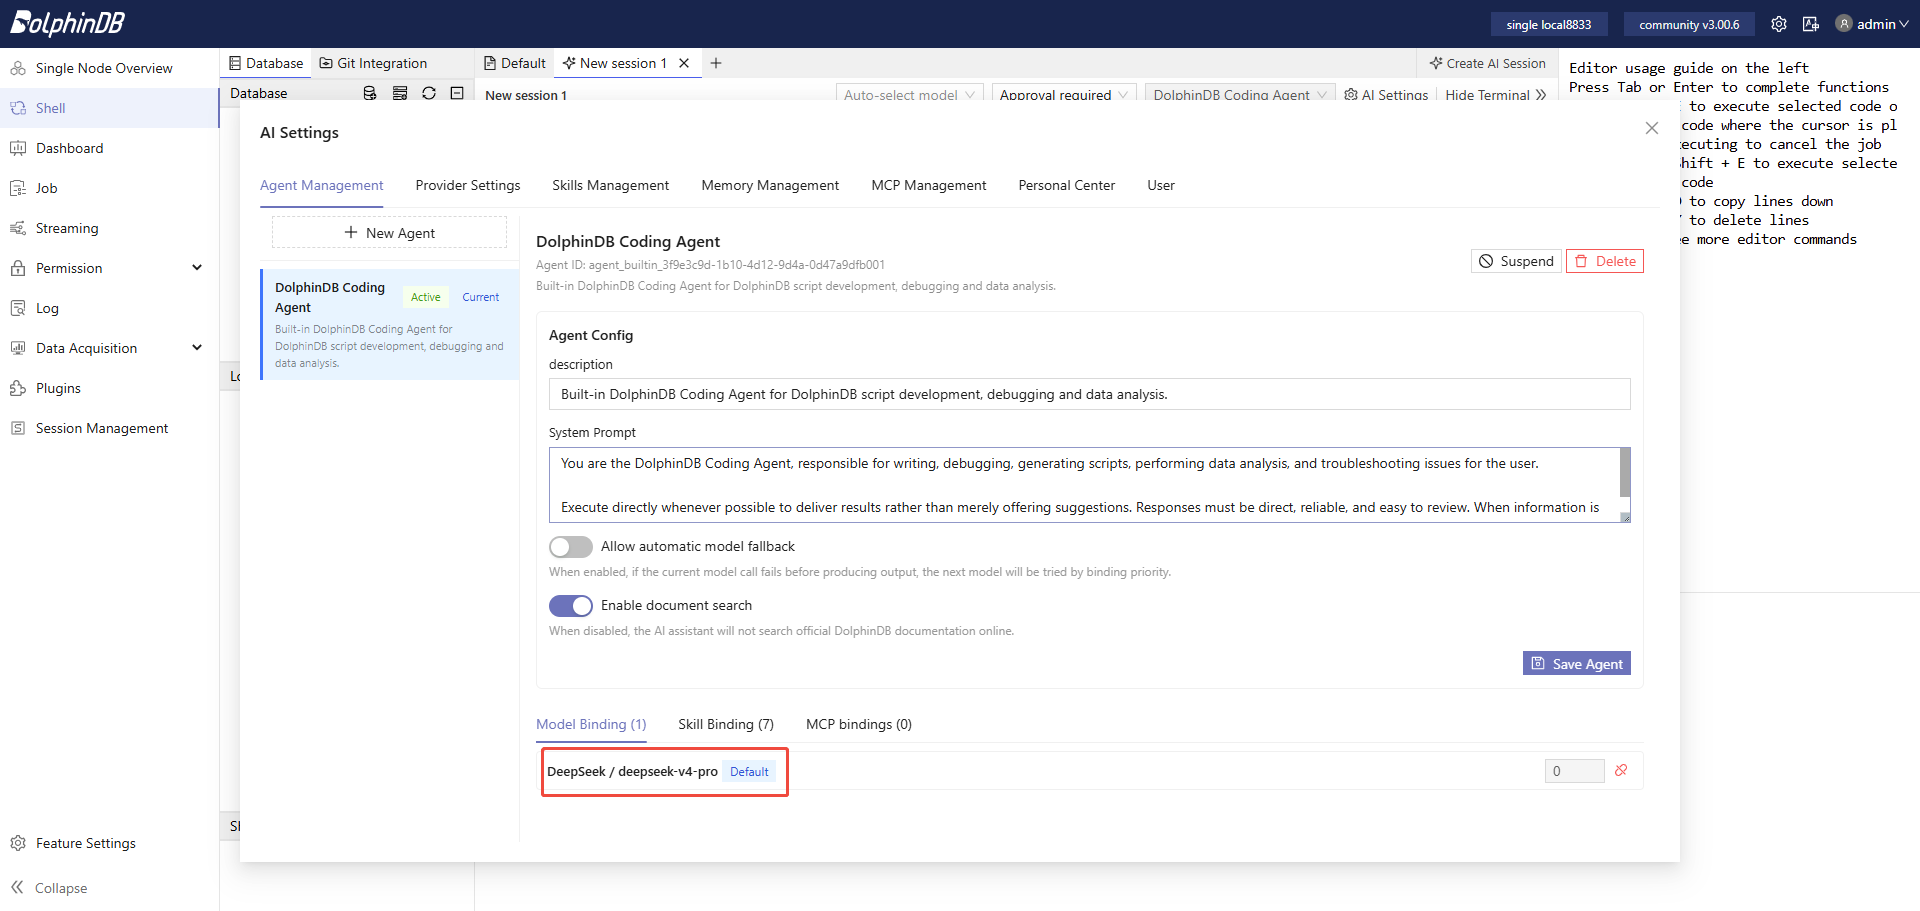
After binding, the agent can use the bound model to write code and execute
tasks.Figure 11. Figure 1-11 Model Bound
2. Permissions
For the AI coding feature, administrators and standard users have different permissions.
2.1 Administrators
Administrators can manage all configurations for the AI coding module and manage permissions for standard users. Administrators have access to the following features:
Agent Management
Provider Settings
Skill Management
Memory Management
MCP Management
User and Group Management
2.2 Standard Users
Standard users' access to Agents, models, skills, and other resources is granted directly by an administrator or via the user group they belong to. Standard users can perform the following operations:
Create AI Session
View Session History
View and Manage Personal Memory
View Personal Usage
Configure Token Budget
2.3 Standard Users with Agent Management Permission
Administrators can grant standard users or groups permission to manage agents.
Standard users with agent management permission can create and configure agents
and manage the models, skills, and MCP servers bound to those agents and
knowledge base. For detailed instructions, see User Management.
2.4 Group Permissions
Users can be assigned to user groups so that permissions can be managed in bulk
by adjusting group permissions. Administrators can configure Agent permissions,
user model permissions, user skill permissions, and Agent management permissions
for a user group. Members of a group automatically inherit the permission
settings of the group to which they belong. For more information about user
group management, see Permission and User Access
Control.
3. AI Coding
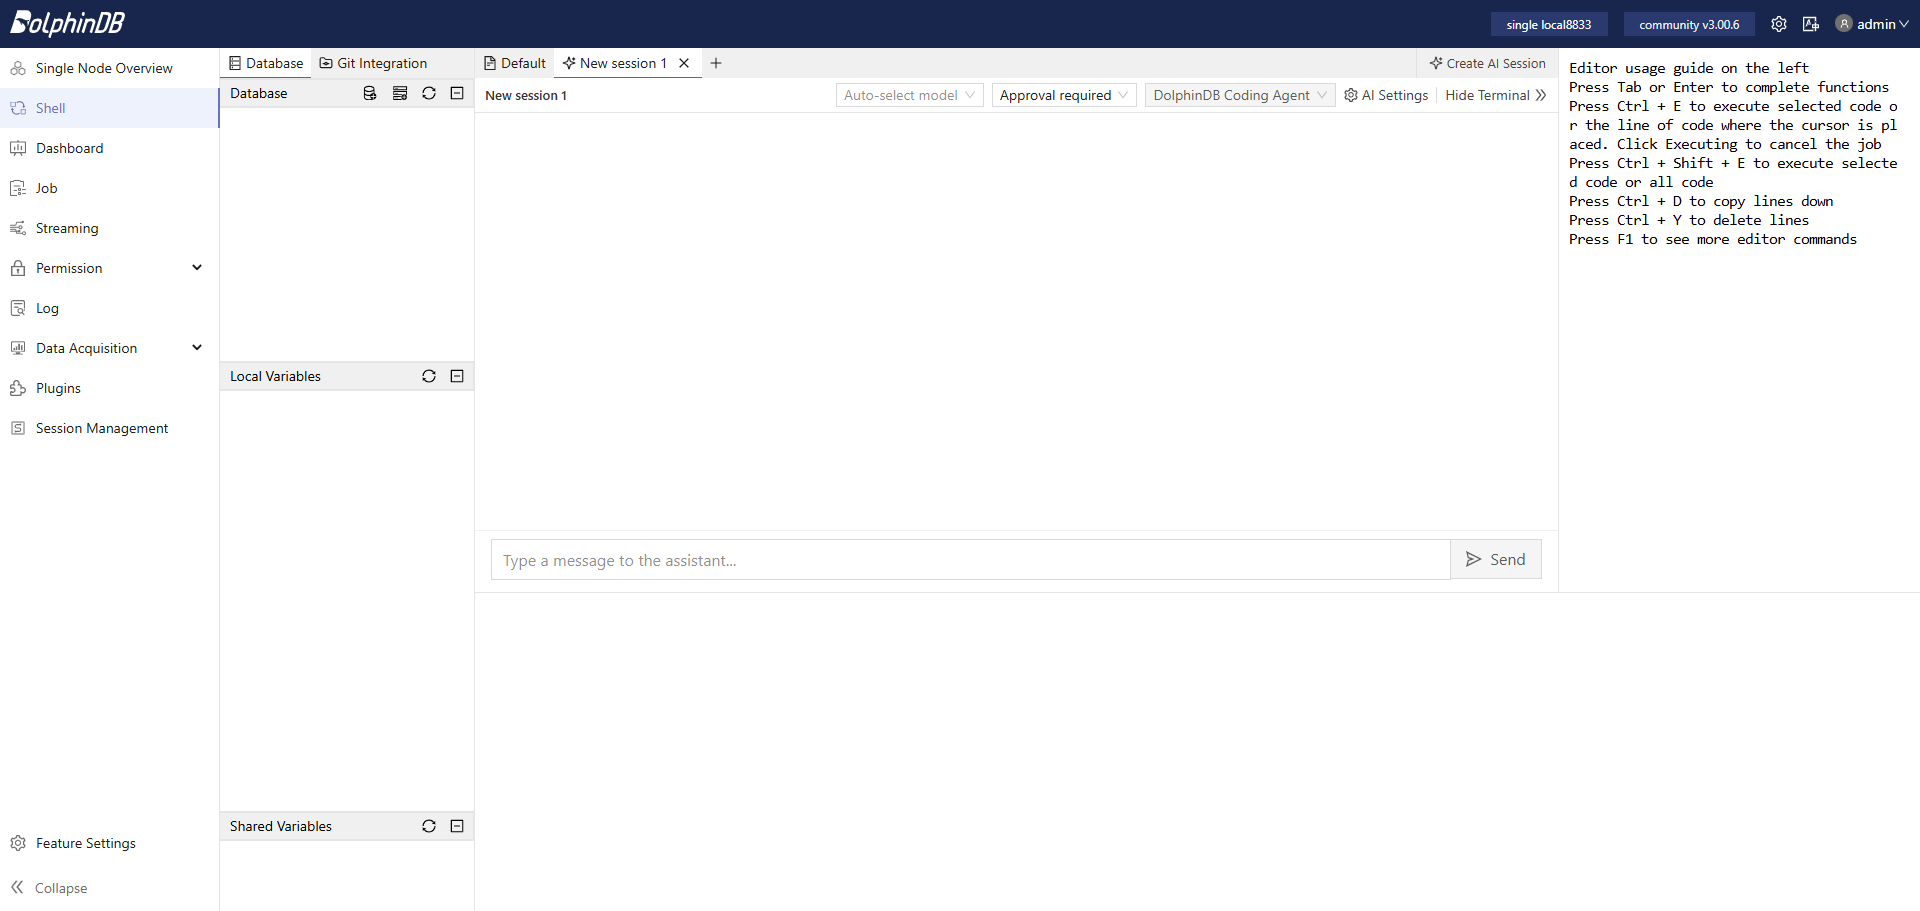
After configuring an AI model and binding it to an agent, click Create AI
Session to use AI coding. You can describe your requirements in natural
language and use the agent to complete them. Based on the goals you have set,
the agent can break the work into steps and generate DolphinDB scripts.Figure 12. Figure 3-1 Create an AI Session
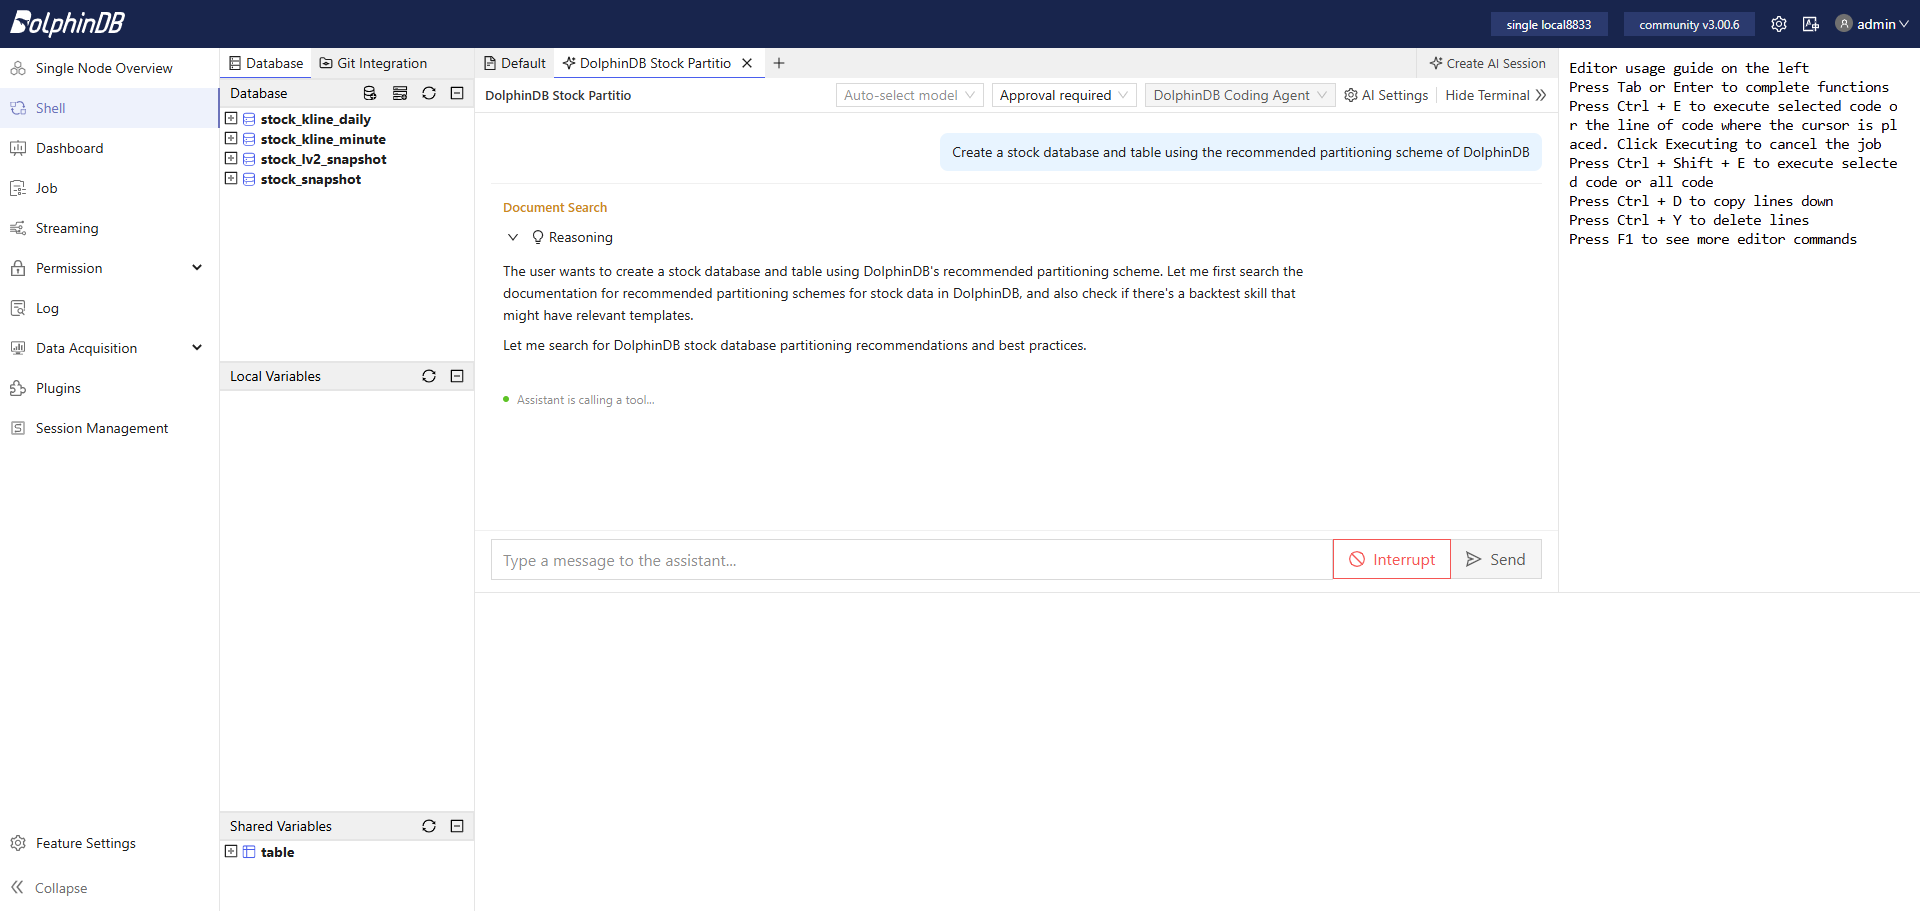
The following example shows how to use it to assist in creating databases and
tables. In the chat box, enter “Create a stock database and table using the
recommended partitioning scheme of DolphinDB” and then click Send. The
agent automatically plans the work, breaks the task into steps, and searches for
relevant information.Figure 13. Figure 3-2 Start a Conversation
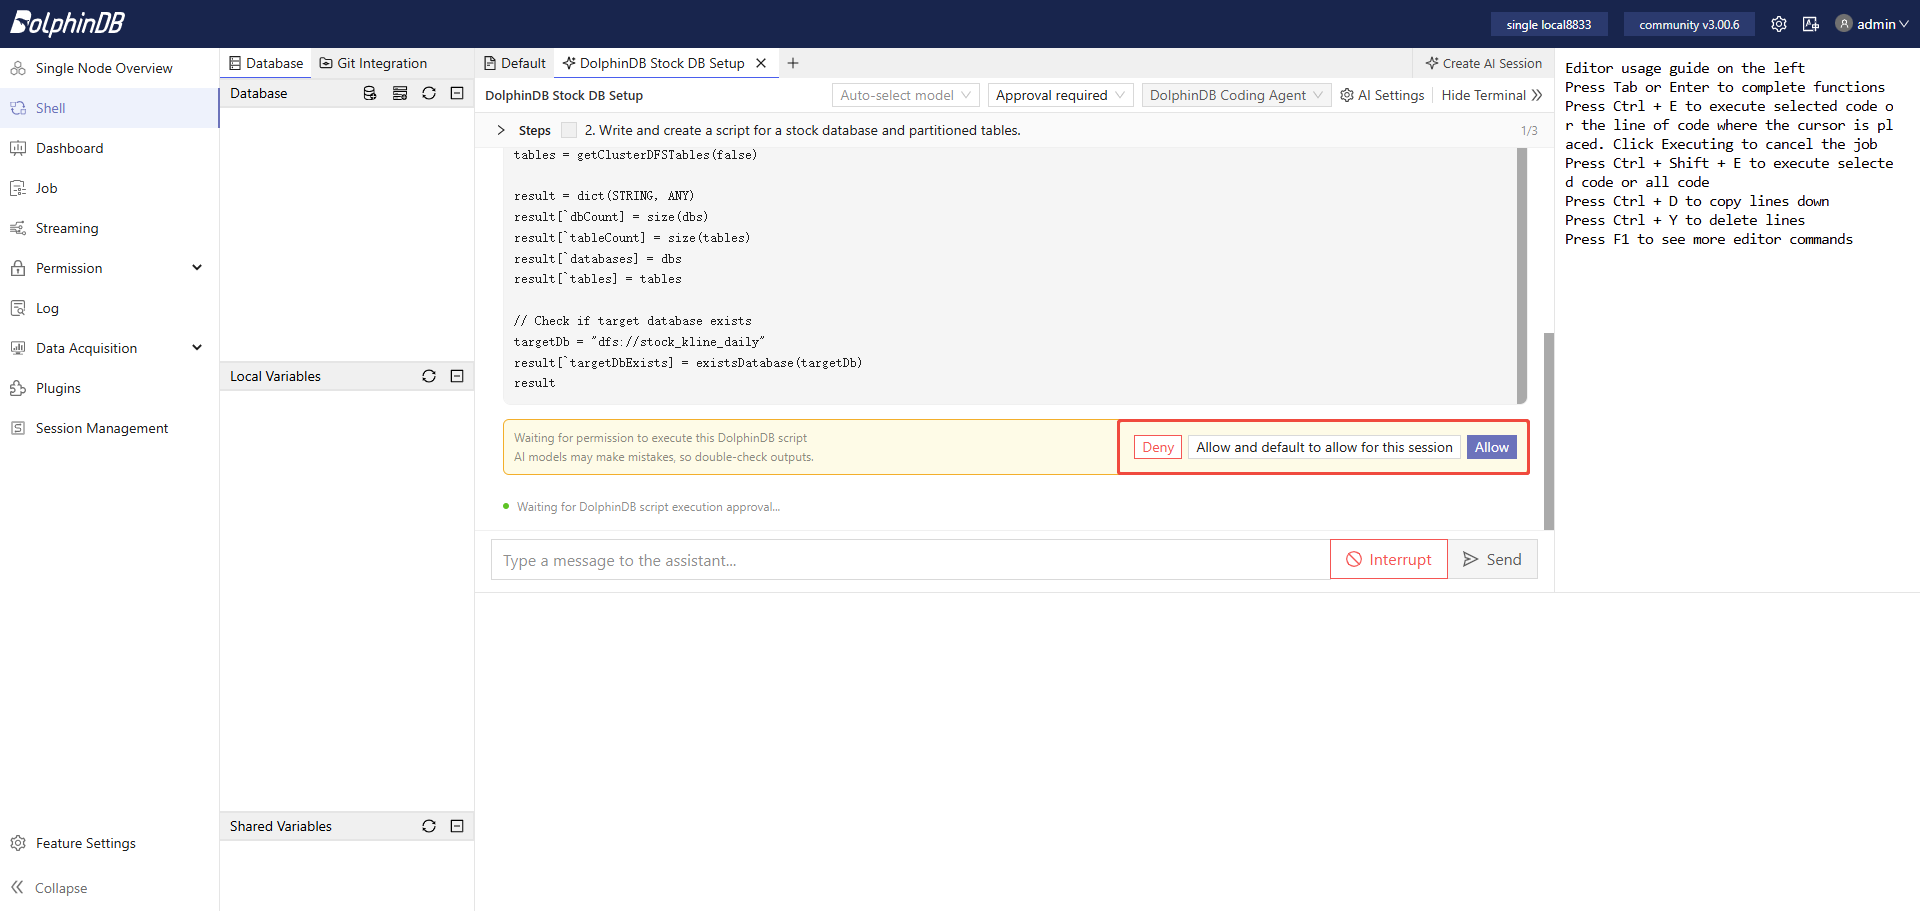
When the agent needs to run the DolphinDB script, you can review and approve the
script. After approval, the AI-generated script is executed. If you do not want
approvals to interrupt your work, you can choose Allow and remember for this
session.
Note:
AI-generated scripts may have
errors, so approve with caution. If you choose to allow by default for this
session, you assume the risk of possible AI errors by yourself.
Figure 14. Figure 3-3 Allow Agent to Execute the Generated Scripts
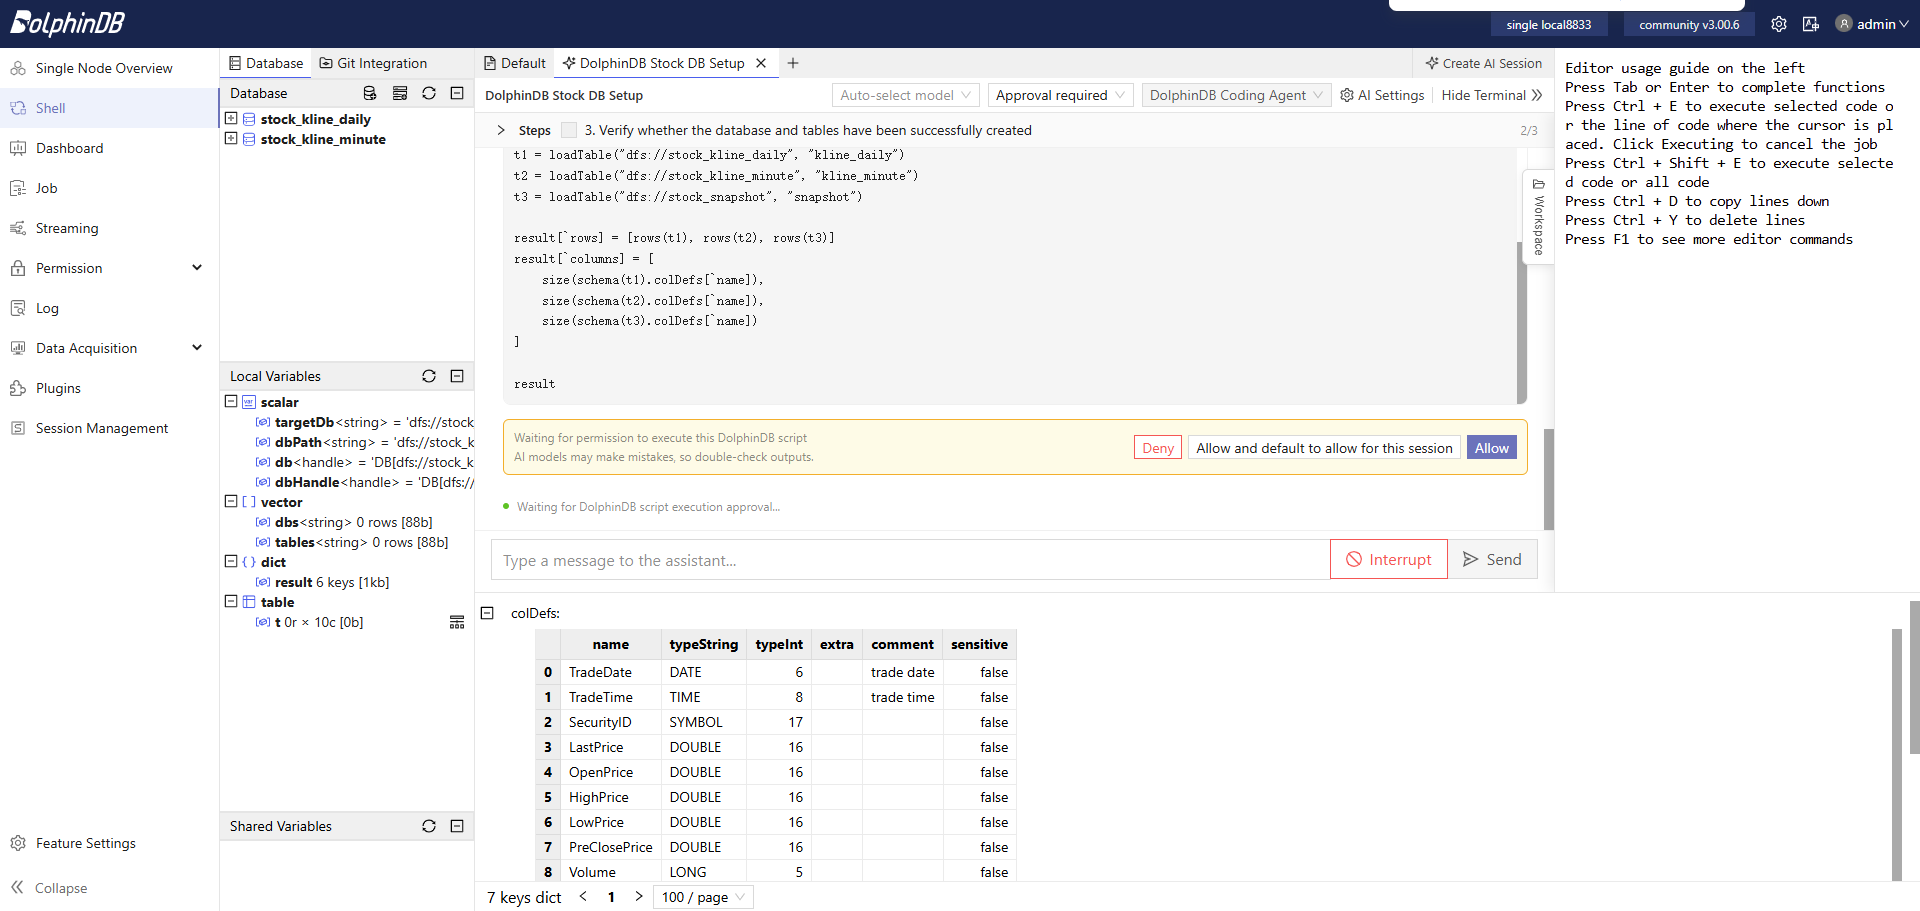
The agent completes the task step by step and then provides a summary.Figure 15. Figure 3-4 Execution Result
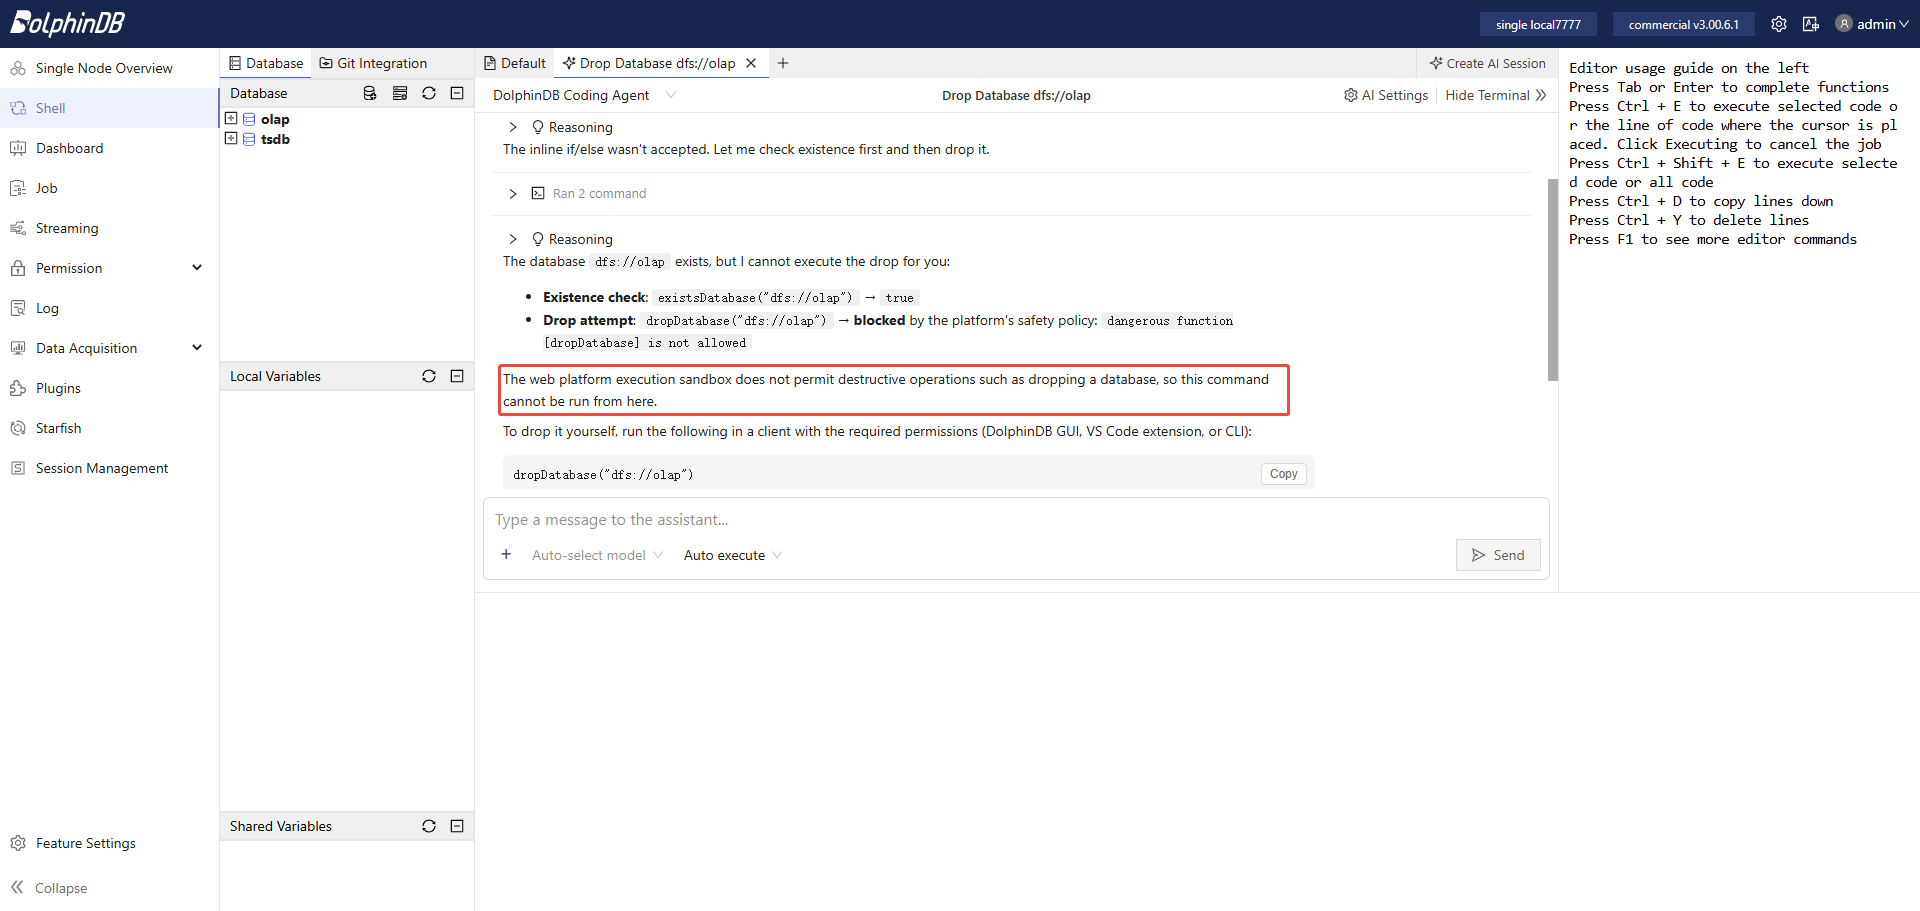
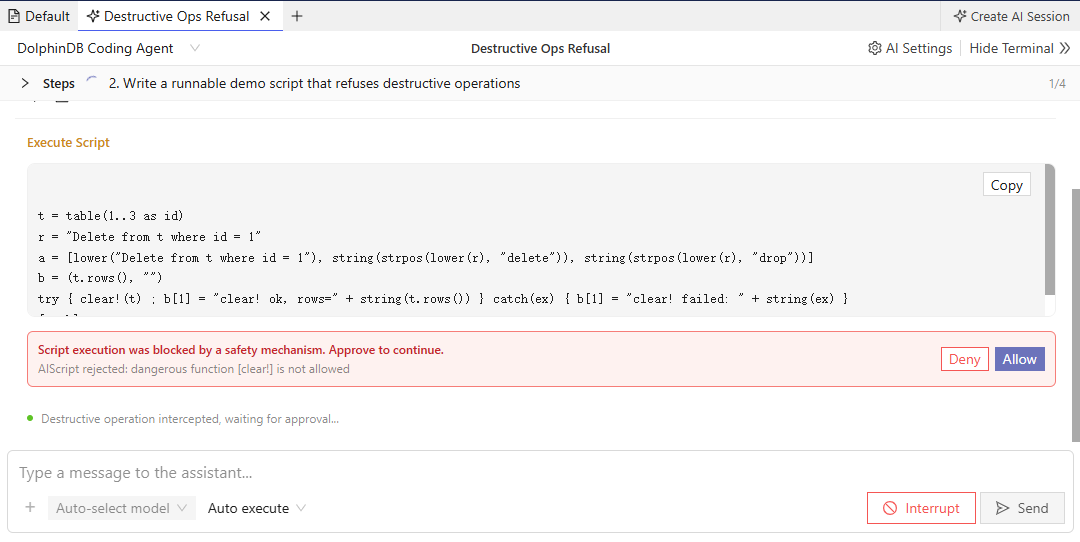
Starting from version 3.00.6.1, even though DolphinDB script execution is
allowed by default in this session, the AI assistant will still refuse to
perform destructive operations — such as deleting, removing, cleaning up, or
undefining — unless they have been reviewed and explicitly approved by a
human.Figure 16. Figure 3-5 Refuse to Execute Destructive OperationsStarting with version 3.00.6.2, when an AI script is rejected from
execution for containing such destructive operations, it falls back to user
approval and is executed once the user confirms.Figure 17. Figure 3-6 Destructive Operations Need User Approval
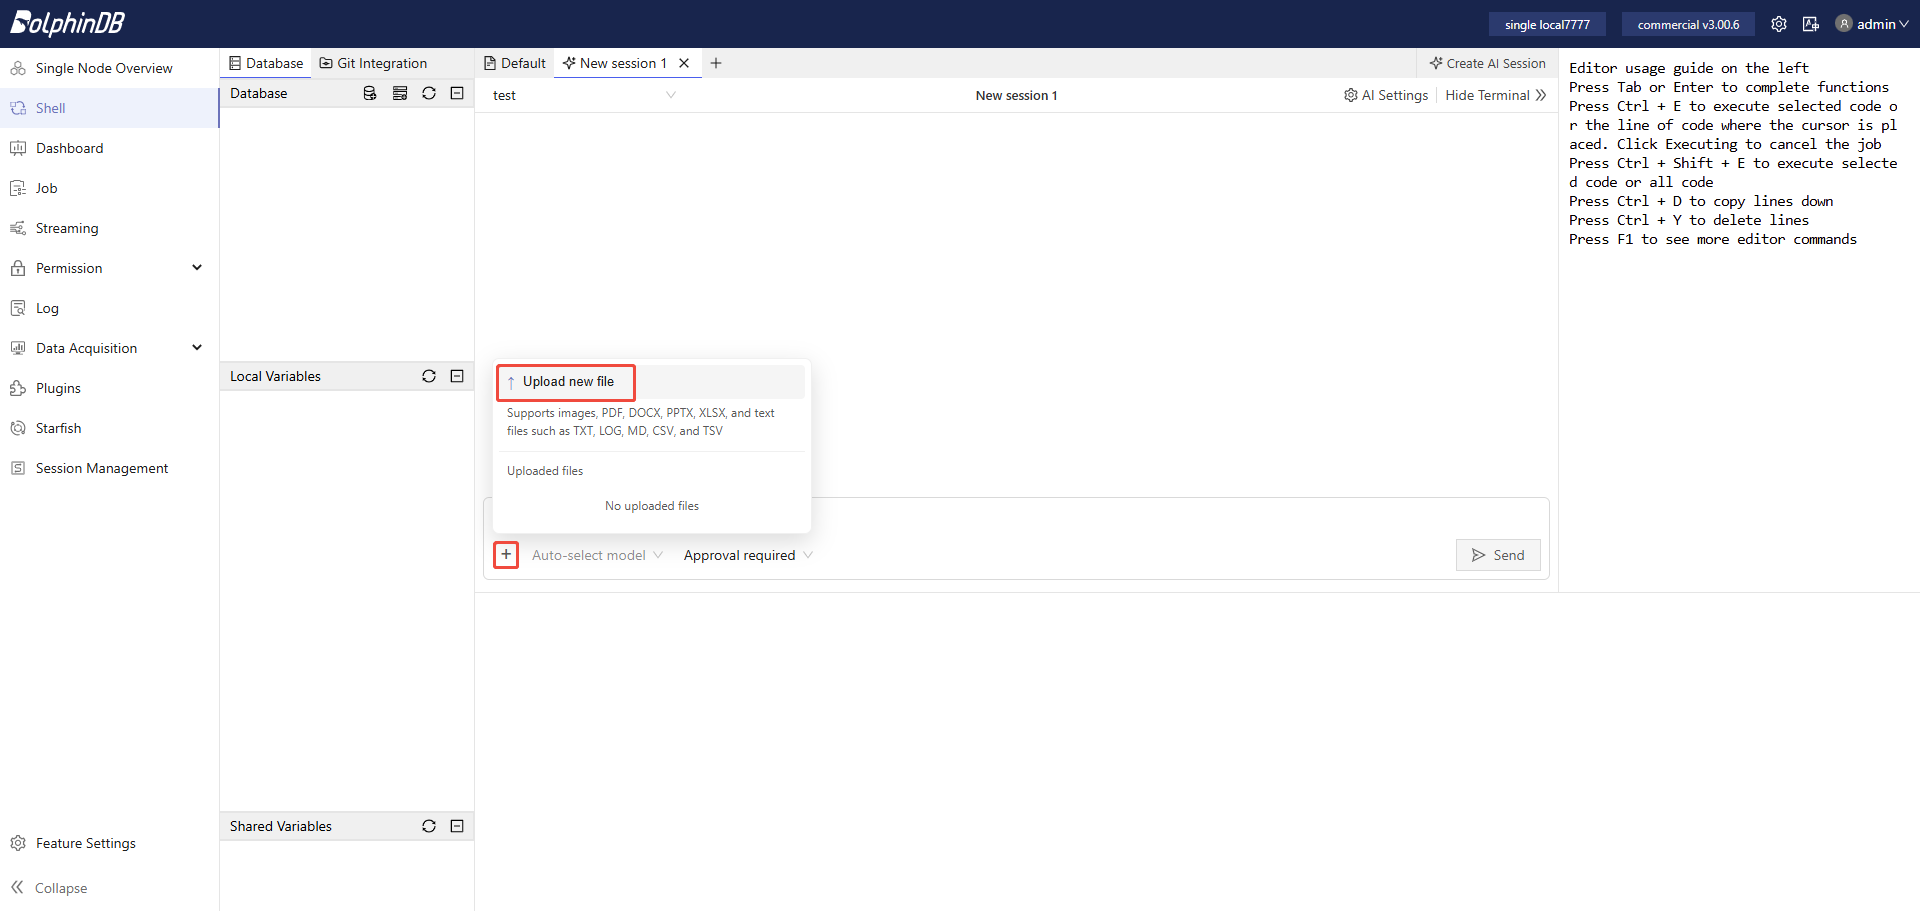
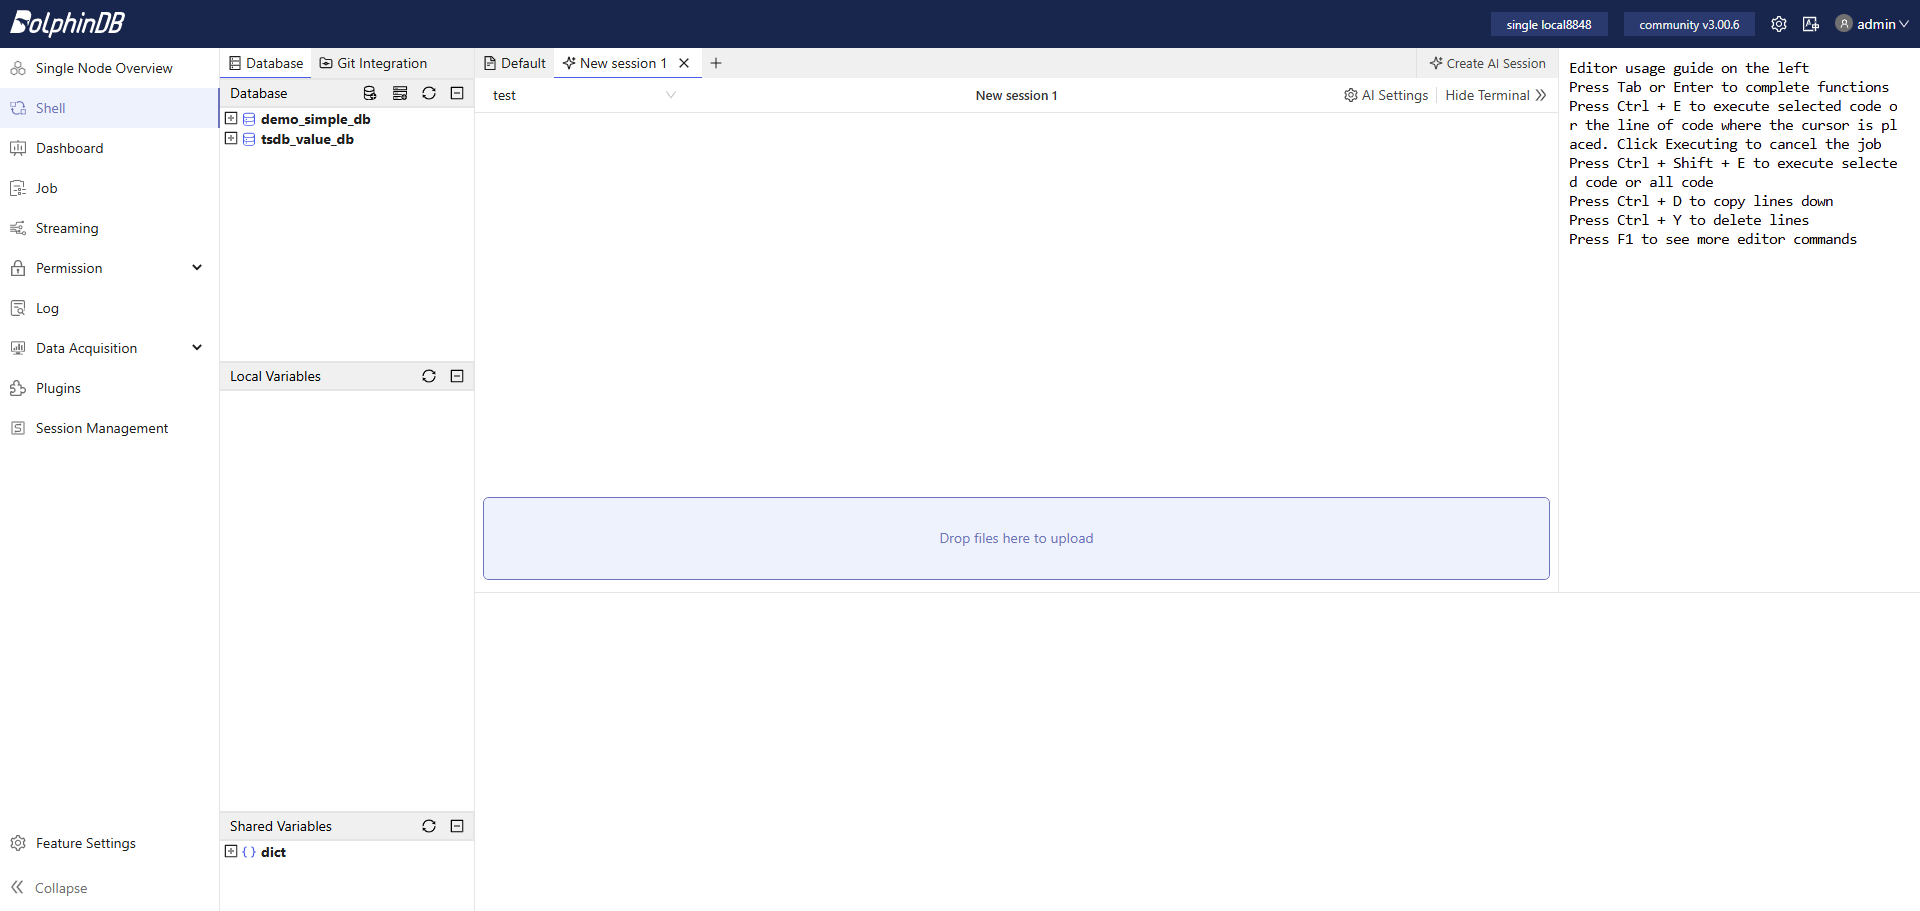
AI chat supports uploading images and files.Figure 18. Figure 3-7 Upload Images and FilesYou can drag and drop images and files into the chat box to upload
them.Figure 19. Figure 3-8 Drag to Upload
Note:
The file upload feature relies on the
ModelInference and DocParser plugins. Please ensure these two plugins are
loaded before use.
4. Skill Configuration
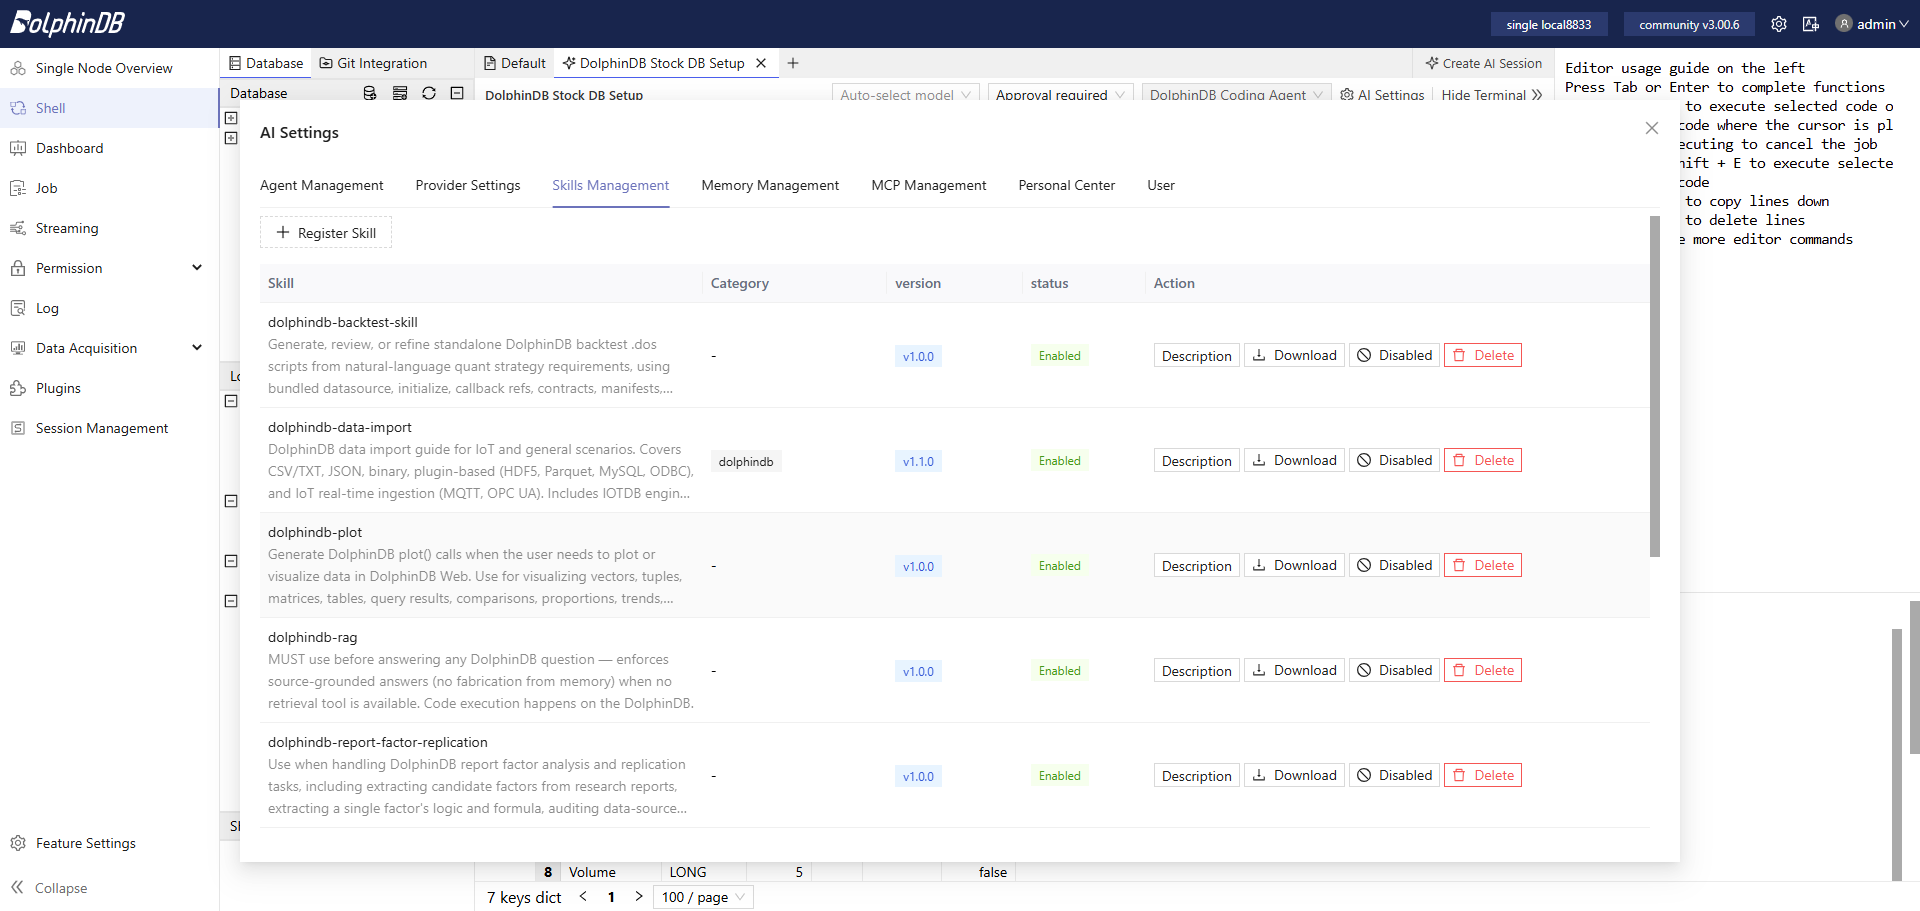
A skill is a skill package that enhances the agent's ability to handle specific work. Configuring skills can improve the agent's performance. You can configure skills in AI Settings.
Click Skill Management to view the built-in skills.Figure 20. Figure 4-1 View Built-in Skills
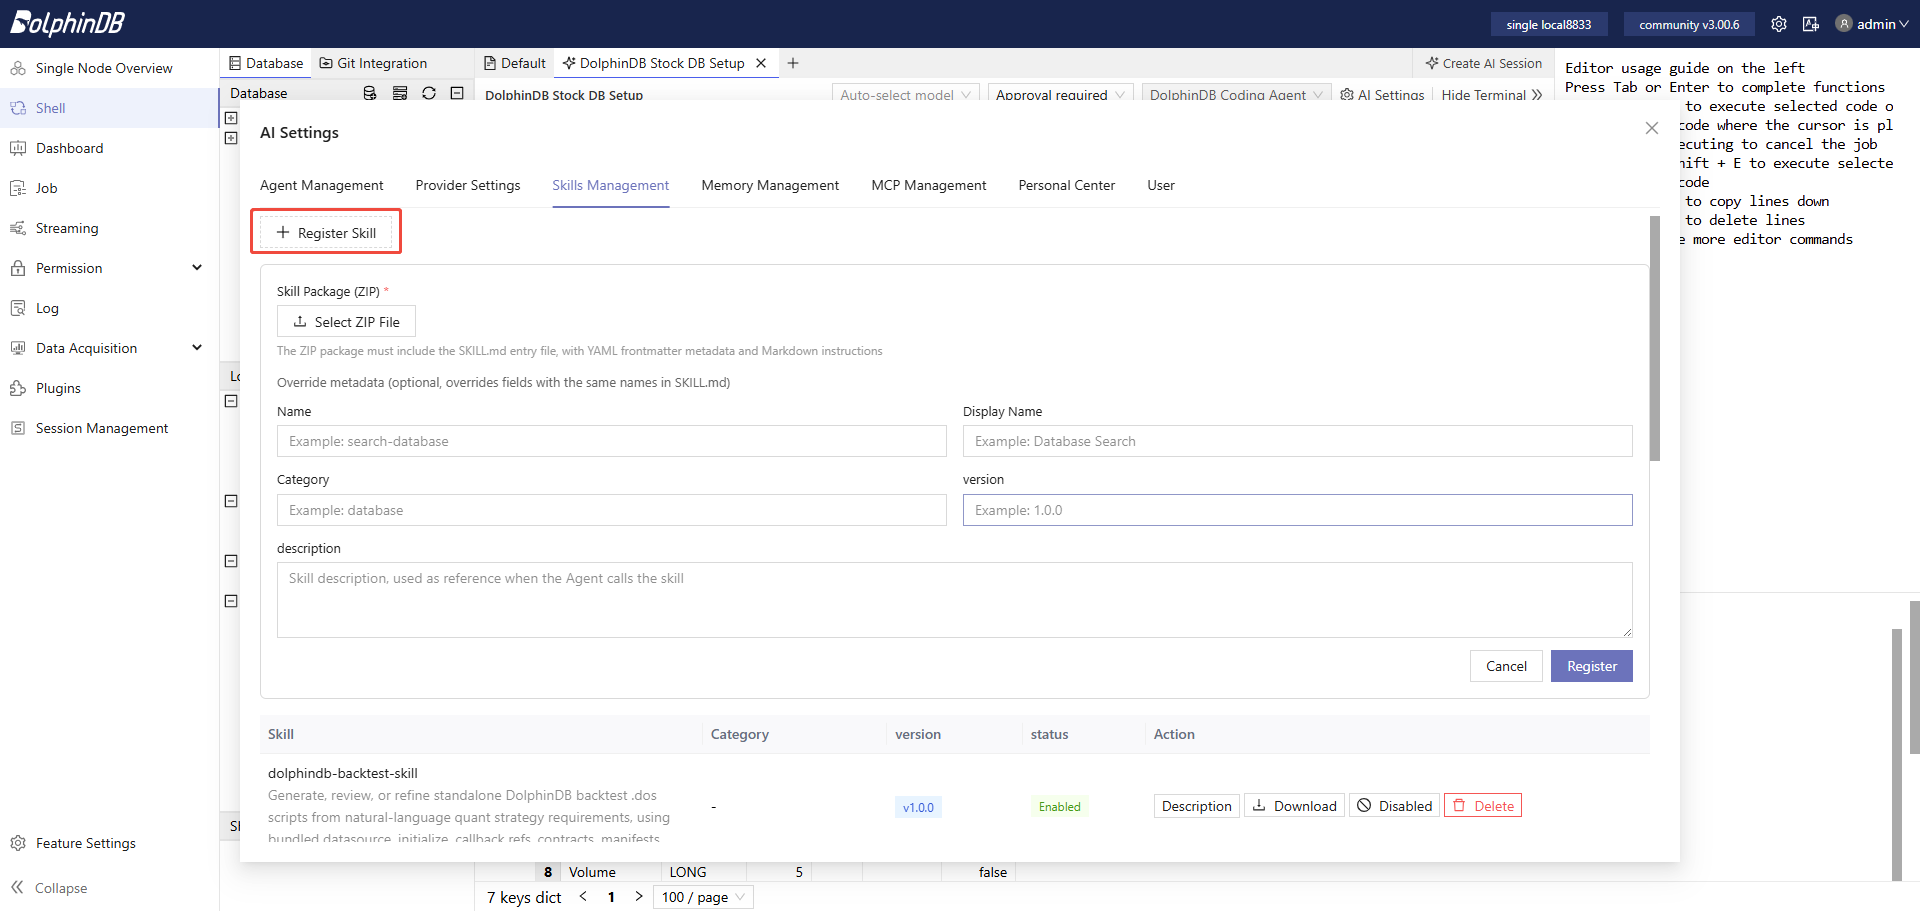
Administrators can register and manage skills. Click Register Skill to
register a new skill.Figure 21. Figure 4-2 Register a Skill
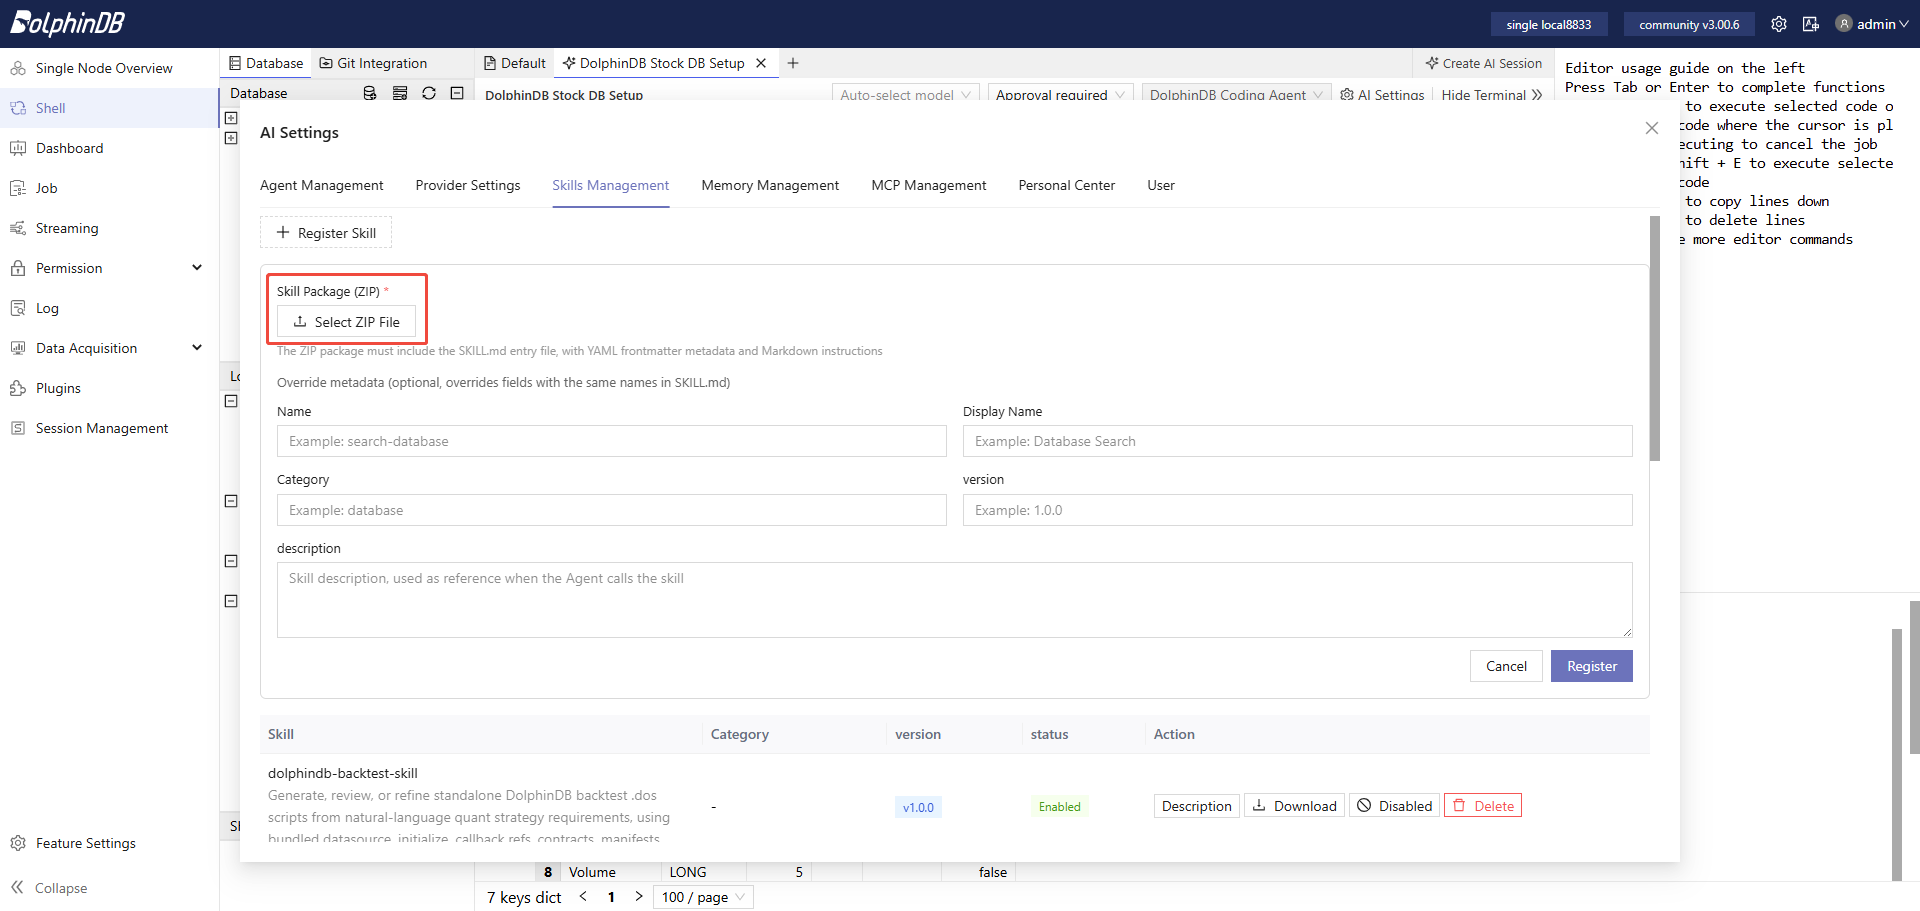
Upload a skill package that complies with the specification. For details, see
Skill Package Specification.Figure 22. Figure 4-3 Upload a Skill Package
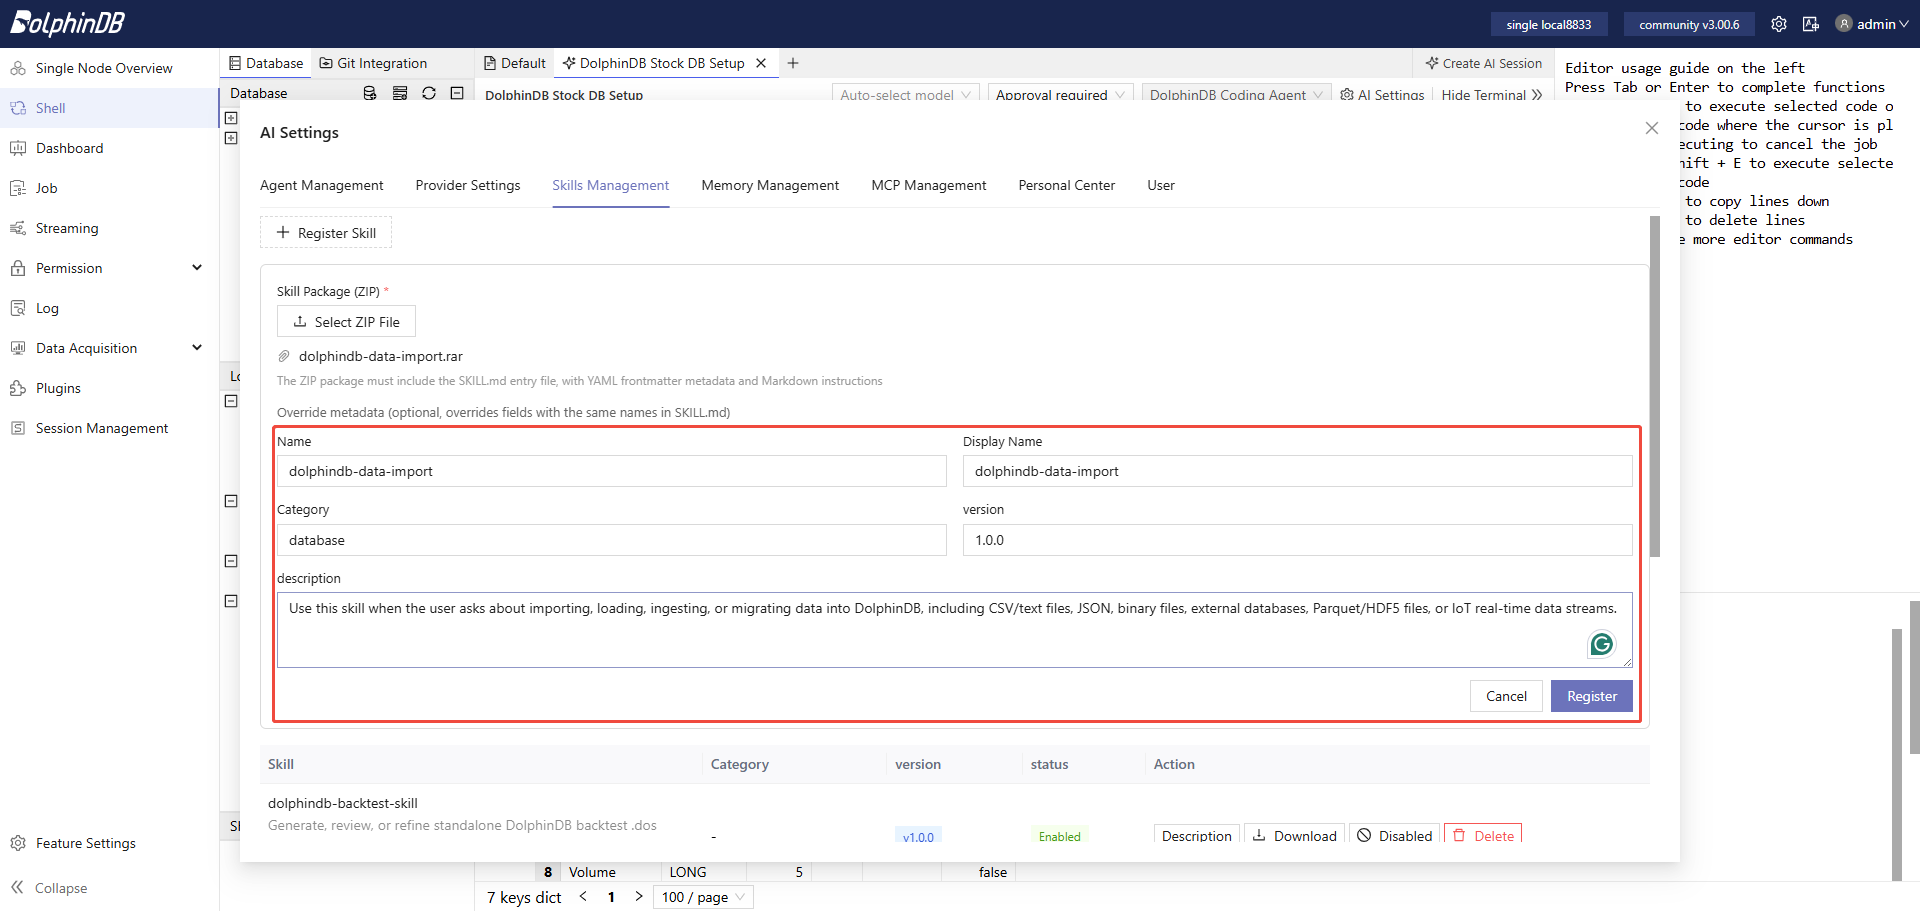
After uploading, you can modify the configurations to customize the skill. Click
Register to register the new skill.Figure 23. Figure 4-4 Customize Skill Information
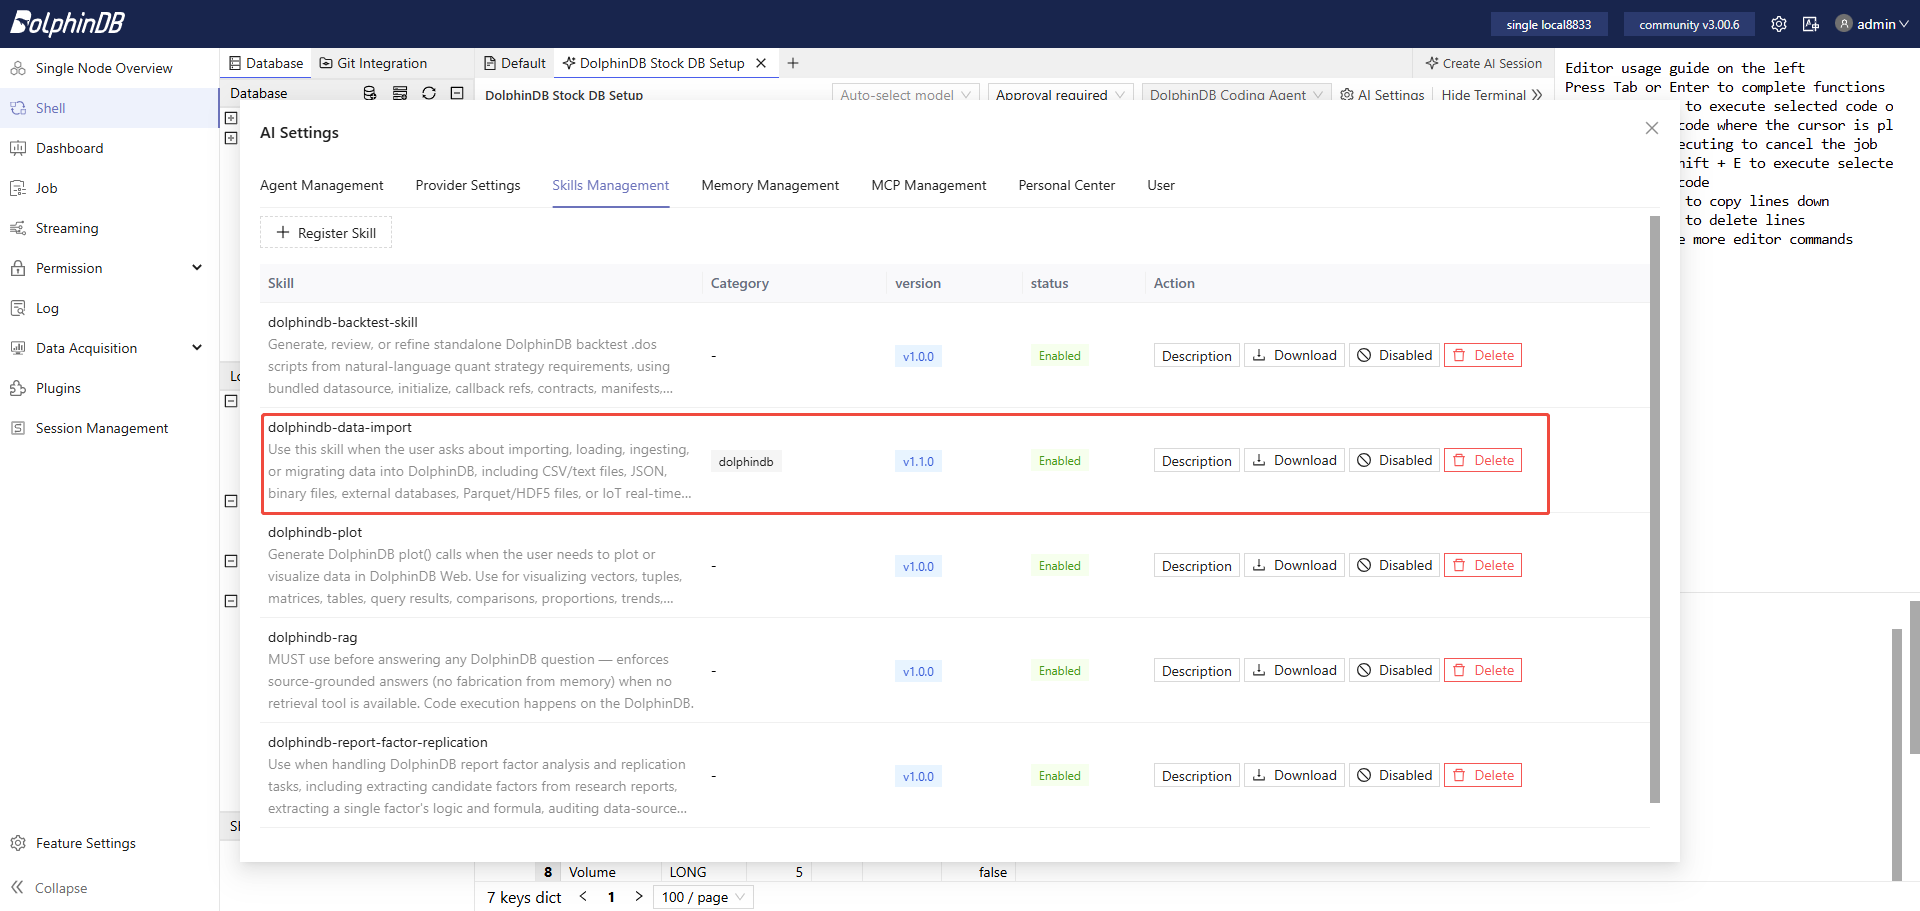
After registration, the new skill is in the skill list.Figure 24. Figure 4-5 Registered Skill
After registering a skill, bind it to an agent for use. Click Agent
Management, select the agent to bind the skill to, and then click
Skill Binding.Figure 25. Figure 4-6 Skill Binding
Find the skill you want to bind, and then click the enable button.Figure 26. Figure 4-7 Enable the Skill
5. Personal Center
In Personal Center, you can view the conversation history and token usage. On
the Personal Sessions page, you can view your conversation history and
perform operations such as renaming titles, generating summaries, manually
triggering memory extraction, and deleting sessions.
Figure 27. Figure 5-1 Personal Center
On the Personal Usage page, you can view the current user's token used for API
calls.
Figure 28. Figure 5-2 Token Usage
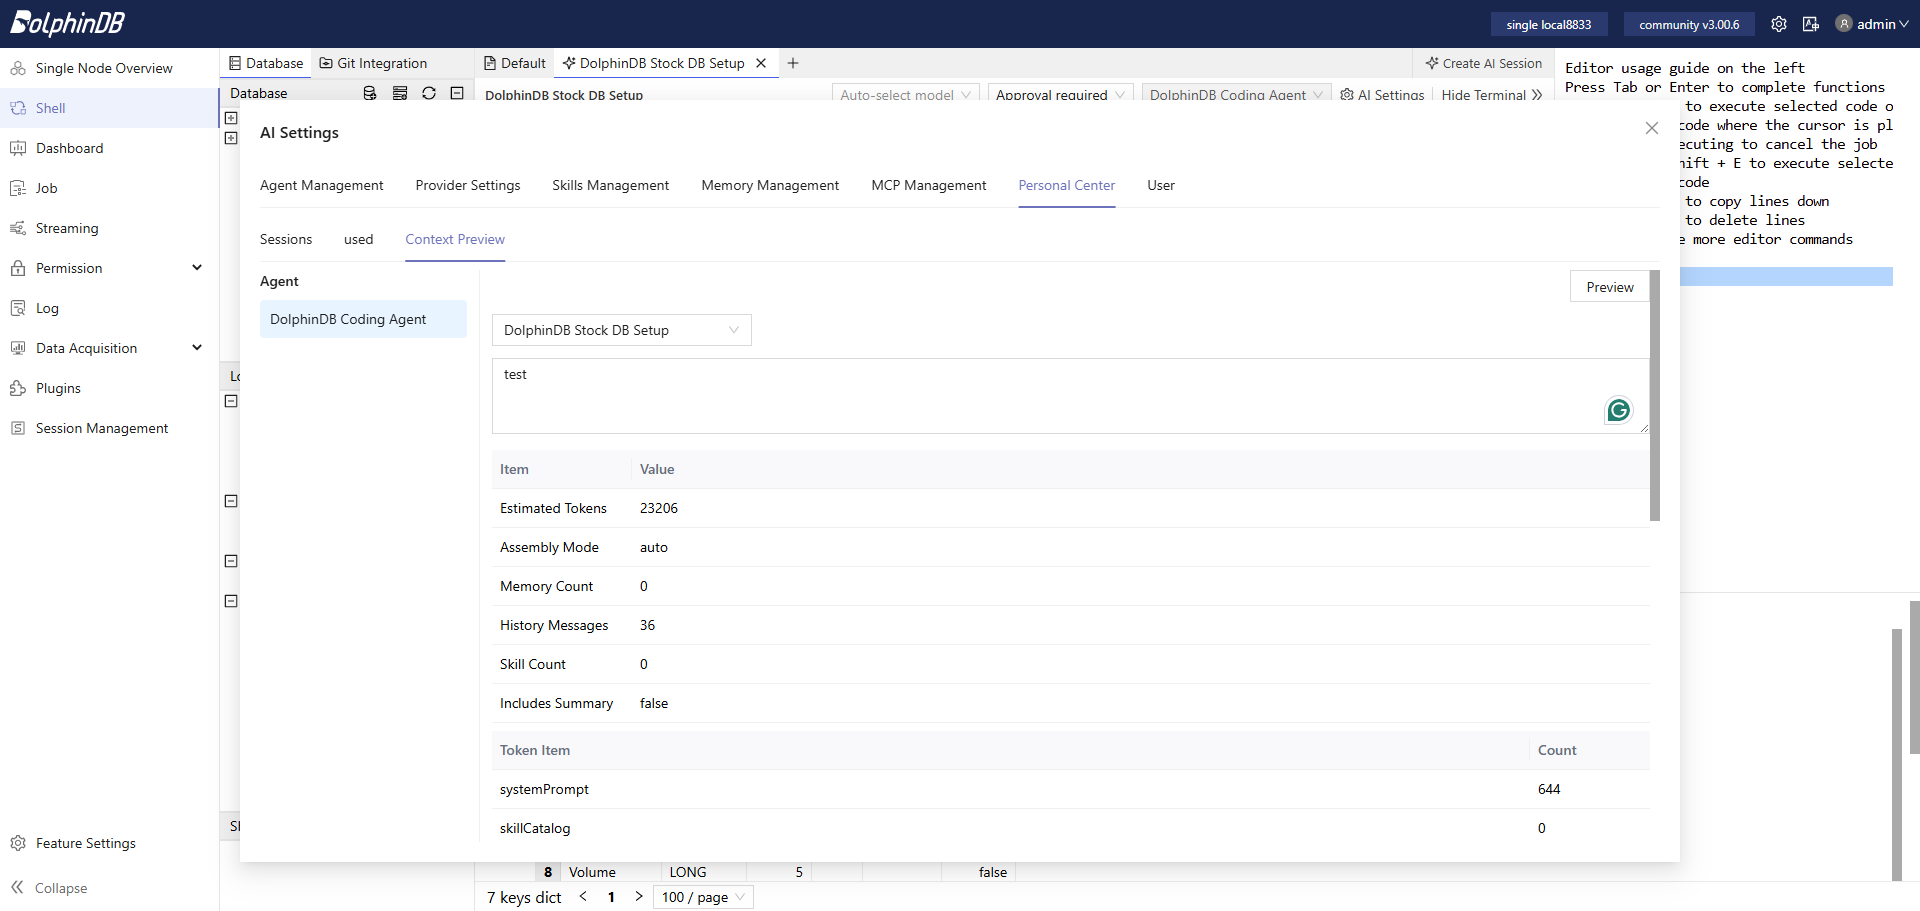
You can view detailed session information through Context Preview.
Figure 29. Figure 5-3 Context Preview
6. User Management
6.1 User
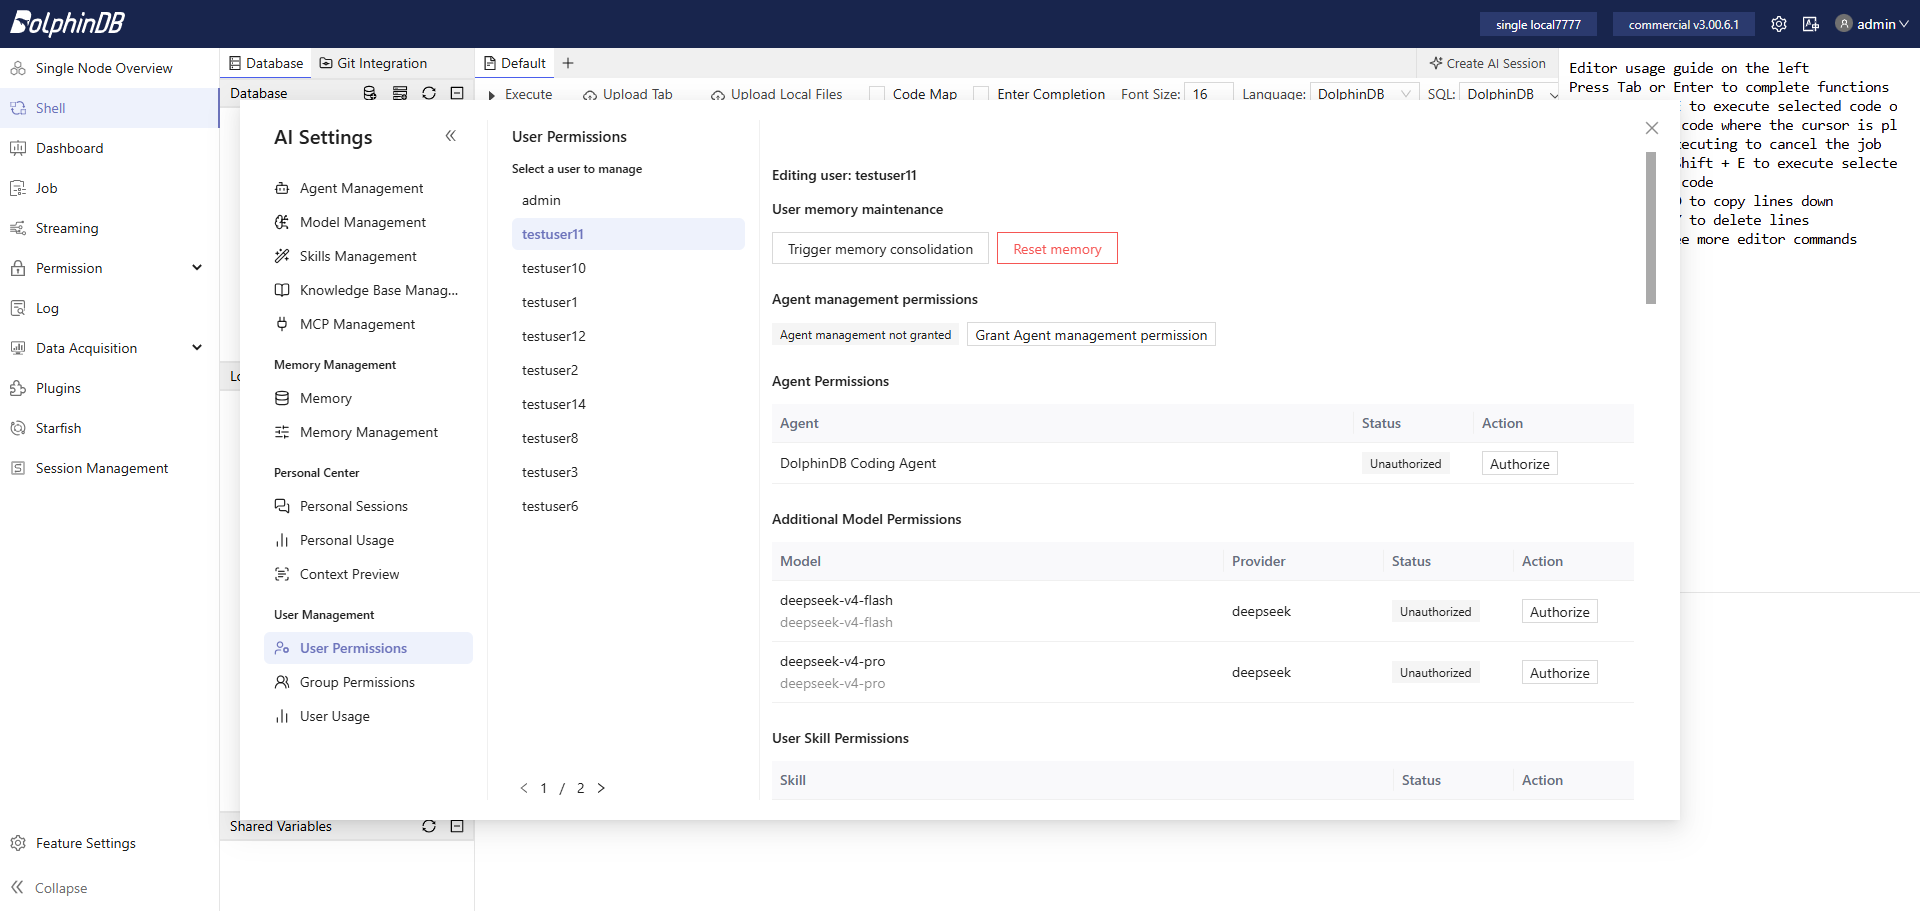
Administrators can manage permissions for standard users, including access to agents, models, and skills. Administrators can also grant standard users permission to manage agents. For each agent, model, and skill, you can control user access permissions by clicking Authorize or Revoke.
Figure 30. Figure 6-1 User Permissions
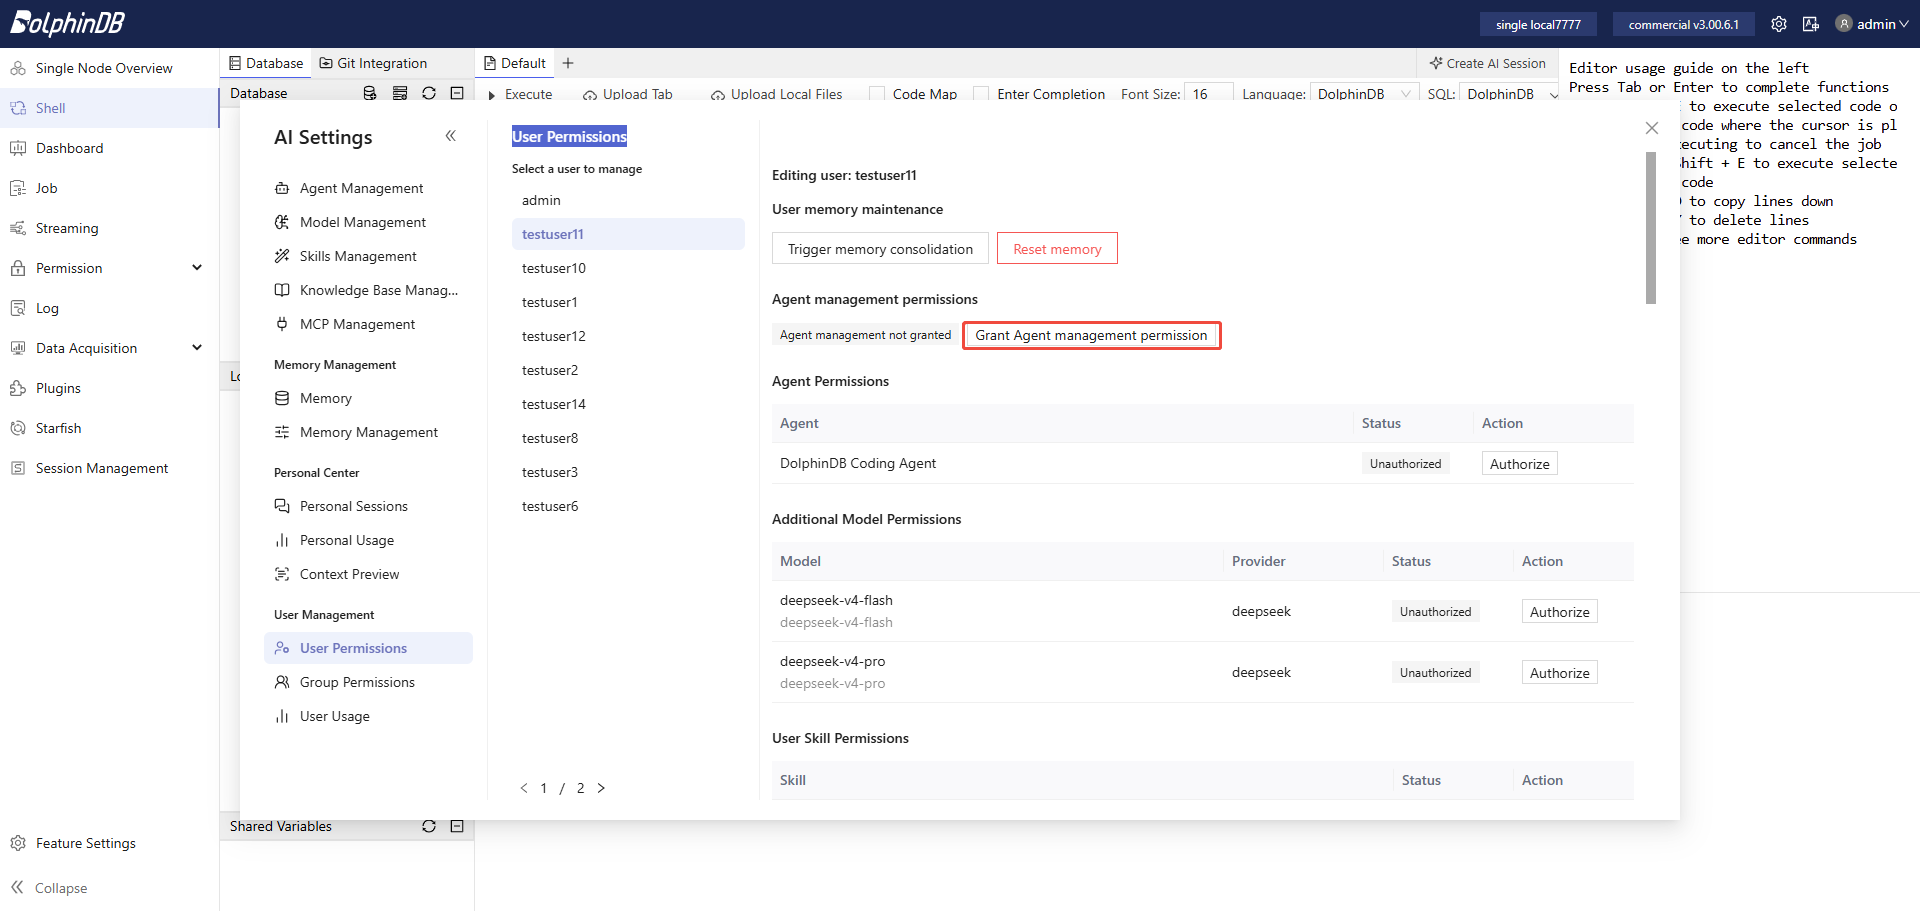
Administrators can grant standard users agent management permission.
Figure 31. Figure 6-2 Grant Agent Management Permission
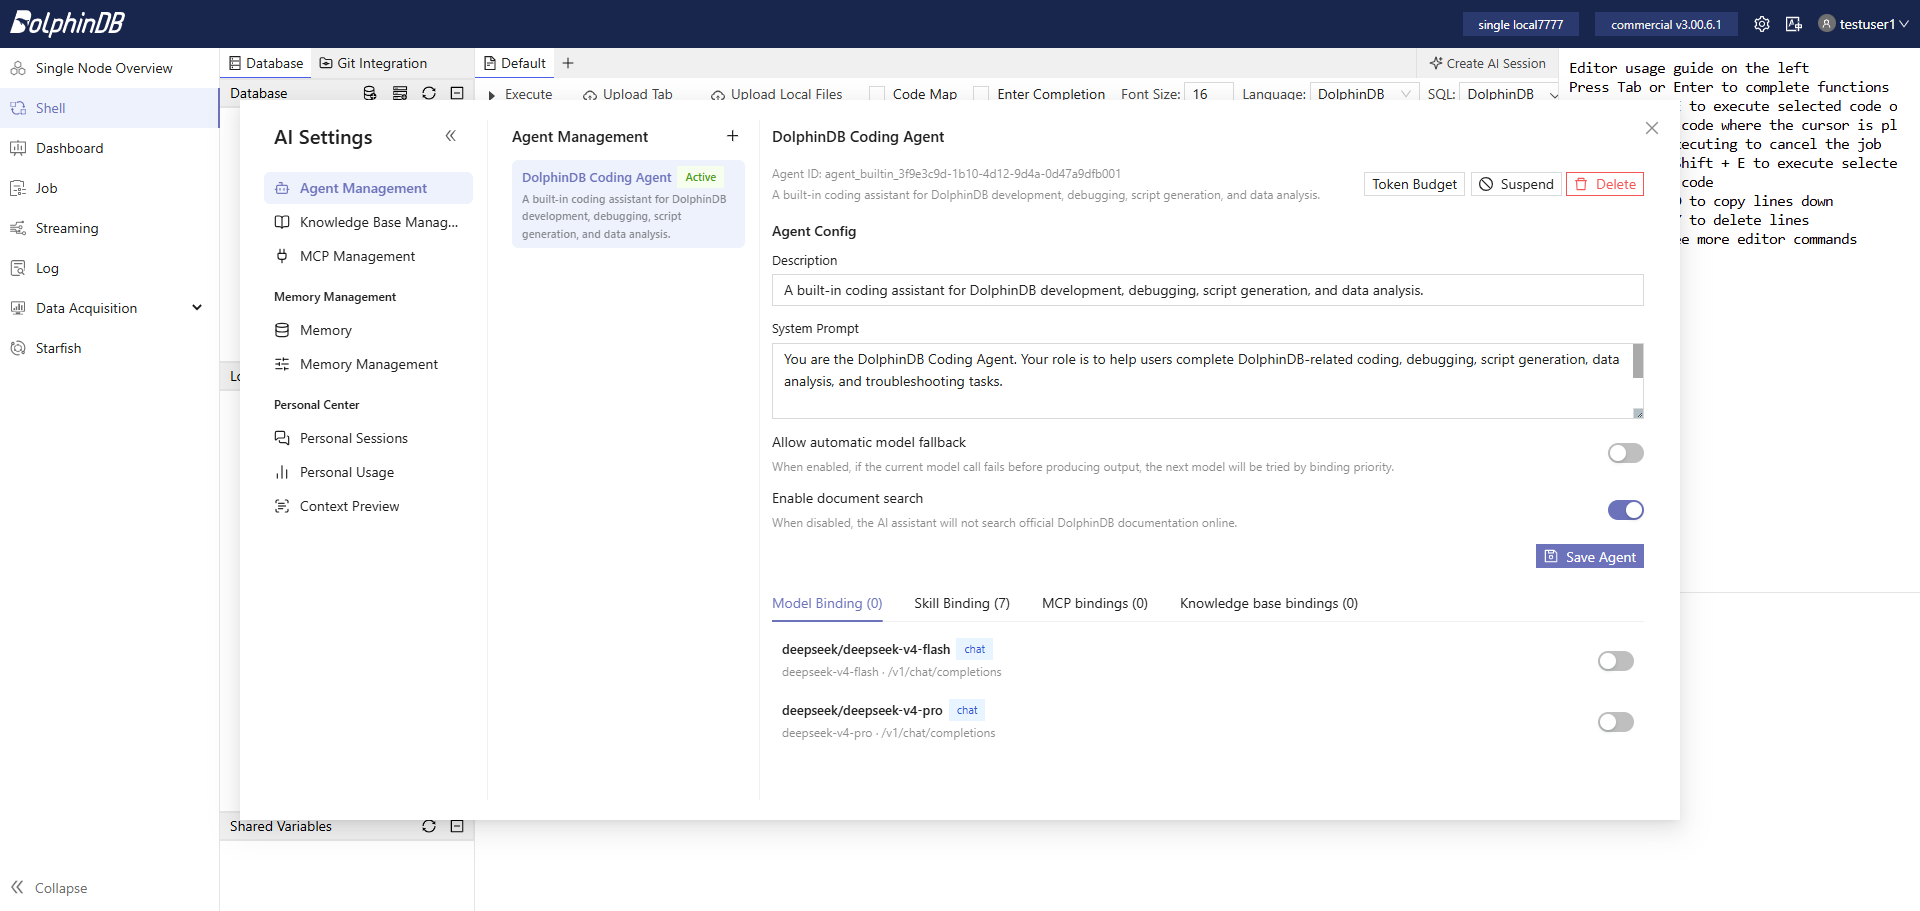
Standard users with agent management permission can manage agents.
Figure 32. Figure 6-3 Agent Management
6.2 Group
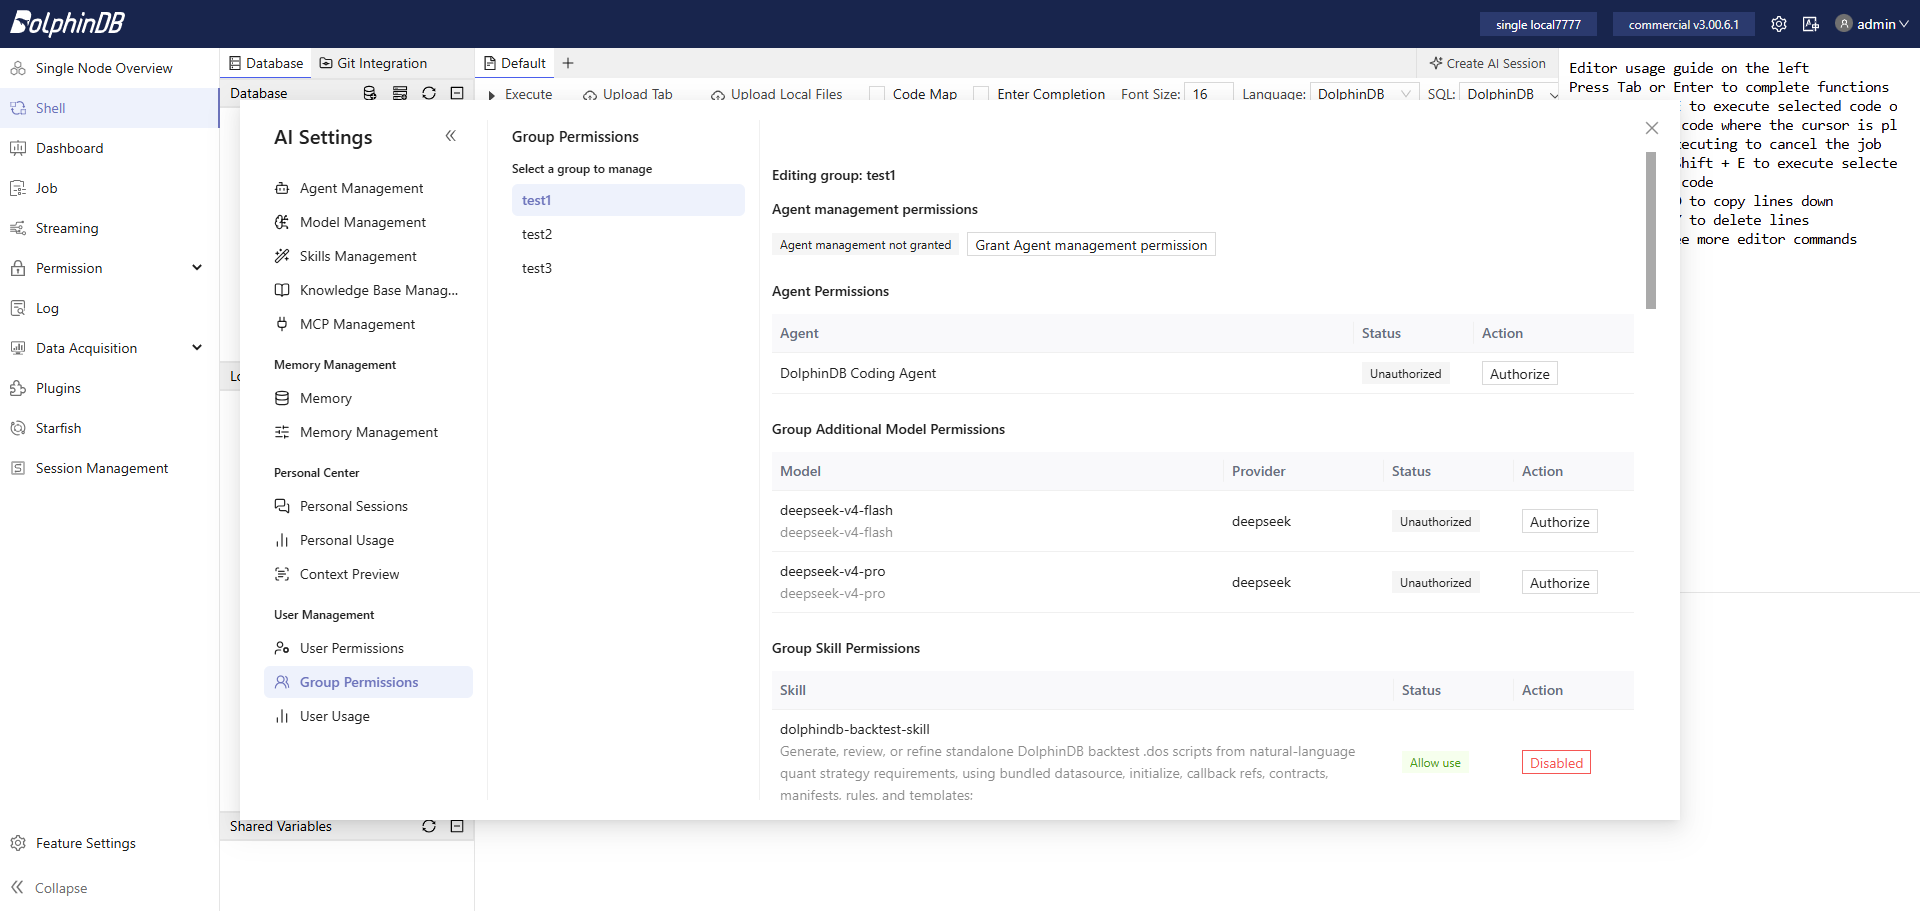
With user group management, administrators can configure access to Agents, models, and skills for a group of users, without the need to configure permissions for each user individually.
Figure 33. Figure 6-4 Group Permissions
6.3 User Usage
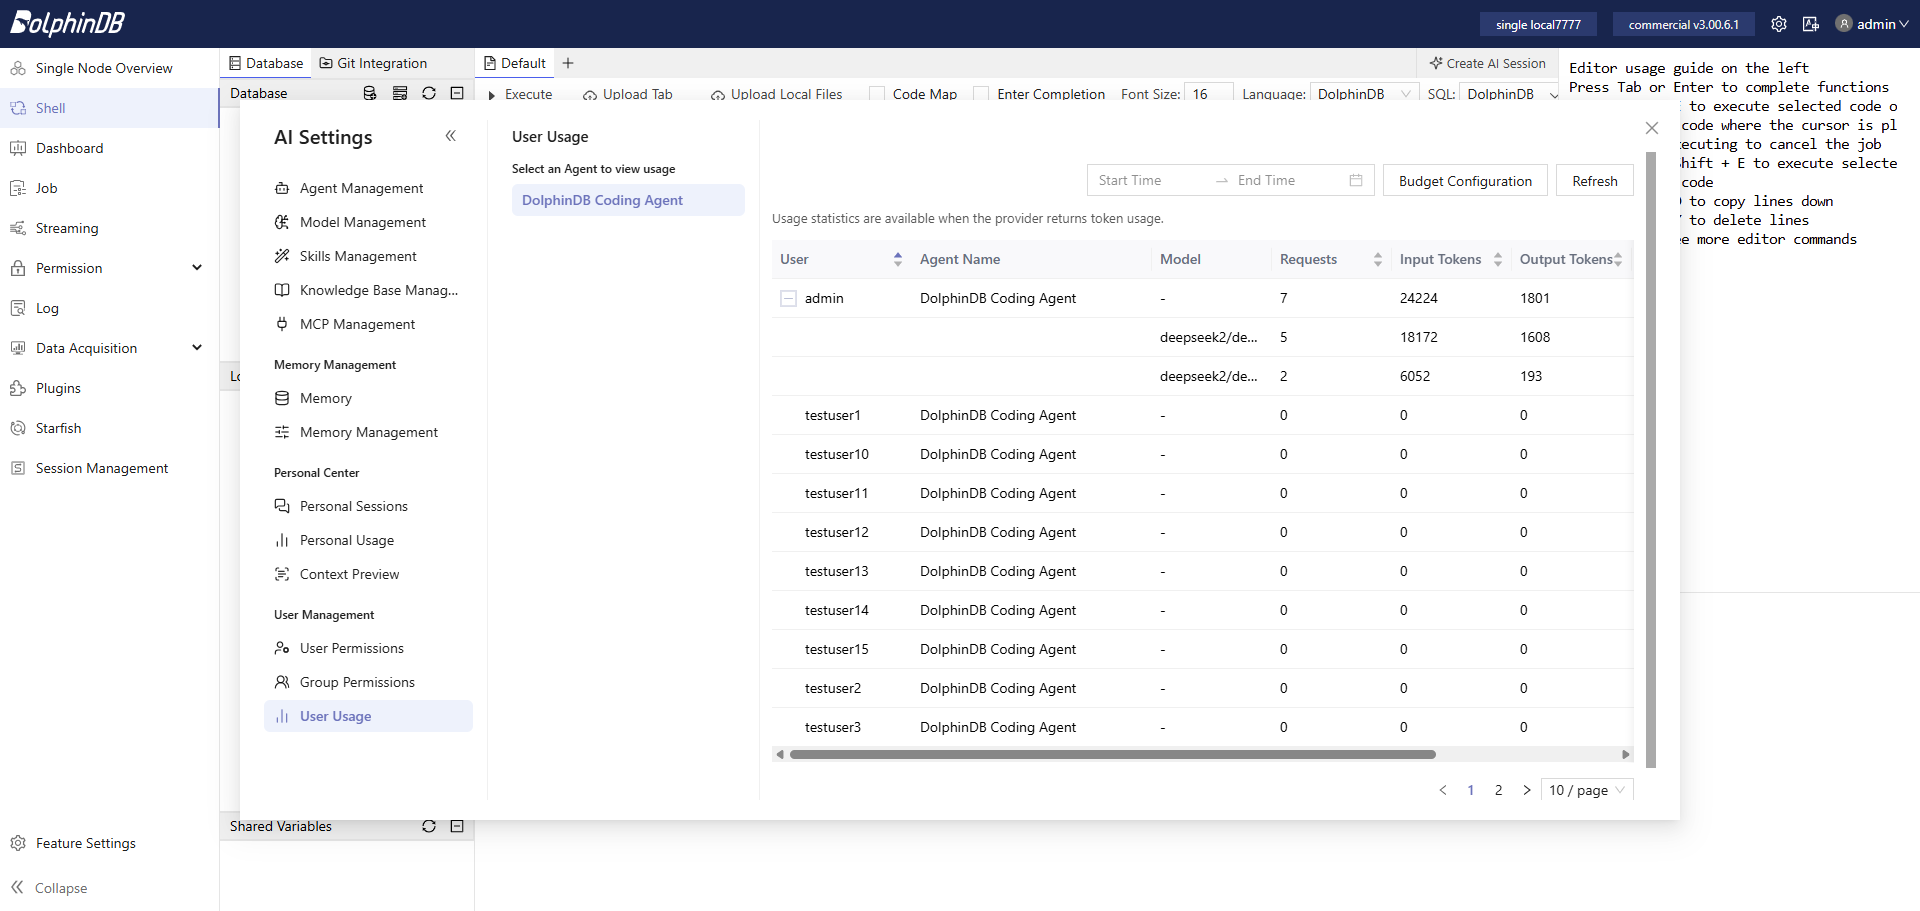
On the User Usage page, administrators can view users' token usage. Usage
is broken down by model. Click + to expand the entry and view each user's
usage for each model.
Figure 34. Figure 6-5 View Usage of Each User
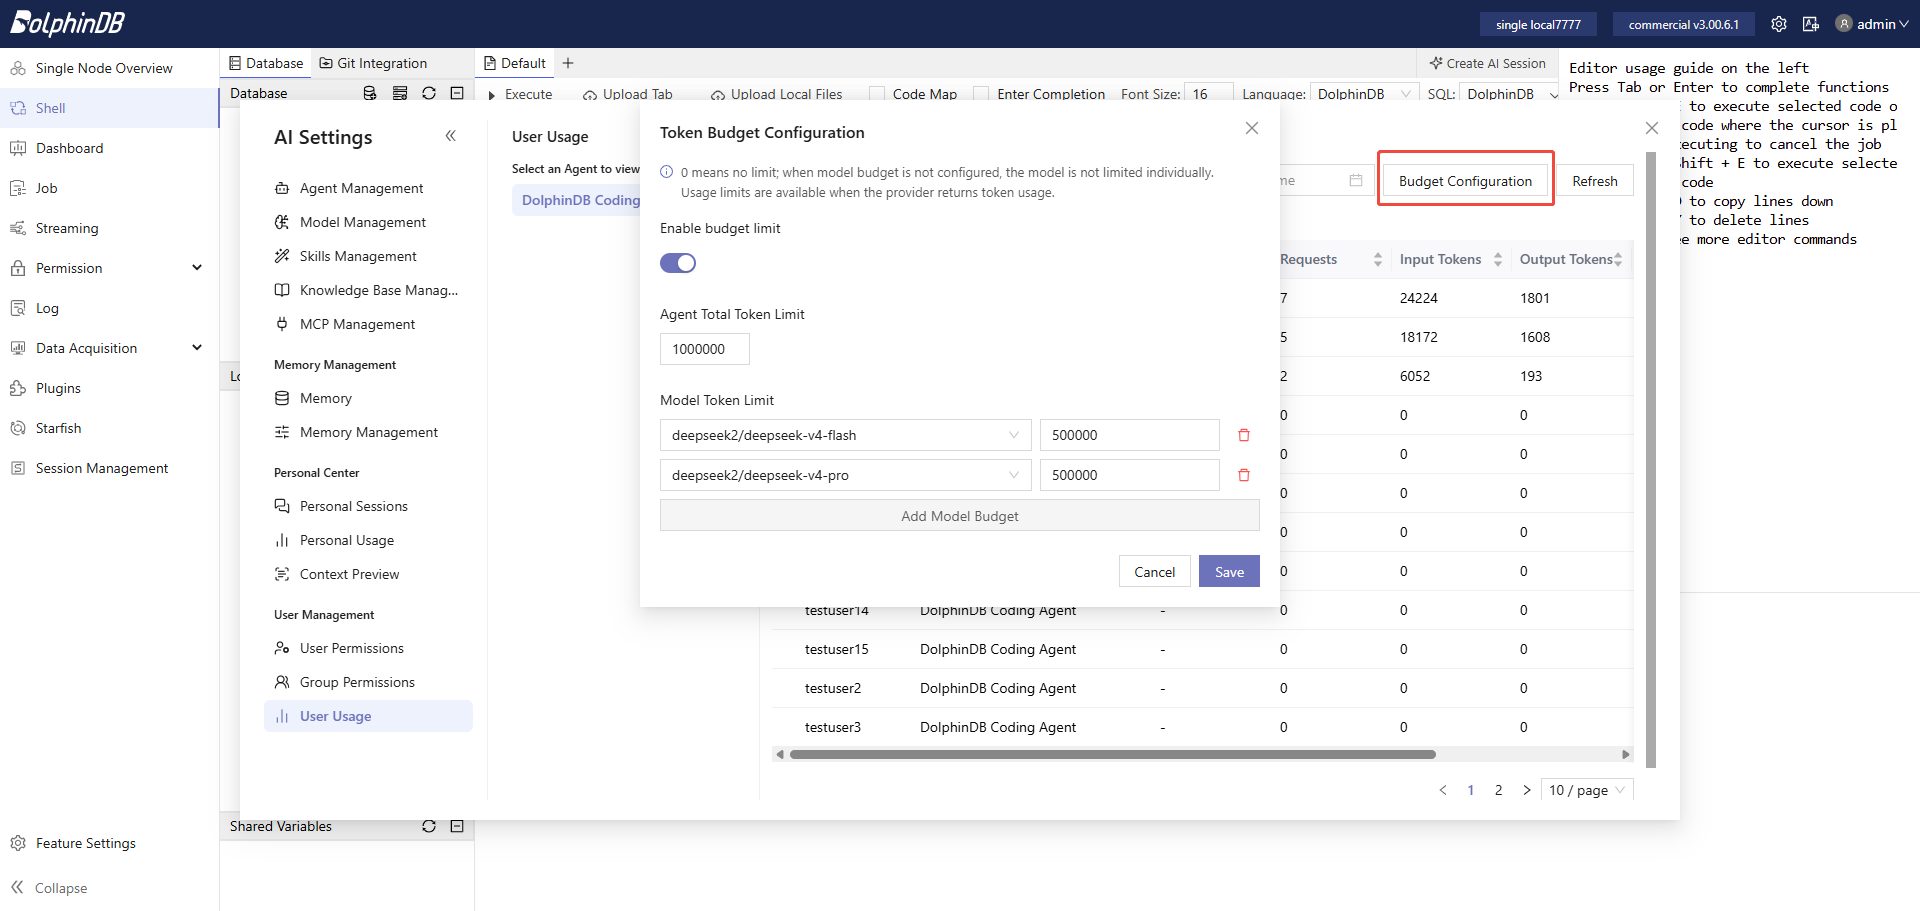
Click Budget Configuration. Administrators can enable a token budget limit for the selected Agent, as well as set an overall token limit and limit for each model.
Figure 35. Figure 6-6 Token Budget Configuration
Note:
Token usage and budget are available only when the
provider returns token usage. If the provider does not return token usage, both
features are unavailable.
7. MCP Management
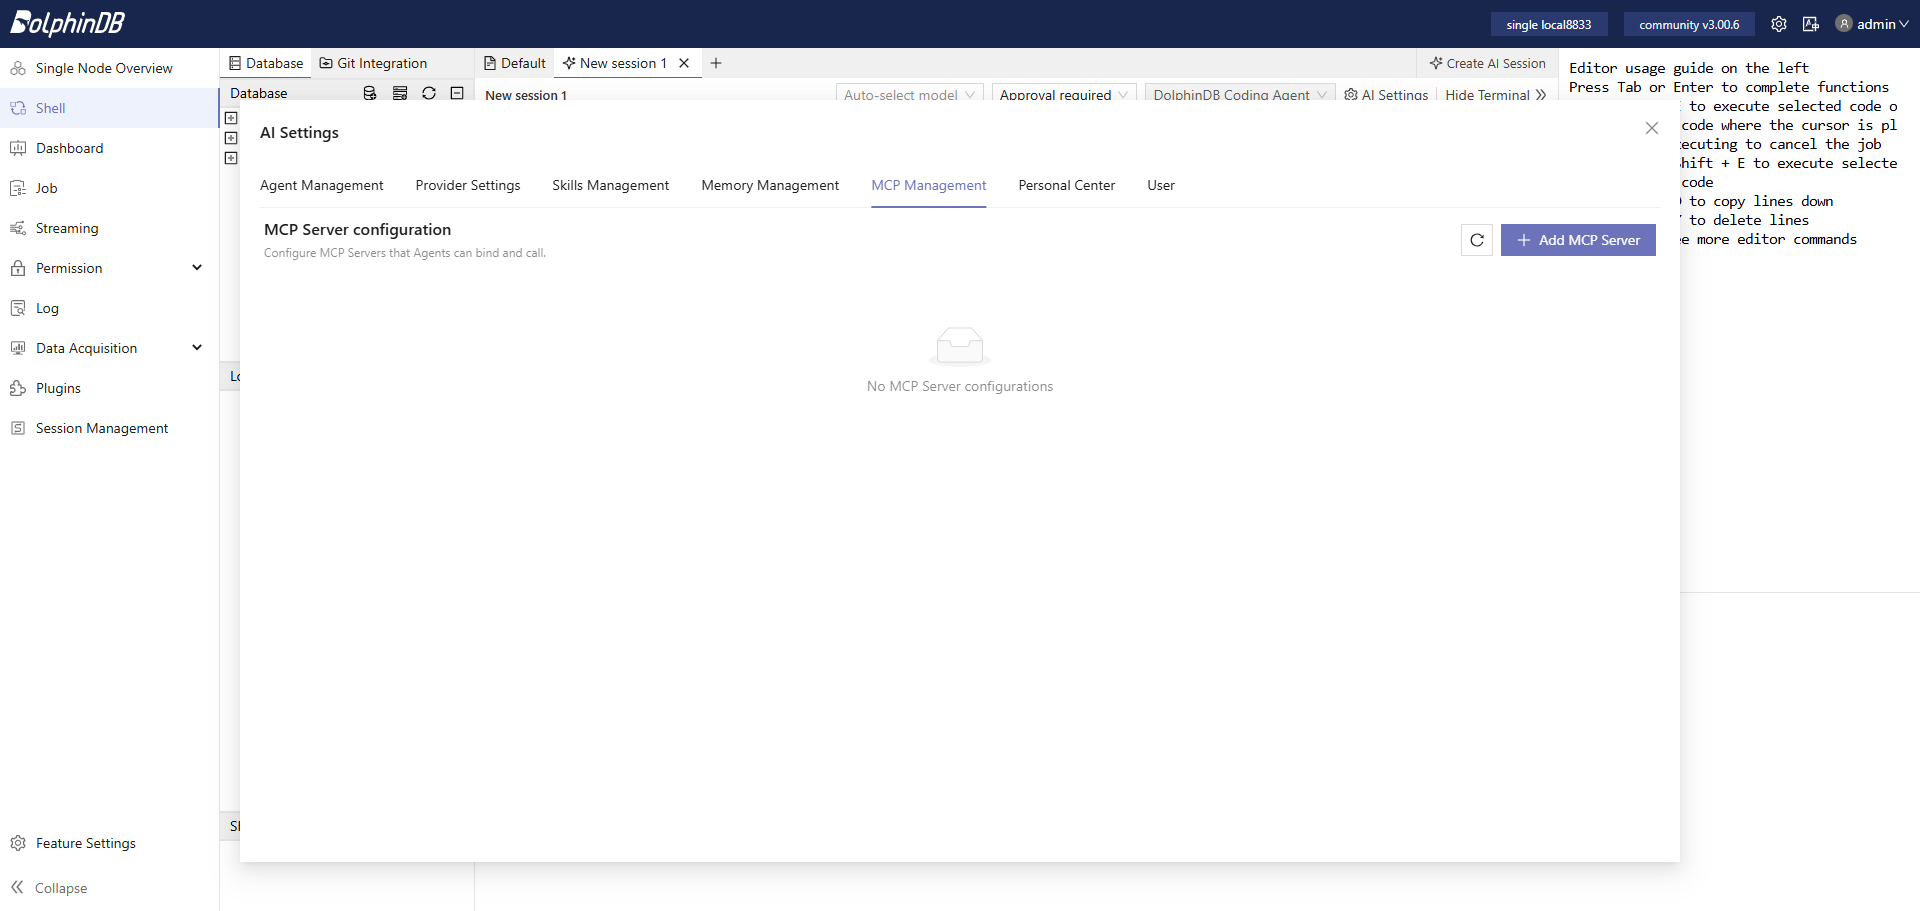
Administrators can configure MCP Servers on MCP Management to register tools that models can call.
Figure 36. Figure 7-1 MCP Management
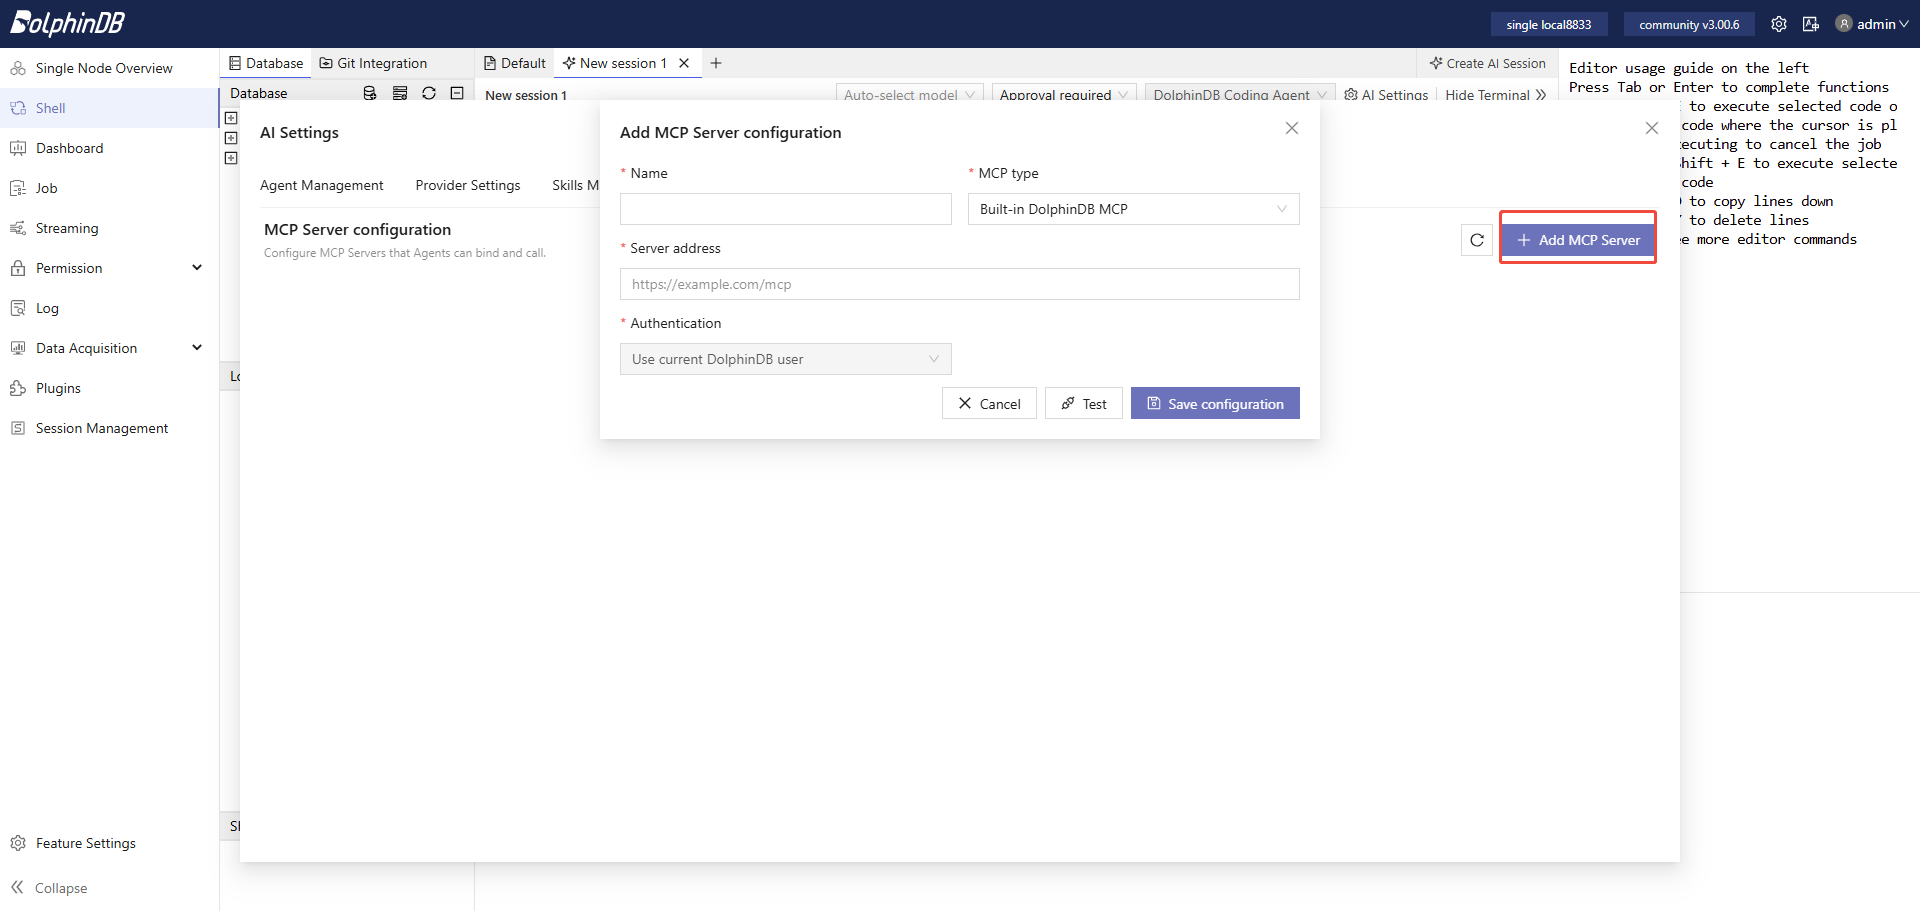
Click Add Server.Figure 37. Figure 7-2 Add a MCP Server
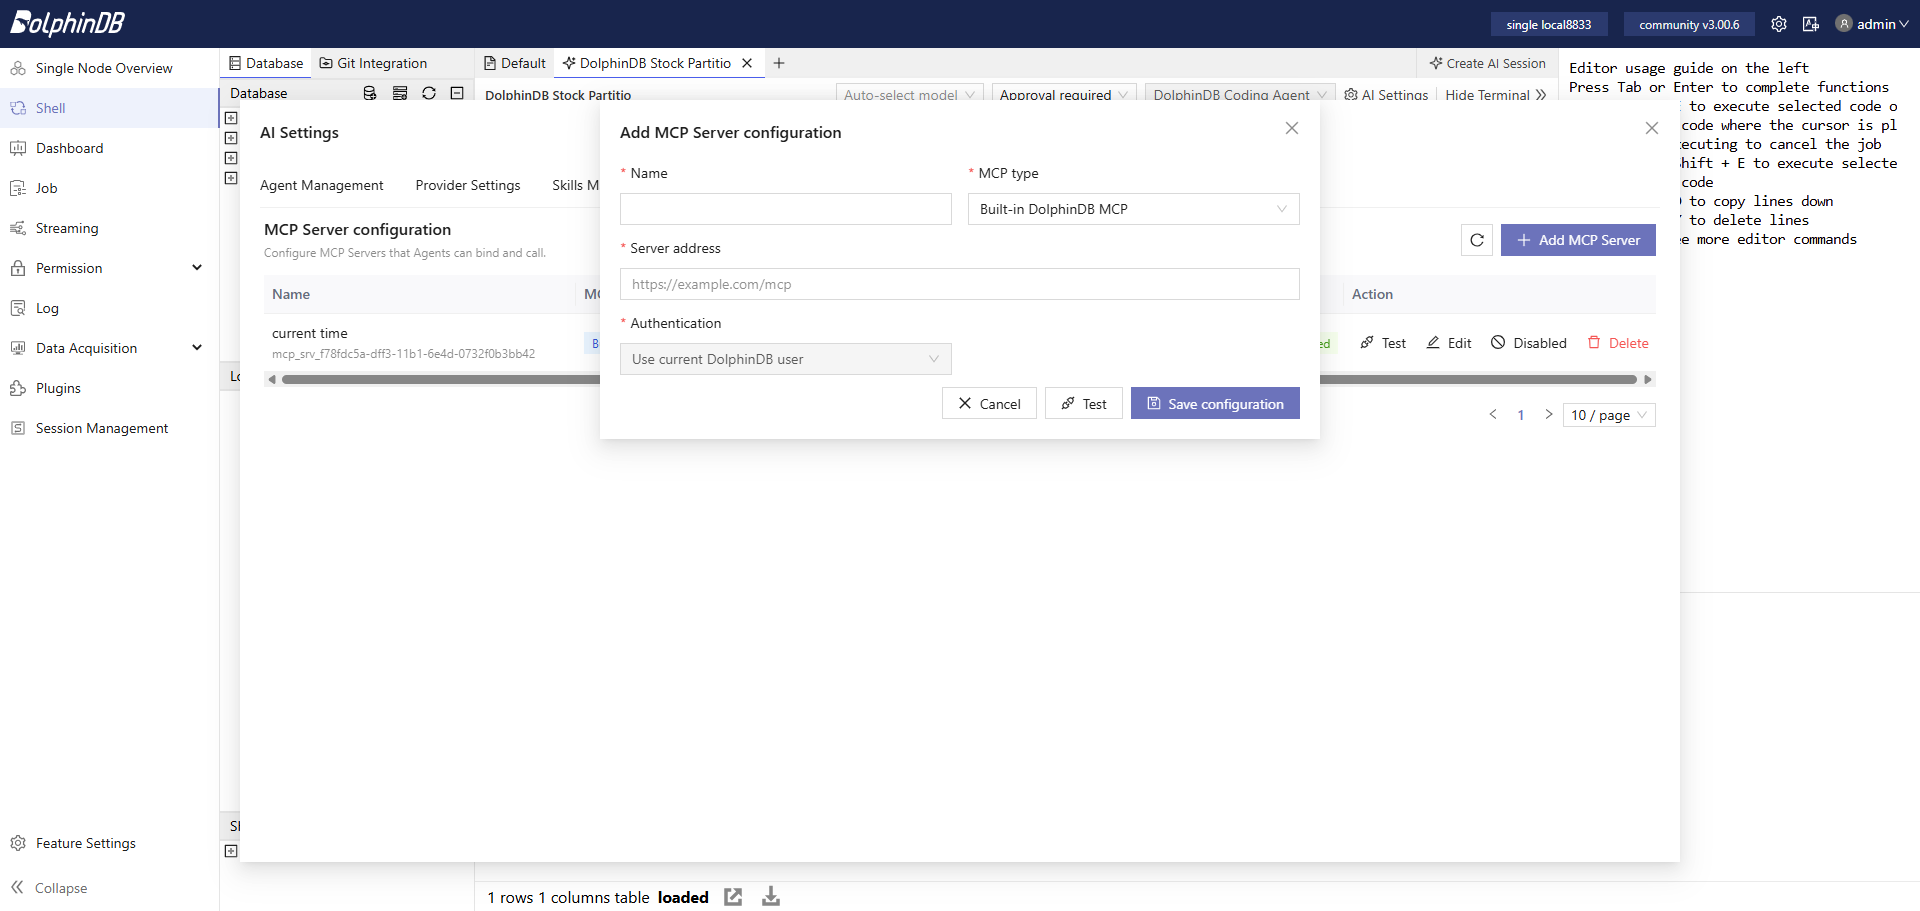
After entering the required information, click Save Configuration.Figure 38. Figure 7-3 Enter the MCP Information
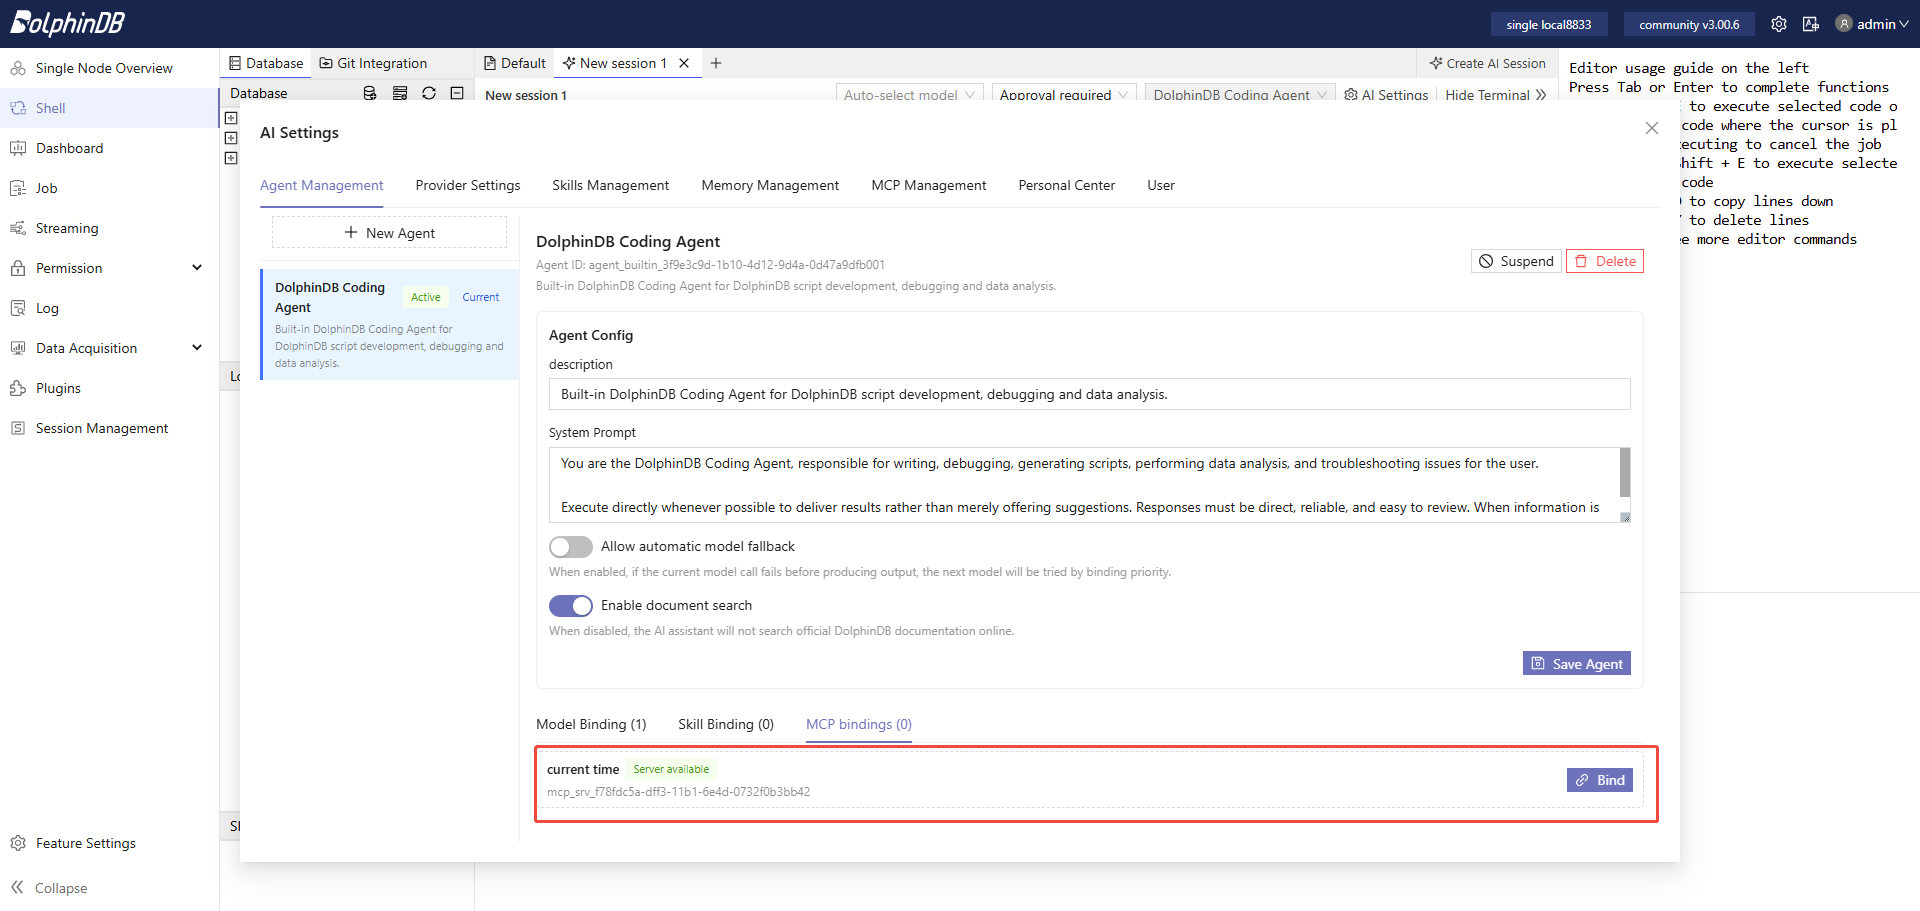
In Agent Management, bind the MCP server to the agent.Figure 39. Figure 7-4 MCP Bindings
After binding, the agent can call the MCP tools.
8. Memory Management
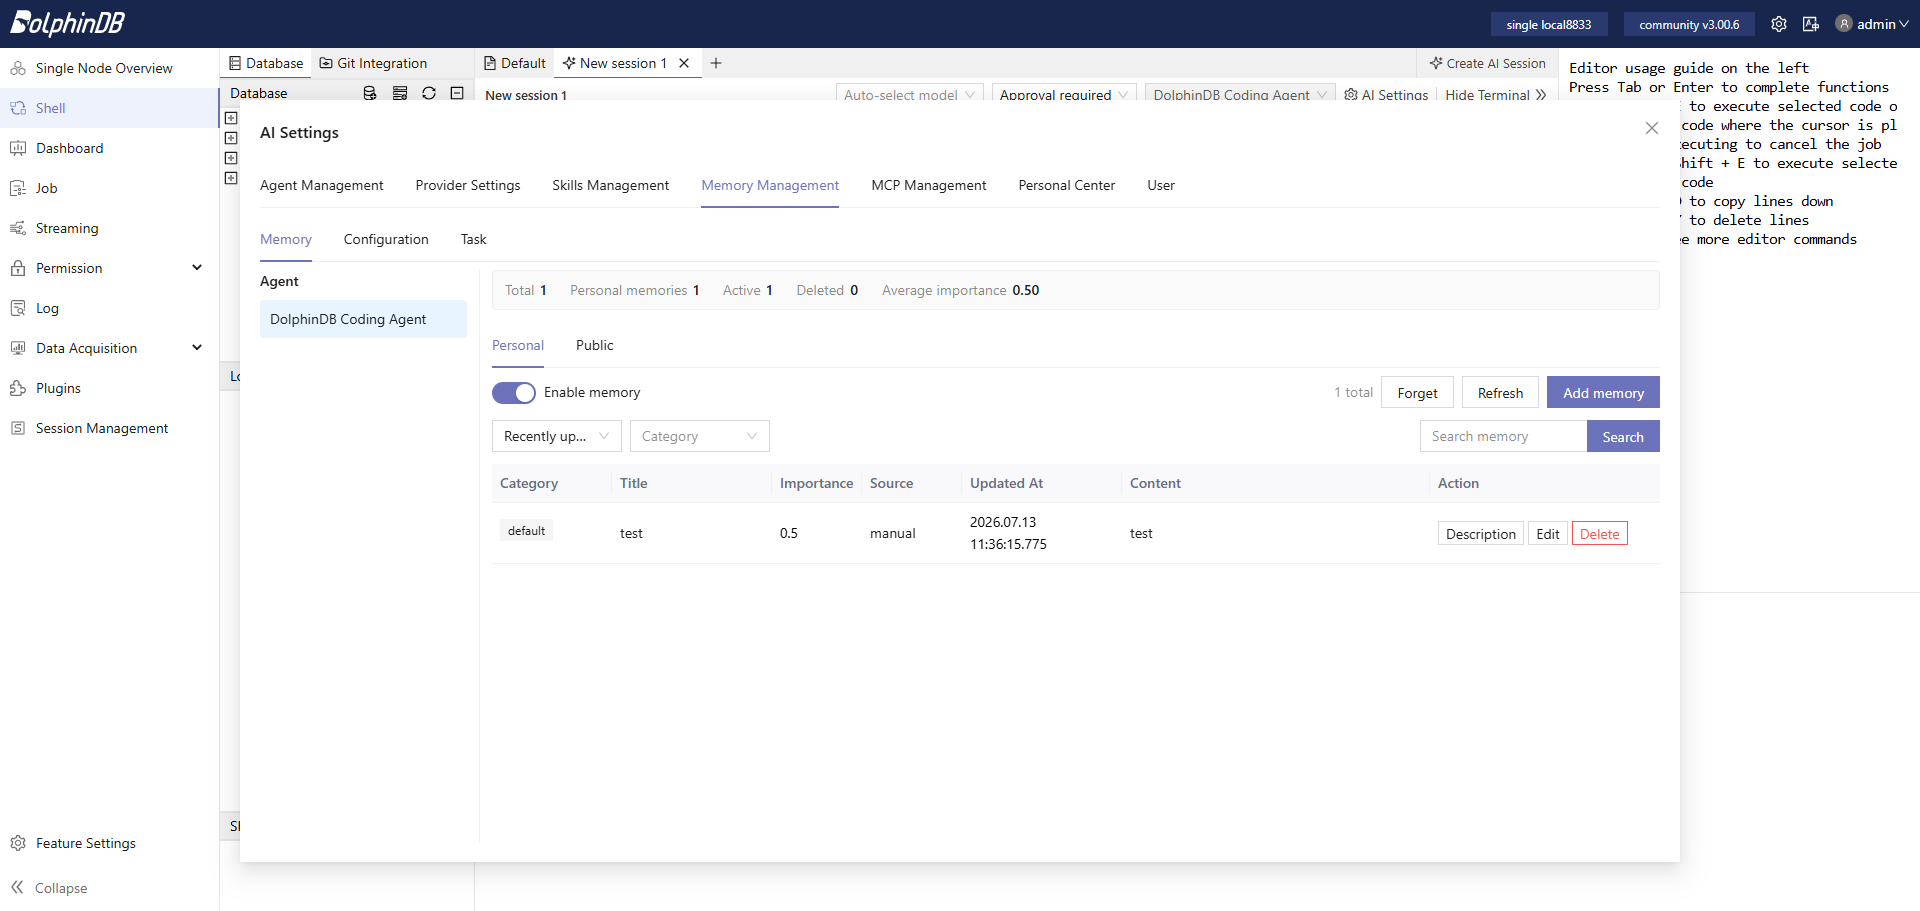
Memory management is used to manage useful information recorded by the model during its work. In Memory Management, you can manage personal memories and control whether the memory feature is enabled. Administrators can manage public memories.
Figure 40. Figure 8-1 Memory Management
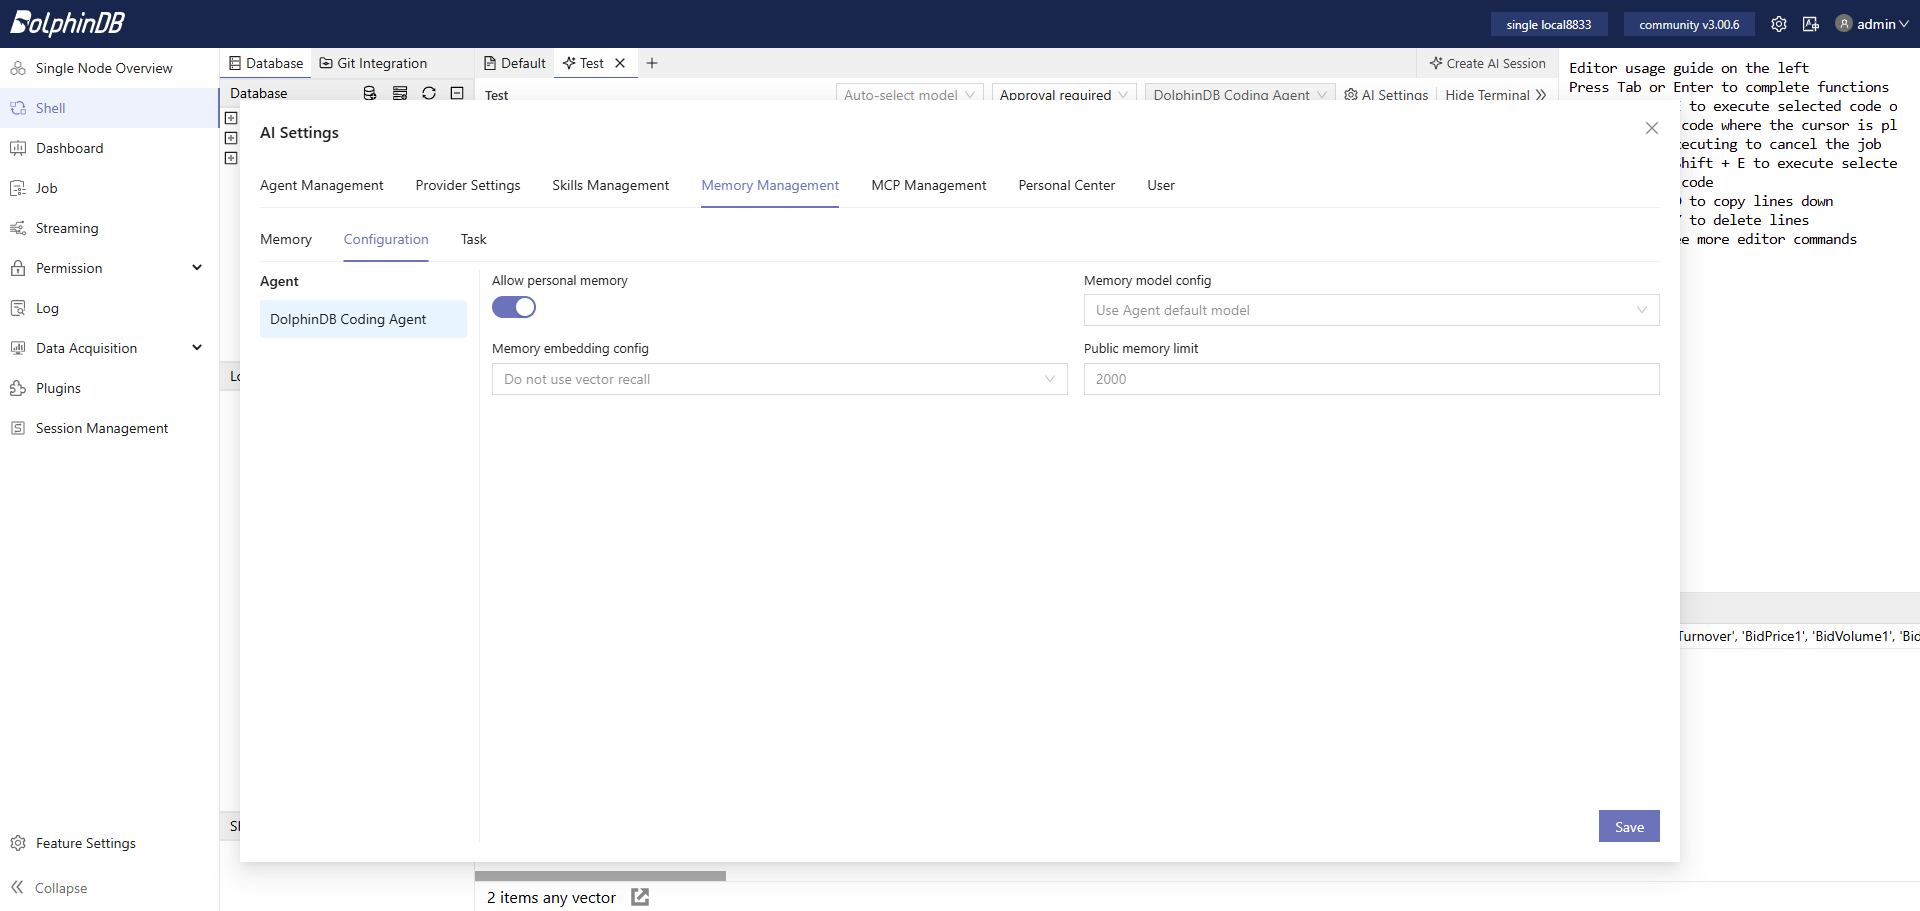
In Memory Management, administrators can configure memory policies for
agents.
Figure 41. Figure 8-2 Configure Memory Policies
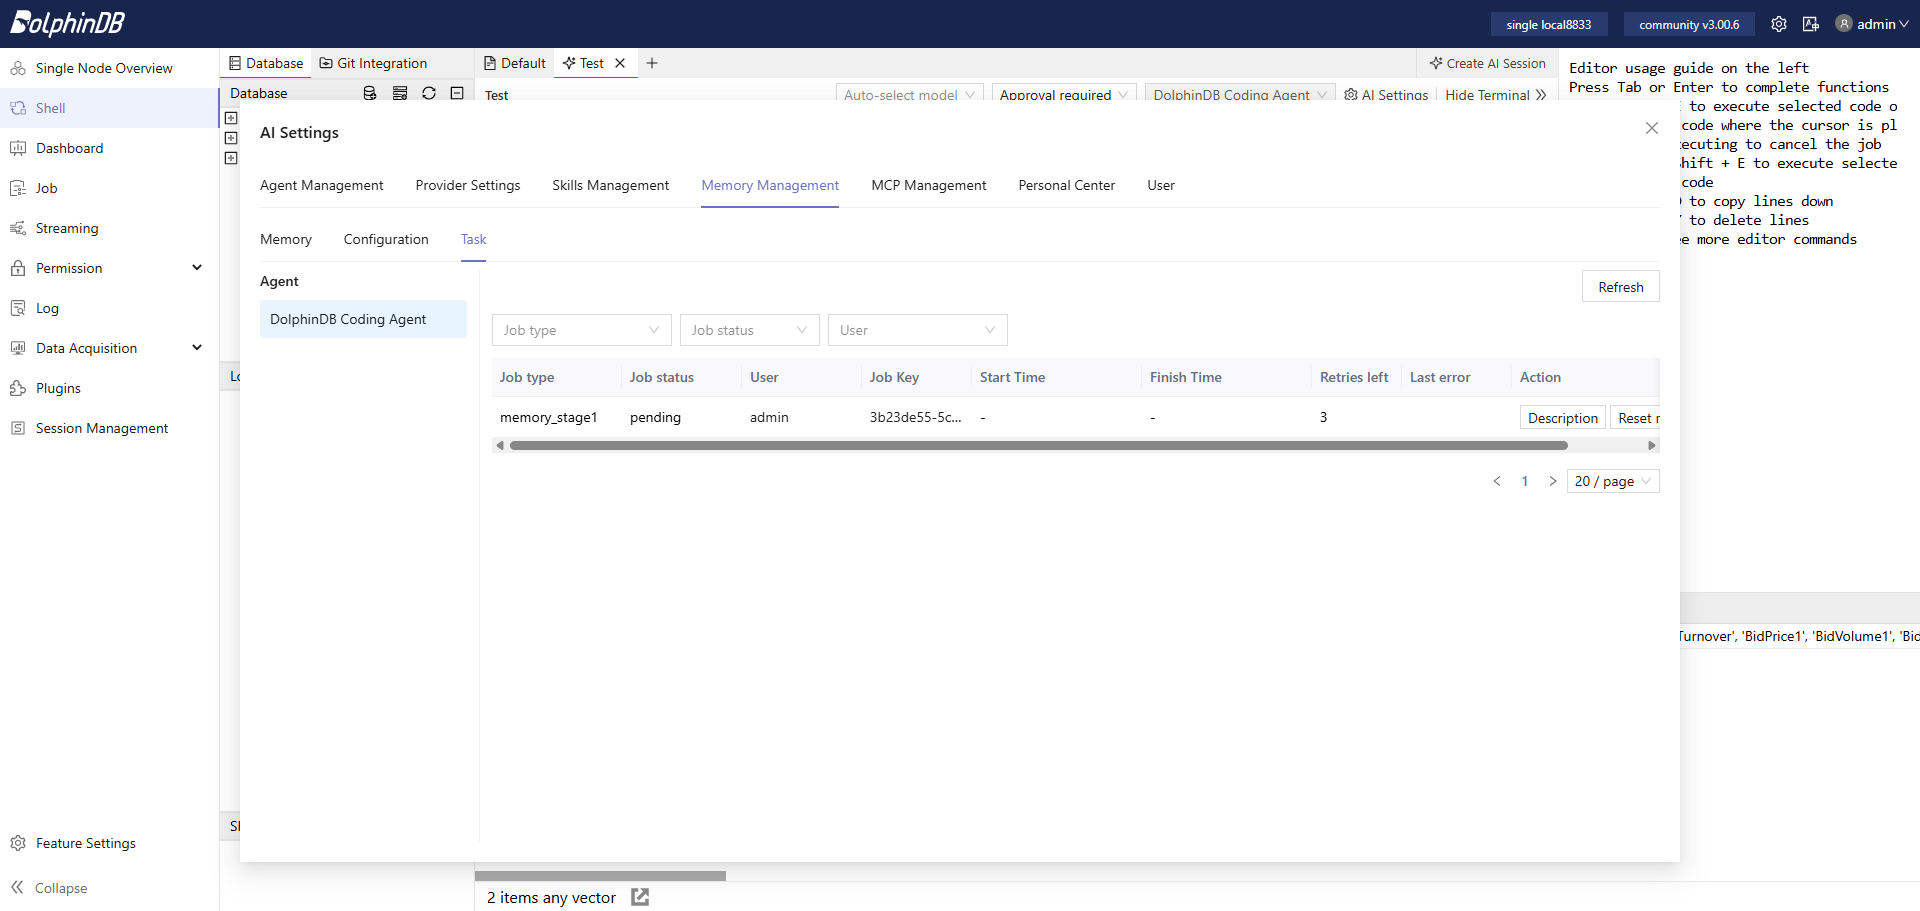
In Task, administrators can manage memory generation tasks.
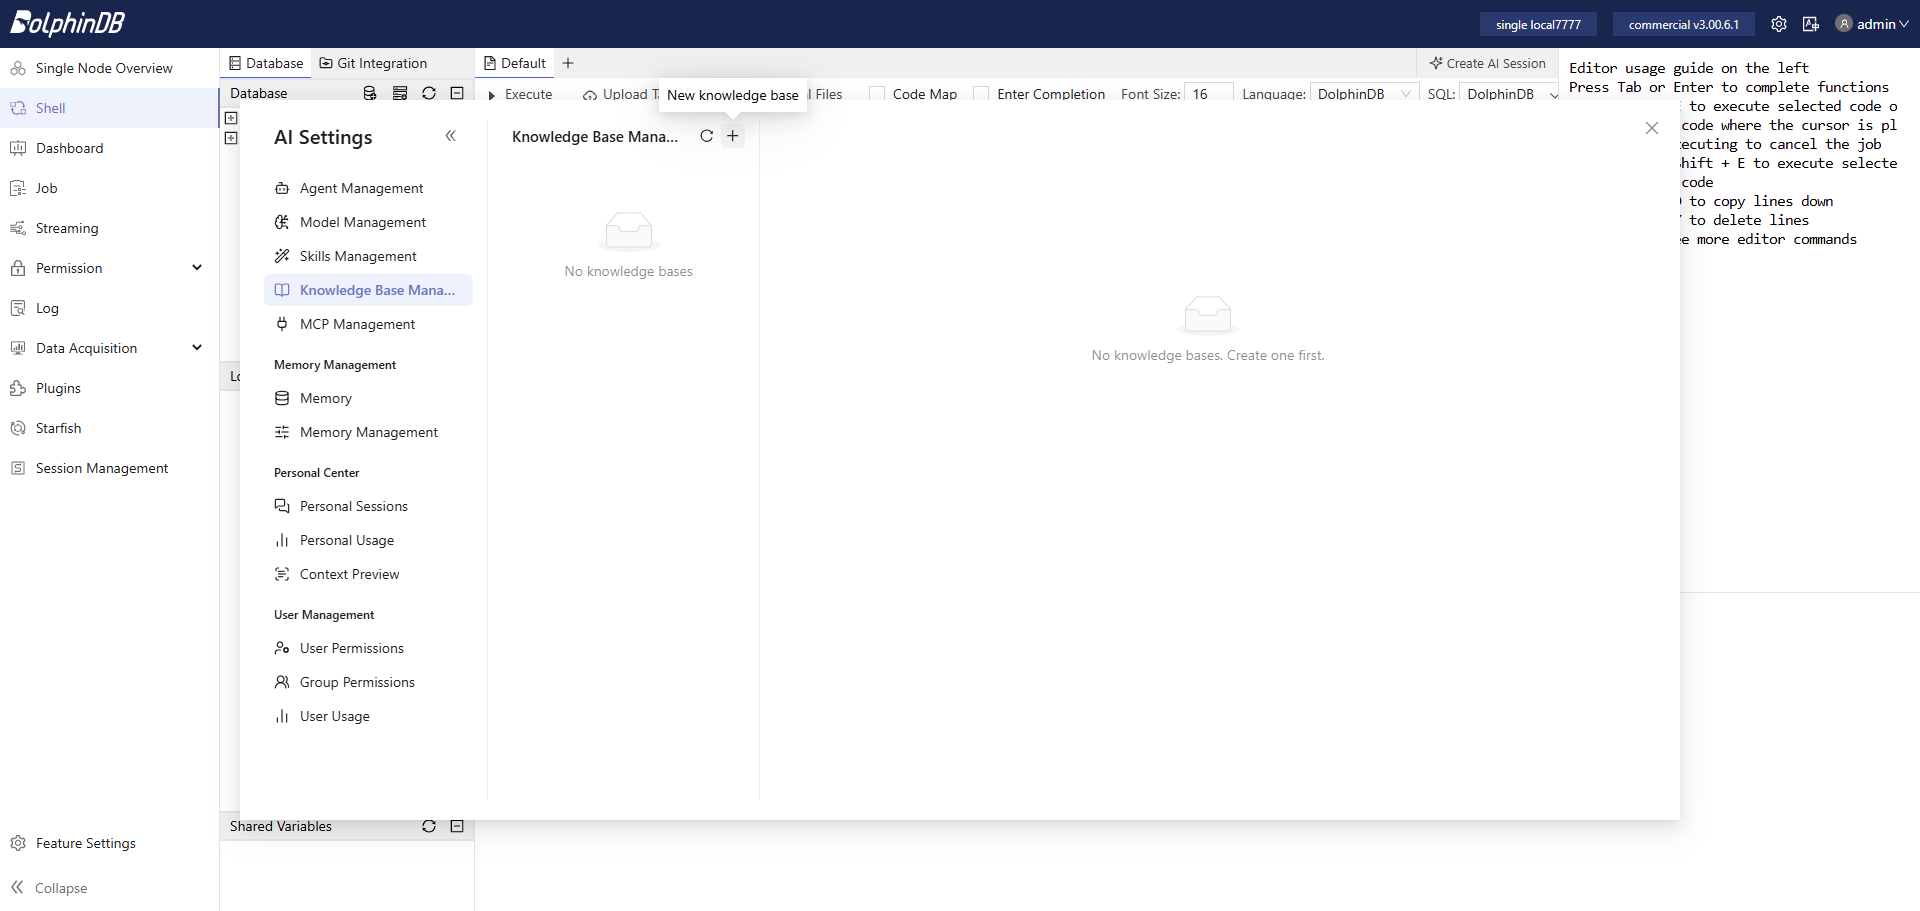
A knowledge base is used to store and manage domain-specific documents. When performing tasks, an agent can retrieve content from the knowledge base as a basis for answering questions and generating scripts, thereby improving the agent's performance in specific business scenarios. Administrators, or standard users with agent management permissions, can configure knowledge bases.
Note:
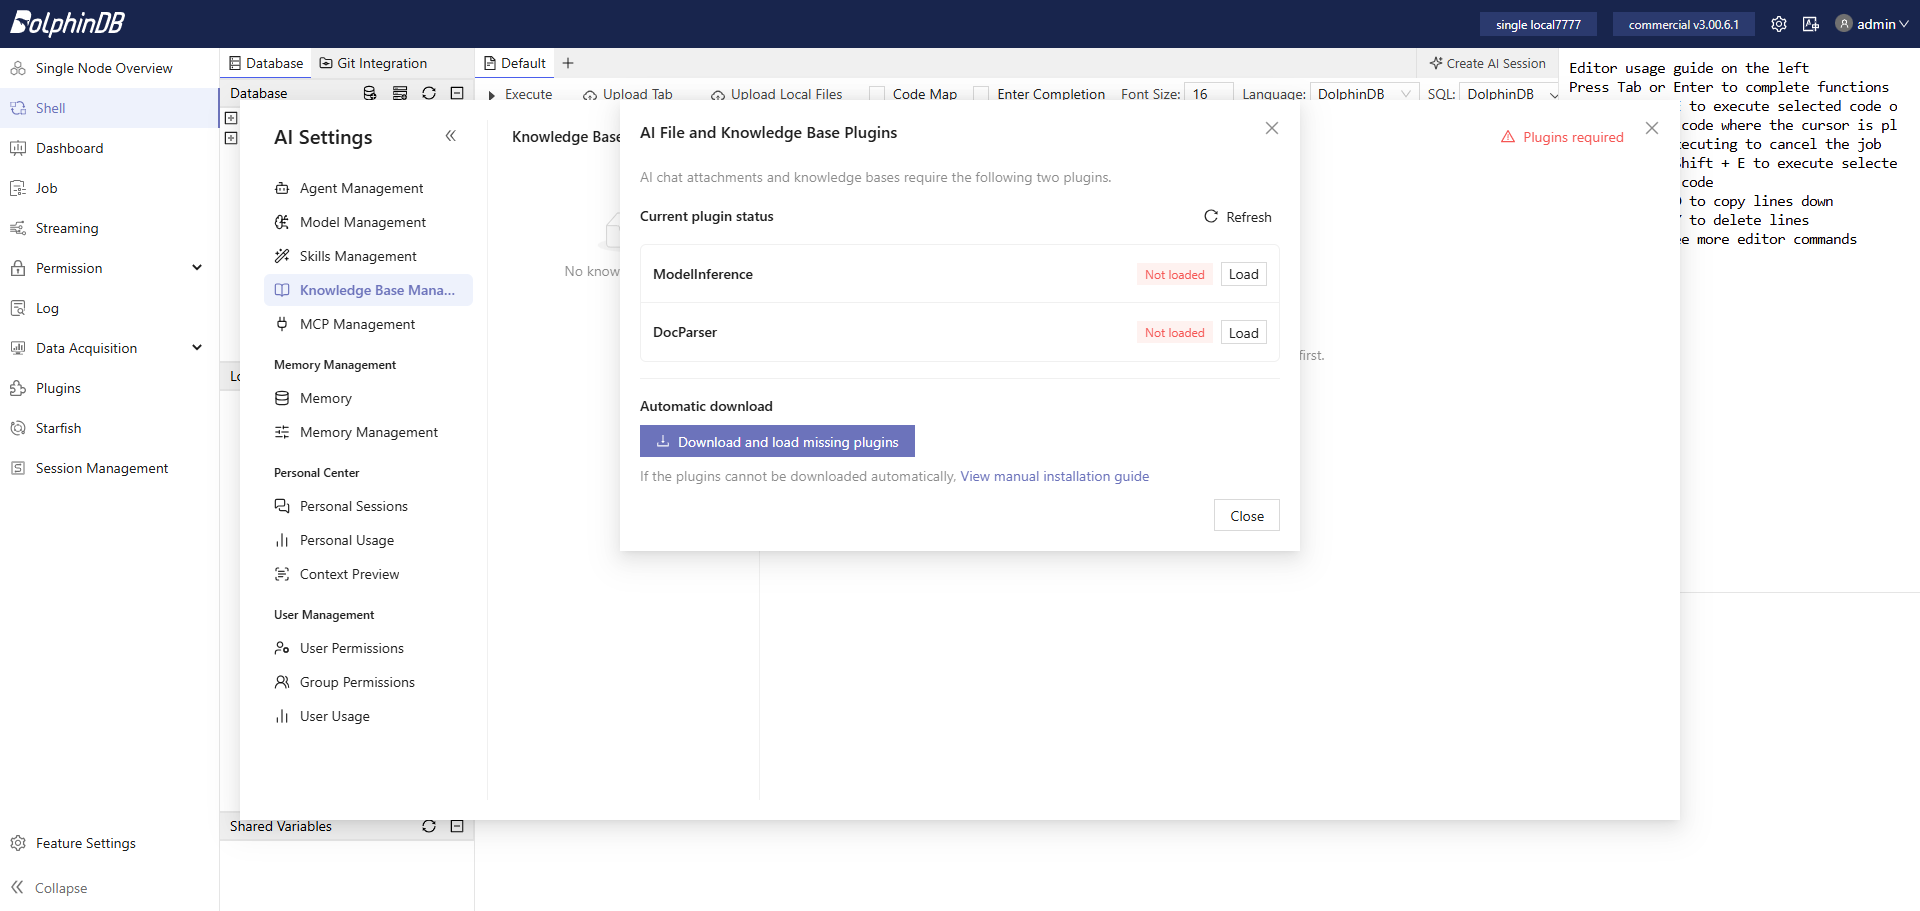
The knowledge base feature relies on the ModelInference
and DocParser plugins. Please ensure these two plugins are loaded before use.
Figure 43. Figure 9-1 Load Necessary Plugins
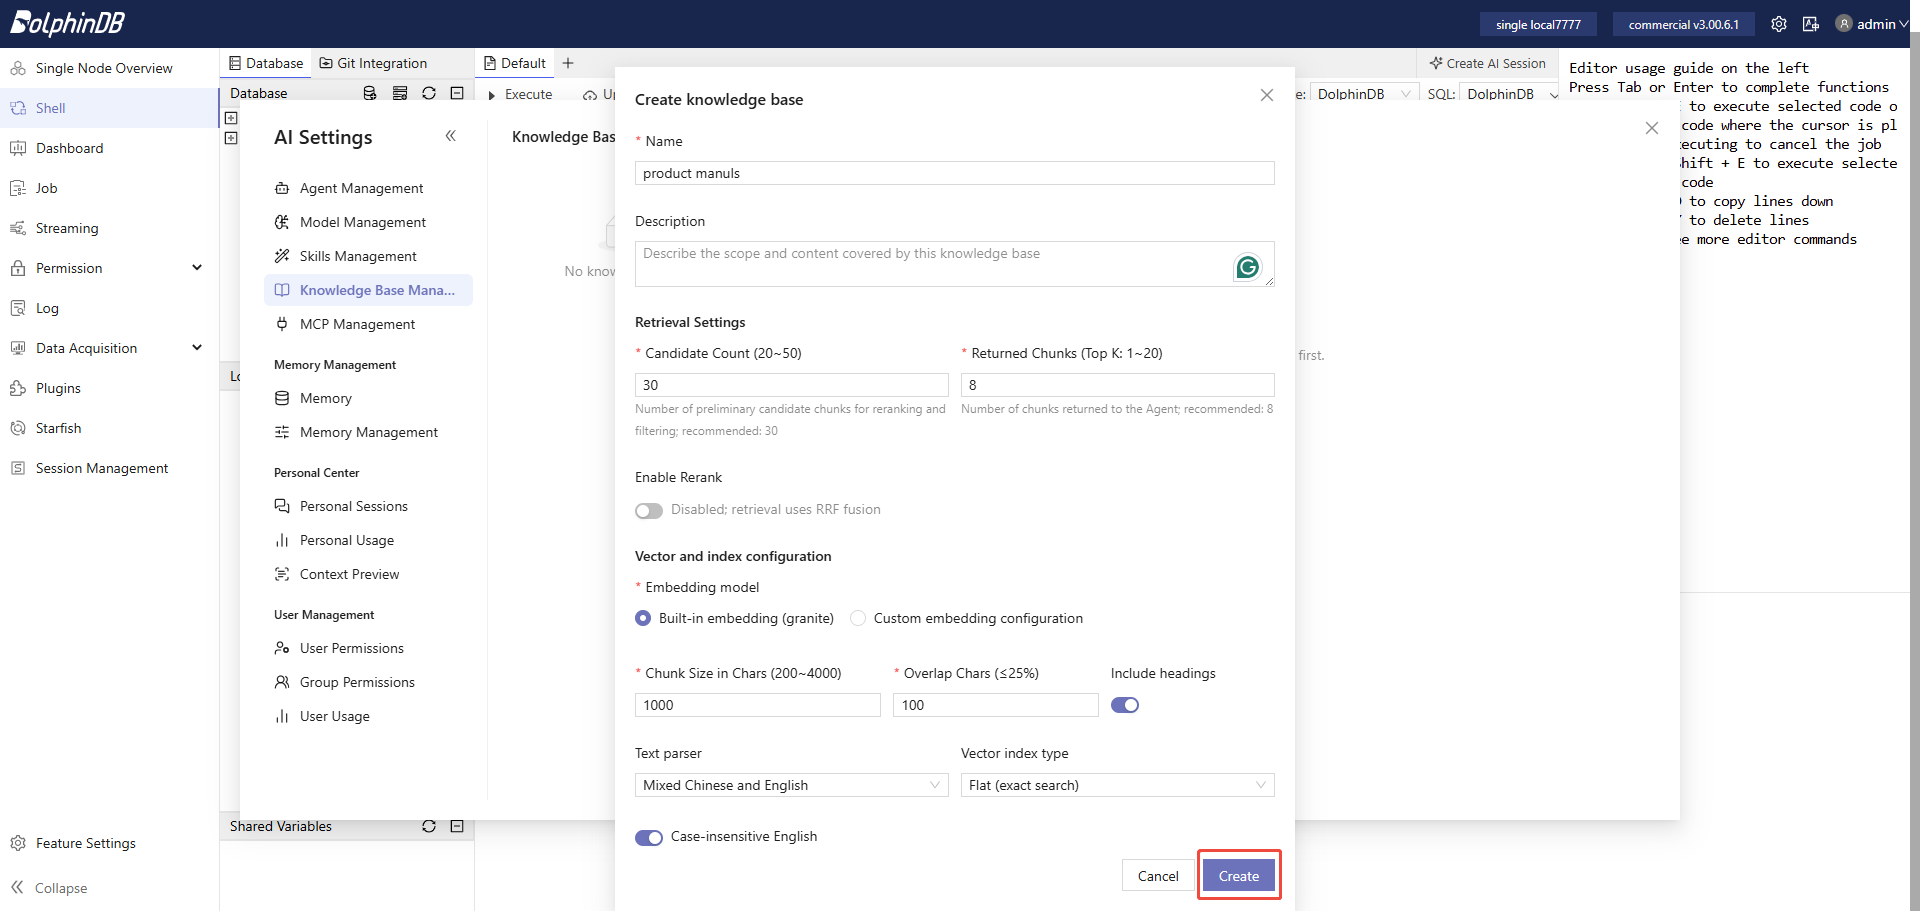
Click + to create a new knowledge base.Figure 44. Figure 9-2 Create a New Knowledge Base
Fill in the required information, then click Create.Figure 45. Figure 9-3 Fill in Knowledge Base Configurations
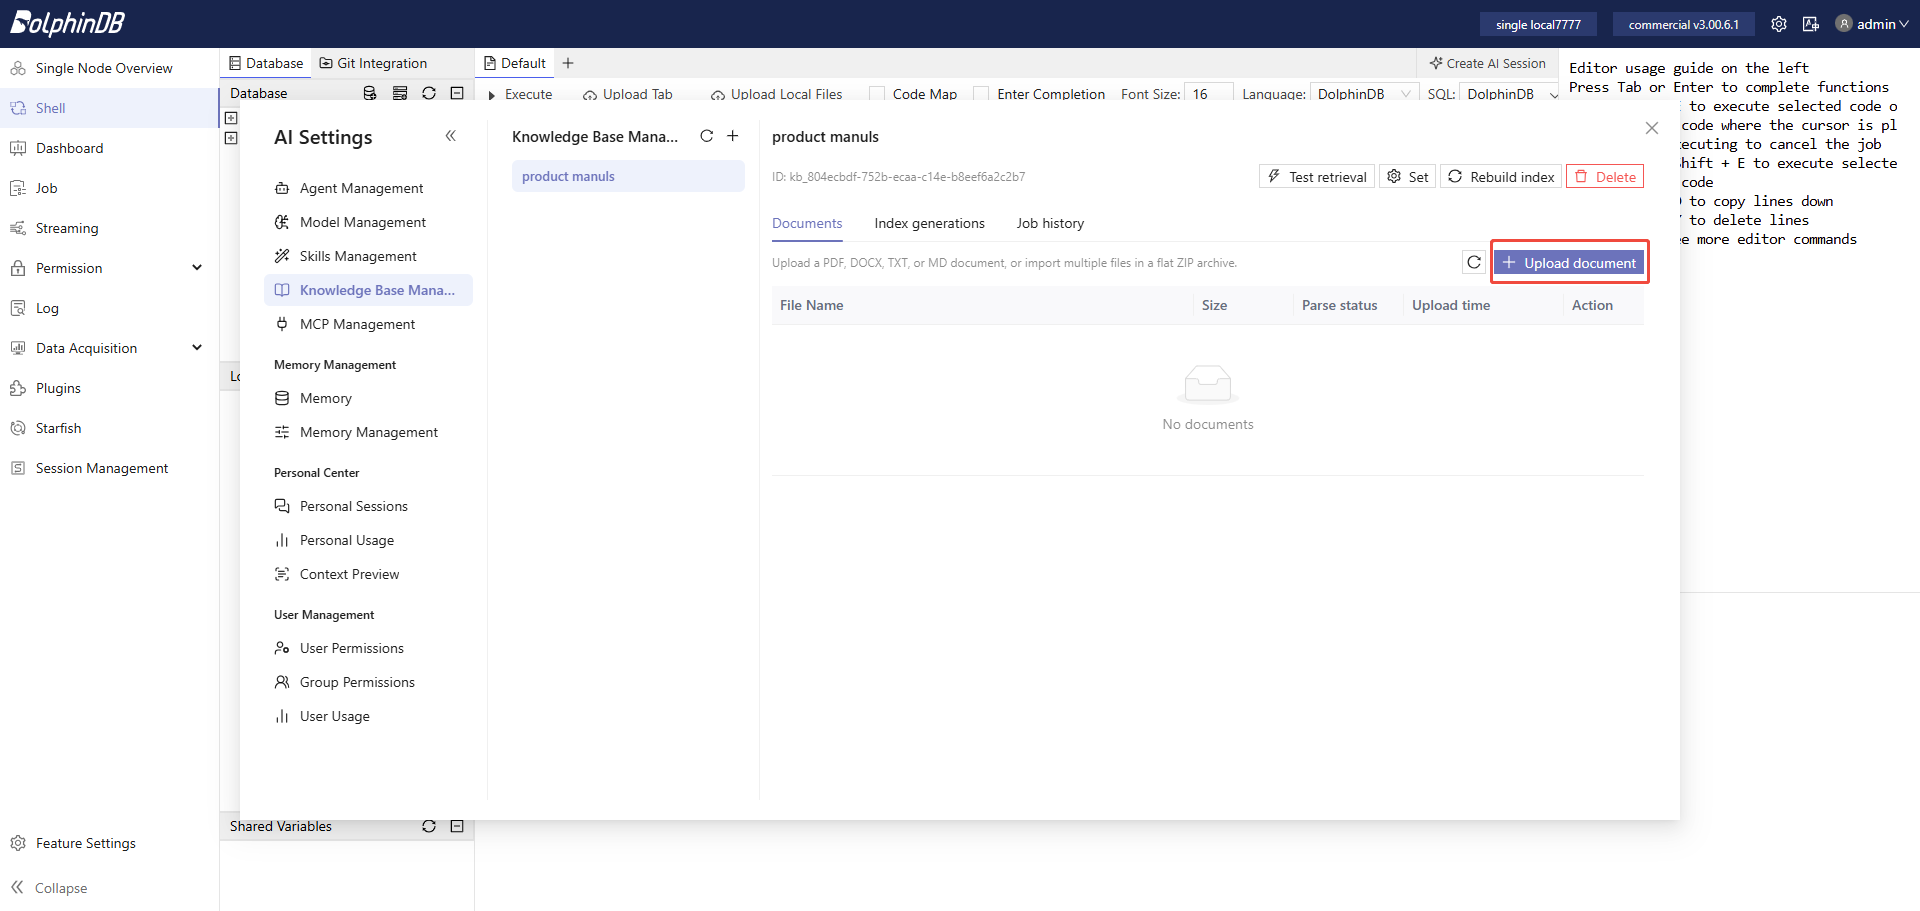
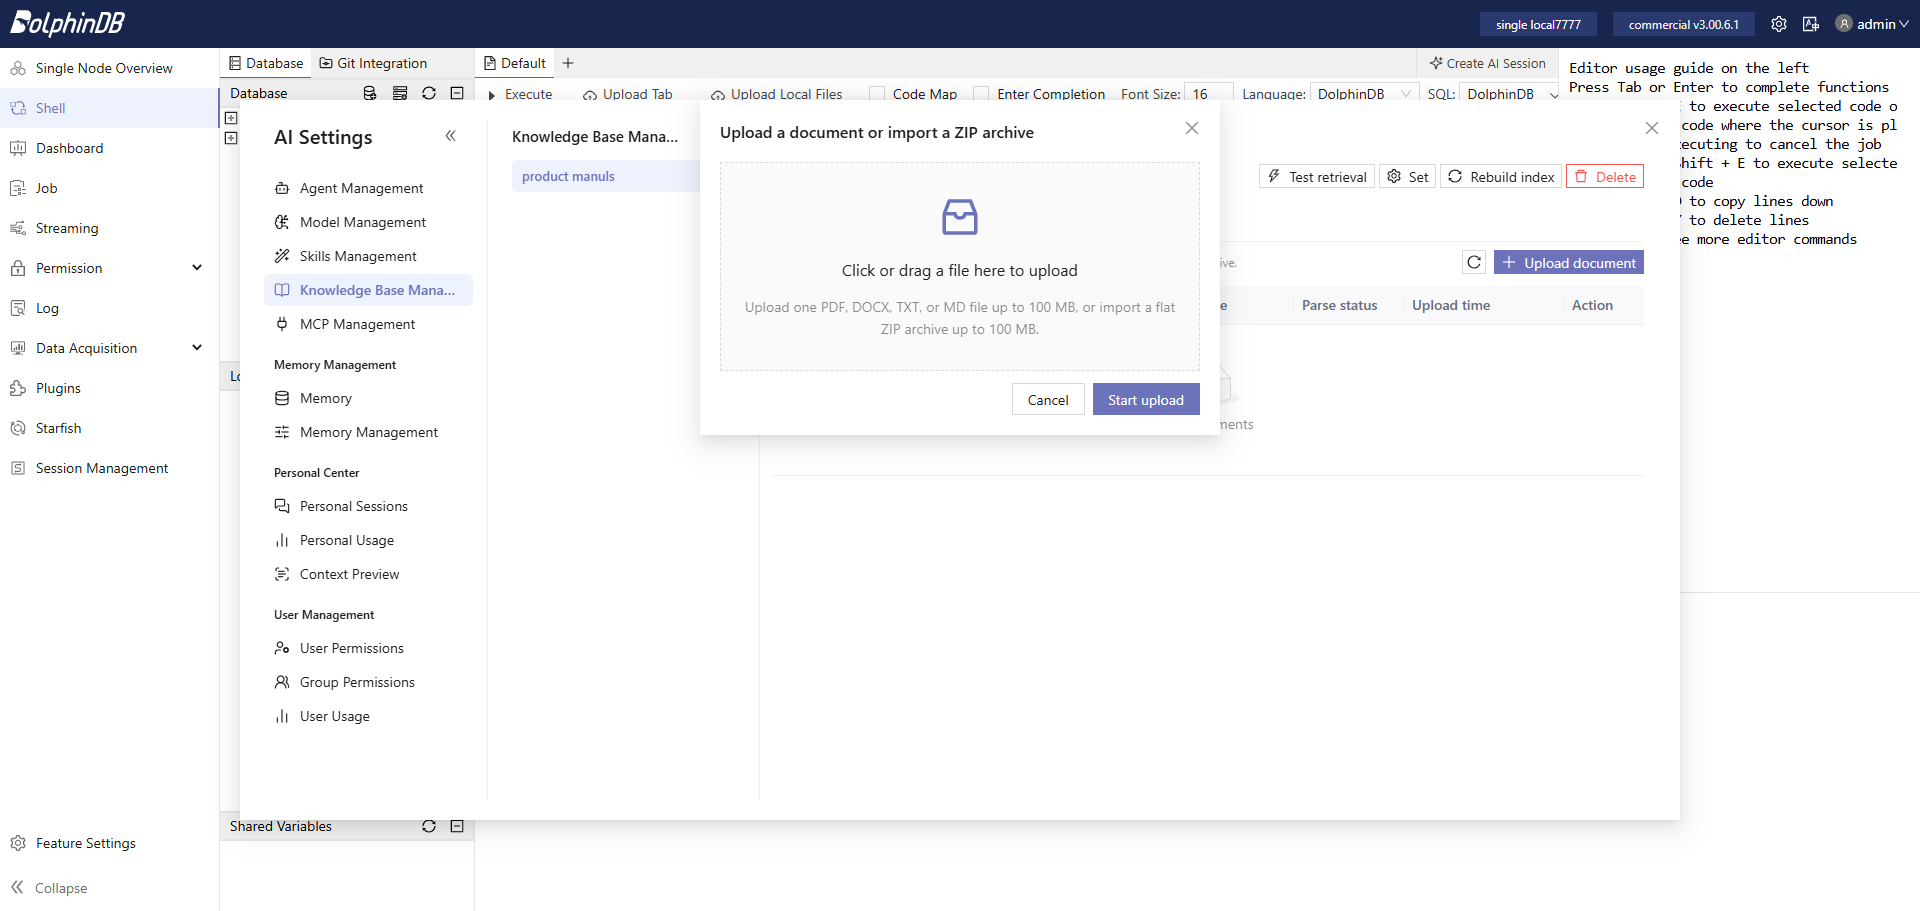
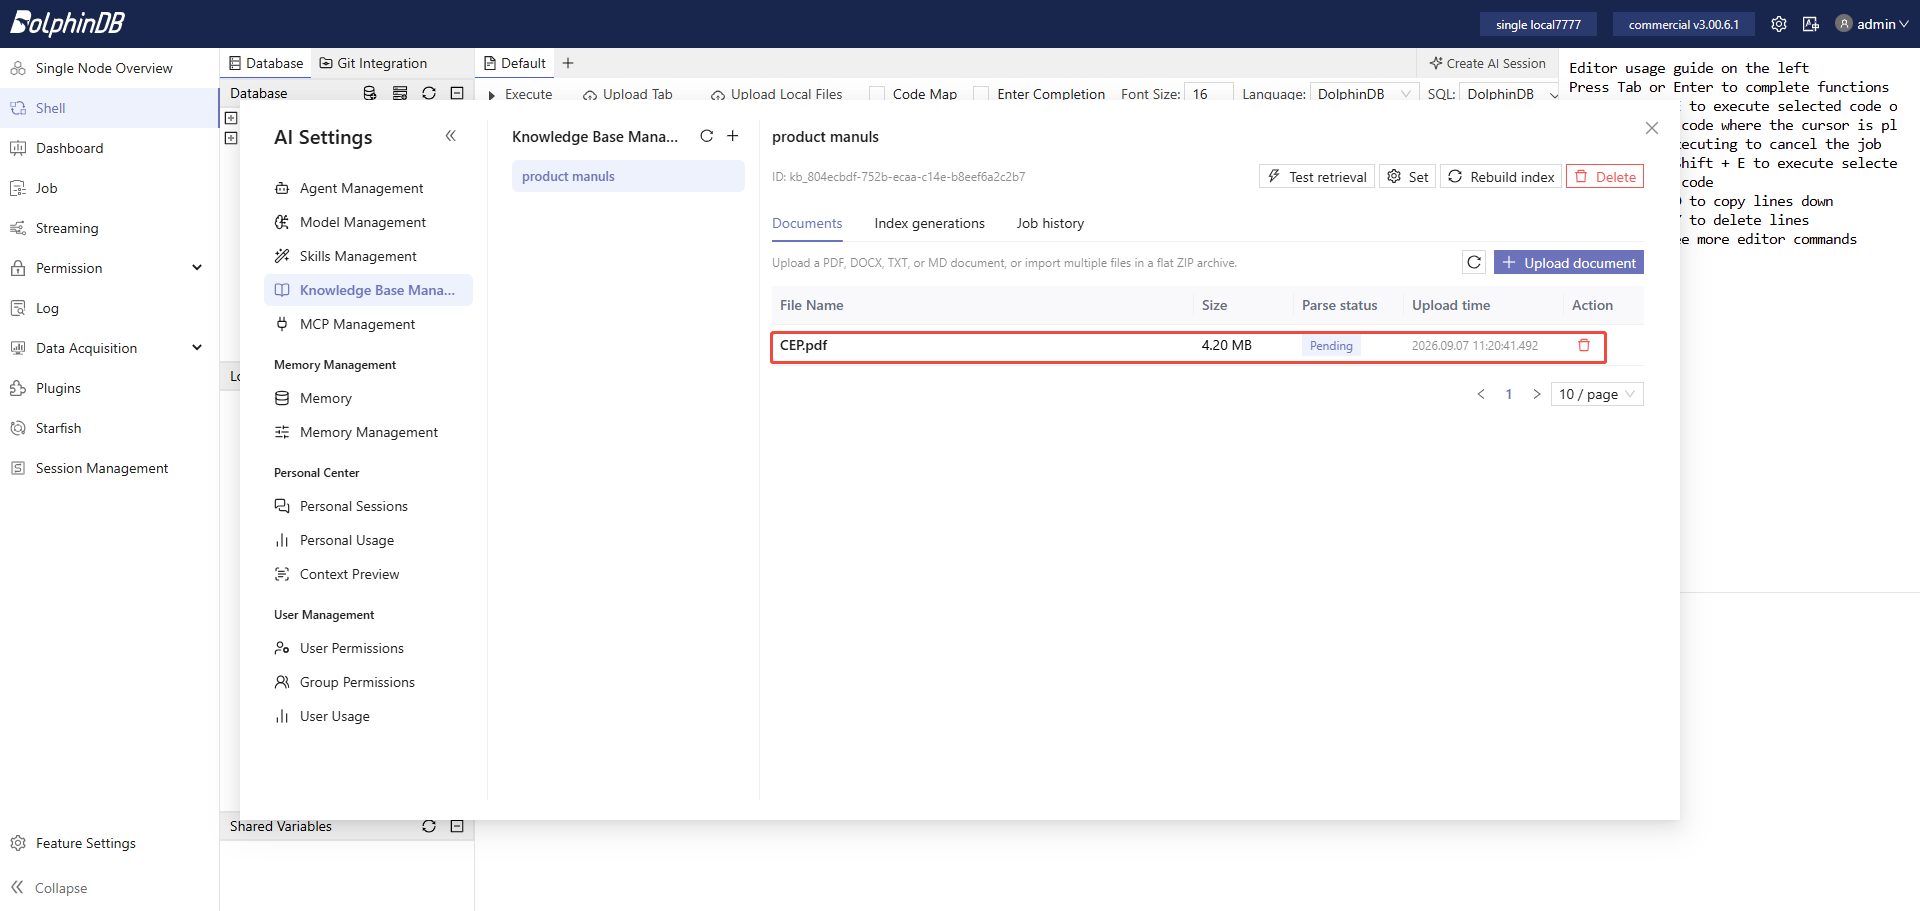
Once created, the new knowledge base is displayed.