DolphinDB 数据访问接口开发教程
教程难度
- 中级
面向读者
- 熟悉 DolphinDB 数据存储:数据库操作
- 熟悉 DolphinDB 的用户权限管理方法的用户:用户权限管理
- 需要基于已经存入 DolphinDB 的数据表开发便捷的对外数据访问接口
- 需要对数据访问接口设置访问权限
数据存入DolphinDB 后,数据库管理员需要给用户提供取数接口。
本文主要介绍如何通过用户权限管理和函数视图给用户提供数据接口。
本教程中会学习到:
- 如何在 DolphinDB 中设置数据访问接口
- 如何在 DolphinDB server 中调用函数视图访问数据
- 如何在 DolphinDB API 中调用函数视图访问数据
1. 测试环境准备
本教程开发的软件环境如下:
| 软件名称 | 版本信息 |
|---|---|
| DolphinDB | 2.00.10.9 2023.12.09 |
| DolphinDB Python API | 3.0.1.0 |
| DolphinDB C++ API | 300.2 |
| DolphinDB Java API | 3.00.2.0 |
| DolphinDB C# API | 3.00.1.1 |
| DolphinDB JavaScript API | 3.0.200 |
第一步:部署测试环境
- 部署 DolphinDB 单节点:单节点部署教程。
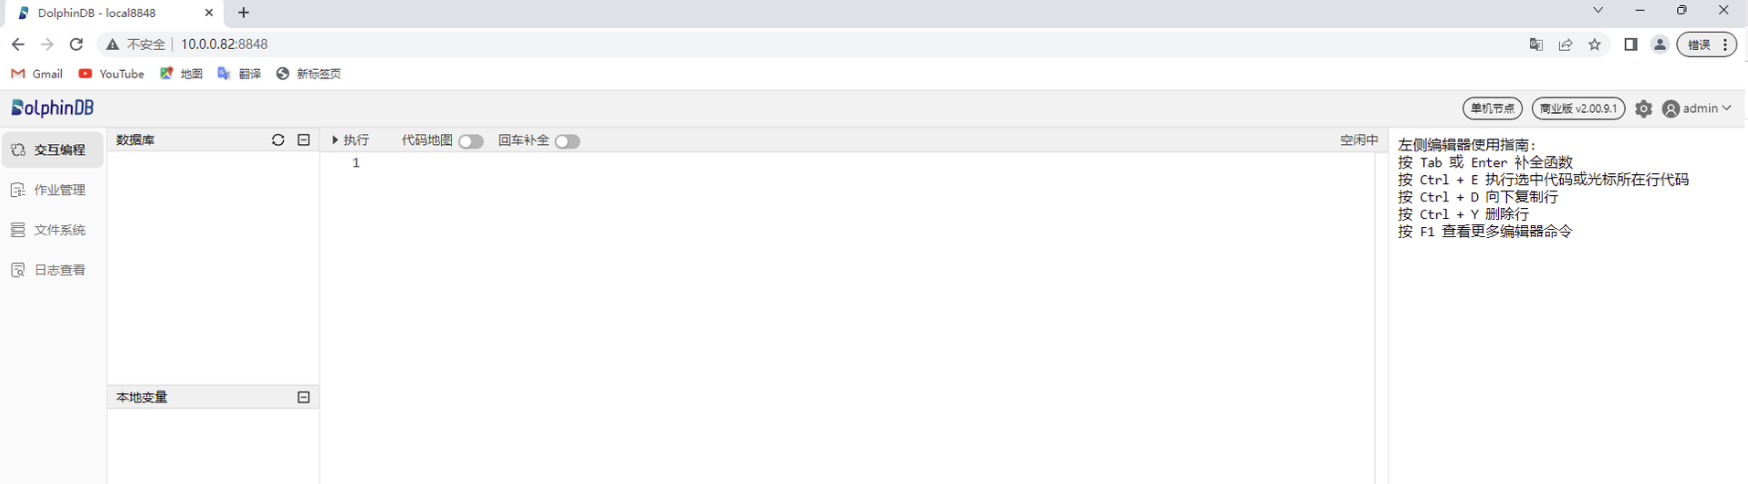
- 根据部署教程打开节点 Web 编程界面,登录后运行后续步骤测试代码,默认 admin 账户的密码是 123456。
图2-1 DolphinDB Web 编程界面
第二步:创建模拟数据库表
创建本教程示例的分区表,模拟数据内容为:
- 10 年 10 支股票分钟级别指标,指标列为 col1, col2, col3, …, col49, col50。
粘贴下述代码至 Web 编程界面,选中需要执行代码点击执行(执行快捷键:Ctrl+E)即可:
//登陆账户
login("admin", "123456")
//创建数据库和分区表
dbName = "dfs://stock"
tbName = "factor"
if(existsDatabase(dbName)){
	dropDatabase(dbName)
}
db = database(dbName, VALUE, 2023.01.01..2023.01.30)
colNames = `SecurityID`date`time`col1`col2`col3`col4`col5`col6`col7`col8`col9`col10`col11`col12`col13`col14`col15`col16`col17`col18`col19`col20`col21`col22`col23`col24`col25`col26`col27`col28`col29`col30`col31`col32`col33`col34`col35`col36`col37`col38`col39`col40`col41`col42`col43`col44`col45`col46`col47`col48`col49`col50
colTypes = [SYMBOL, DATE, SECOND, DOUBLE, DOUBLE, DOUBLE, DOUBLE, DOUBLE, DOUBLE, DOUBLE, DOUBLE, DOUBLE, DOUBLE, DOUBLE, DOUBLE, DOUBLE, DOUBLE, DOUBLE, DOUBLE, DOUBLE, DOUBLE, DOUBLE, DOUBLE, DOUBLE, DOUBLE, DOUBLE, DOUBLE, DOUBLE, DOUBLE, DOUBLE, DOUBLE, DOUBLE, DOUBLE, DOUBLE, DOUBLE, DOUBLE, DOUBLE, DOUBLE, DOUBLE, DOUBLE, DOUBLE, DOUBLE, DOUBLE, DOUBLE, DOUBLE, DOUBLE, DOUBLE, DOUBLE, DOUBLE, DOUBLE, DOUBLE, DOUBLE, DOUBLE]
schema = table(1:0, colNames, colTypes)
db.createPartitionedTable(table=schema, tableName=tbName, partitionColumns='date')
//构建模拟数据
n = 1000000
SecurityID = rand(`000001`000002`000003`000004`000005`000006`000007`000008`000009`000010, n)
date = rand(2015.01.01..2024.12.31, n)
time = 09:30:00 + rand(331, n) * 60
factor = rand(10.0, n:50)
factor.rename!(`col1`col2`col3`col4`col5`col6`col7`col8`col9`col10`col11`col12`col13`col14`col15`col16`col17`col18`col19`col20`col21`col22`col23`col24`col25`col26`col27`col28`col29`col30`col31`col32`col33`col34`col35`col36`col37`col38`col39`col40`col41`col42`col43`col44`col45`col46`col47`col48`col49`col50)
t = table(SecurityID, date, time, factor)
//存入分区表
loadTable("dfs://stock", "factor").append!(t)
成功导入模拟数据后可以执行下述代码,查询前 10 行数据至内存中查看:
data = select top 10 * from loadTable("dfs://stock", "factor")返回:
图2-2 部分模拟数据

第三步:创建测试用户
- 创建用户 testUser1, testUser2。
- 创建用户组 testGroup1,并将用户 testUser1 和 testUser2 加入该用户组。
login("admin", "123456")
createUser("testUser1", "123456",, false)
createUser("testUser2", "123456",, false)
createGroup("testGroup1", `testUser1`testUser2)
2. 设置数据访问接口
教程将给出以下几种数据访问接口开发的示例代码:
- 全表数据访问接口
- 限制行级别访问接口
- 限制列级别访问接口
- 设置行列级别访问接口
2.1 设置全表访问接口
例1: 用户可以访问全表的数据
login("admin", "123456")
def query(startDate, endDate, cols="*", security=NULL) {
	whereConditions = [<date between startDate:endDate>]
	if (typestr(security) <> "VOID") {
		whereConditions.append!(<SecurityID in security>)
	}
	return eval(sql(select=sqlCol(cols), from=loadTable("dfs://stock", "factor"), where=whereConditions))
}
addFunctionView(query)
grant("testGroup1", VIEW_EXEC, "query")- 参数
startDate开始日期endDate结束日期cols列名,默认所有列security证券代码,默认所有证券代码
2.2 设置行级别访问接口
例2: 限制用户仅能访问表中最近一年的数据
login("admin", "123456")
def queryRecentYear(startDate=NULL, endDate=NULL, cols="*", security=NULL) {
	start = temporalAdd(date(now()), -1, "y")
	end = date(now())
	if (startDate == NULL) { date0 = start }
	else if (startDate < start) { throw("Not granted to read data before " + start) }
	else { date0 = startDate }
	if (endDate == NULL) { date1 = end }
	else if (endDate > end) { throw("Not granted to read data after " + end) }
	else { date1 = endDate }
	whereConditions = [<date between date0:date1>]
	if (typestr(security) <> "VOID") {
		whereConditions.append!(<SecurityID in security>)
	}
	return eval(sql(select=sqlCol(cols), from=loadTable("dfs://stock", "factor"), where=whereConditions))
}
addFunctionView(queryRecentYear)
grant("testGroup1", VIEW_EXEC, "queryRecentYear")- 参数
startDate开始日期,默认1年前endDate结束日期,默认今天cols列名,默认所有列security证券代码,默认所有证券代码
2.3 设置列级别访问接口
例3: 限制用户限制用户仅能访问表中前 10 列的数据
login("admin", "123456")
def queryFirst10Col(startDate, endDate, cols=NULL, security=NULL) {
	grantedCols = loadTable("dfs://stock", "factor").schema()['colDefs']['name'][:10]
	notGranted = not(cols in grantedCols)
	if (typestr(cols) == "VOID") { col = grantedCols }
	else if (sum(notGranted) > 0) {	throw("Not granted to read columns " + toStdJson(distinct(cols[notGranted]))) }
	else { col = cols }
	whereConditions = [<date between startDate:endDate>]
	if (typestr(security) <> "VOID") {
		whereConditions.append!(<SecurityID in security>)
	}
	return eval(sql(select=sqlCol(col), from=loadTable("dfs://stock", "factor"), where=whereConditions))
}
addFunctionView(queryFirst10Col)
grant("testGroup1", VIEW_EXEC, "queryFirst10Col")- 参数
startDate开始日期endDate结束日期cols列名,默认允许访问的所有列security证券代码,默认所有证券代码
2.4 设置行列级别访问接口
例4: 限制用户仅能访问表中 2020 年以后的几列数据
login("admin", "123456")
def queryCond(startDate, endDate, cols=NULL, security=NULL) {
	grantedCols = `SecurityID`date`time`col46`col47`col48`col49`col50
	notGranted = not(cols in grantedCols)
	if (typestr(cols) == "VOID") { col = grantedCols }
	else if (sum(notGranted) > 0) {	throw("Not granted to read columns " + toStdJson(distinct(cols[notGranted]))) }
	else { col = cols }
	if (startDate < 2020.01.01) {
		throw("Not granted to read data before 2020")
	}
	if (startDate < temporalAdd(endDate, -1, "y")) {
		throw("Time duration exceeds 1 year. Please change the dates.")
	}
	whereConditions = [<date between startDate:endDate>]
	if (typestr(security) <> "VOID") {
		whereConditions.append!(<SecurityID in security>)
	}
	return eval(sql(select=sqlCol(col), from=loadTable("dfs://stock", "factor"), where=whereConditions))
}
addFunctionView(queryCond)
grant("testGroup1", VIEW_EXEC, "queryCond")- 参数
startDate, endDate开始日期,结束日期,间隔不得超过 1 年cols列名,默认允许访问的所有列security证券代码,默认所有证券代码
3. 在 DolphinDB 开发 IDE 中访问数据
DolphinDB 提供了多种访问 DolphinDB server 数据的开发 IDE,包括 Web 交互编程工具、VS Code 插件和 GUI 客户端。
3.1 DolphinDB 开发 IDE 介绍
本小节将简要介绍 DolphinDB 开发 IDE 的安装和使用方法,更详细的使用教程可以在官方文档中心搜索学习。
3.1.1 Web 交互编程工具
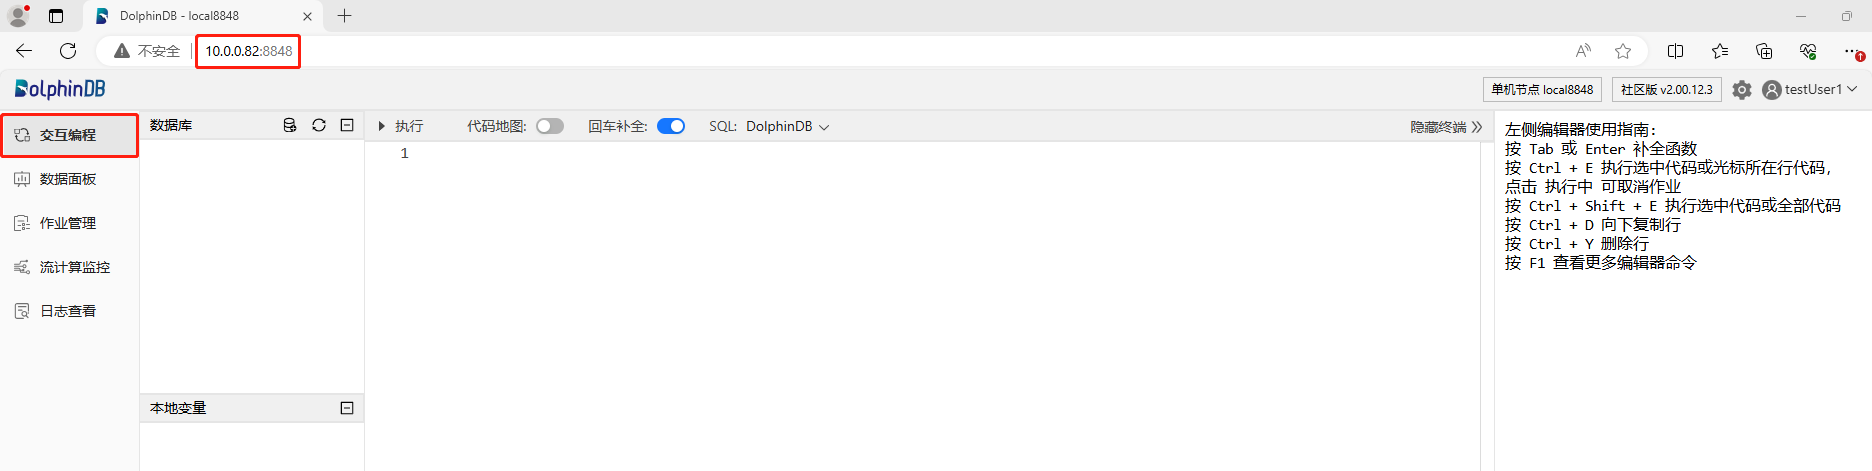
在浏览器中输入 DolphinDB 的部署服务器 IP 地址和部署端口号(如 10.0.0.82:8848),即可进入 Web 交互编程界面。
图4-1 DolphinDB Web 编程界面
登录后可以在编辑器中输入代码,使用数据访问接口访问数据。在编辑器中,可通过左上角的执行按钮执行代码,或通过快捷键 Ctrl + E 执行代码。选中部分(或全部)代码,点击执行按钮,或按下 Ctrl + E 按键,便可执行它们。内存中的数据可以在“本地变量”栏中查看。
图4-2 在 DolphinDB Web 编程界面查看数据

3.1.2 VS Code 插件
DolphinDB 开发了针对 DolphinScript 的 VS Code 插件。用户可以通过该插件编写并执行脚本来操作 DolphinDB 数据库,或查看数据库中的数据。
参考使用方法教程,下载并安装 VS Code,连接 DolphinDB server,并新建一个 DolphinDB 脚本文件。
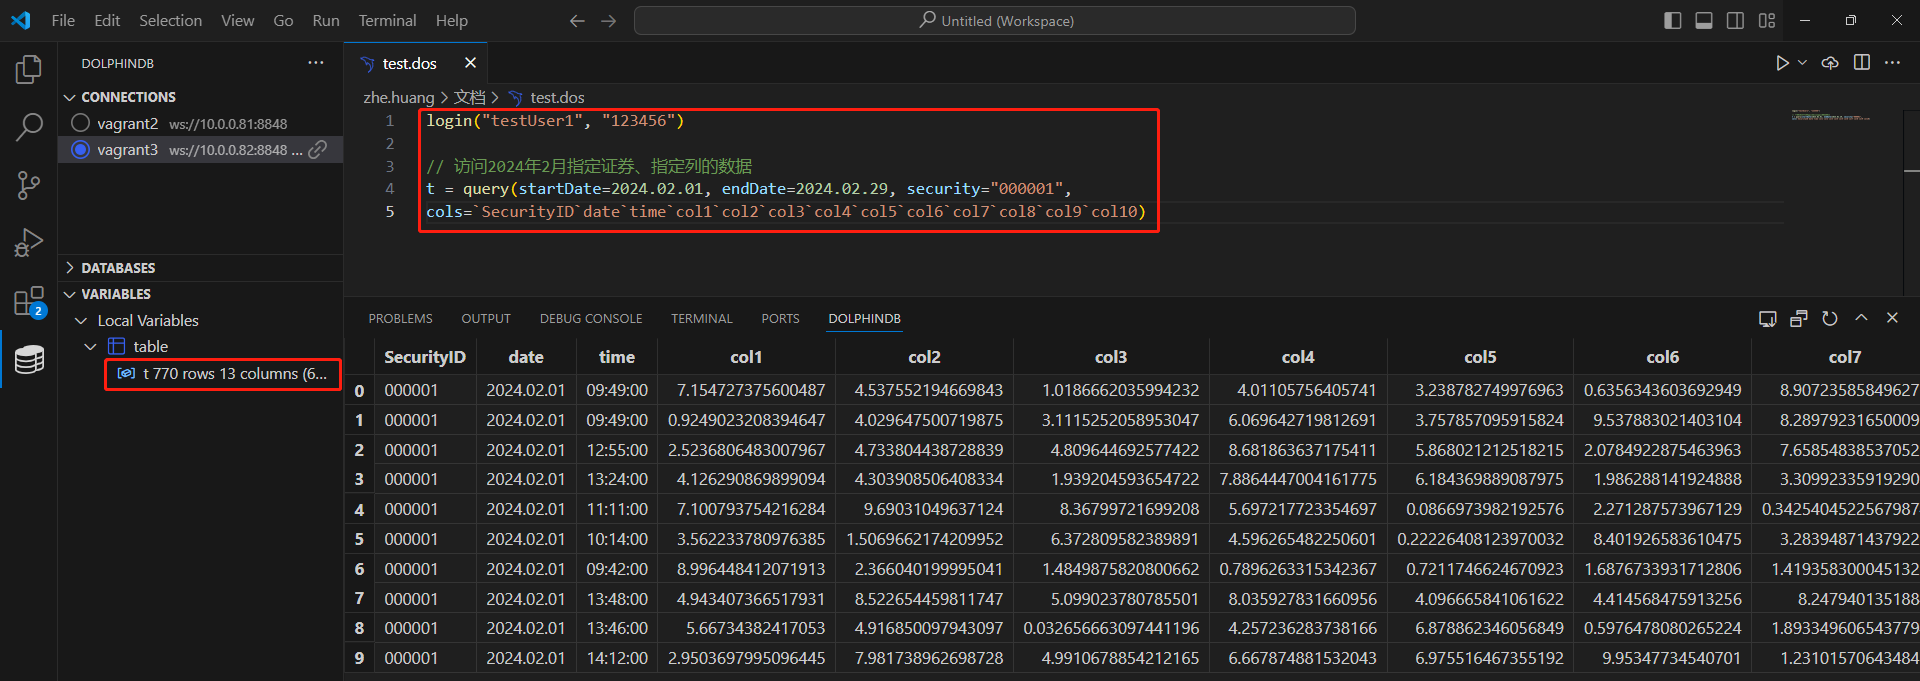
在打开的 DolphinDB 脚本文件中,输入代码,使用数据访问接口访问数据。选中部分(或全部)代码,按快捷键 Ctrl + E 执行。内存中的数据可以在"VARIABLES"栏中查看。
图4-3 VS Code 界面
3.1.3 GUI 客户端
DolphinDB GUI 客户端是基于 Java 的图形化编程以及数据浏览界面,可在任何支持 Java 的操作系统上使用,例如:Windows、Linux、Mac。该客户端运行速度快,功能齐全,用户友好,适用于管理和开发 DolphinDB 脚本、模块,以及数据库交互,查看运行结果等。
参考 GUI 客户端教程,安装并启动 GUI 客户端,连接 DolphinDB server,并新建一个 DolphinDB 脚本文件。
在打开的 DolphinDB 脚本文件中,输入代码,使用数据访问接口访问数据。选中部分(或全部)代码,按快捷键 Ctrl + E 执行。内存中的数据可以在"Variables"中查看。
图4-4 DolphinDB GUI 客户端界面
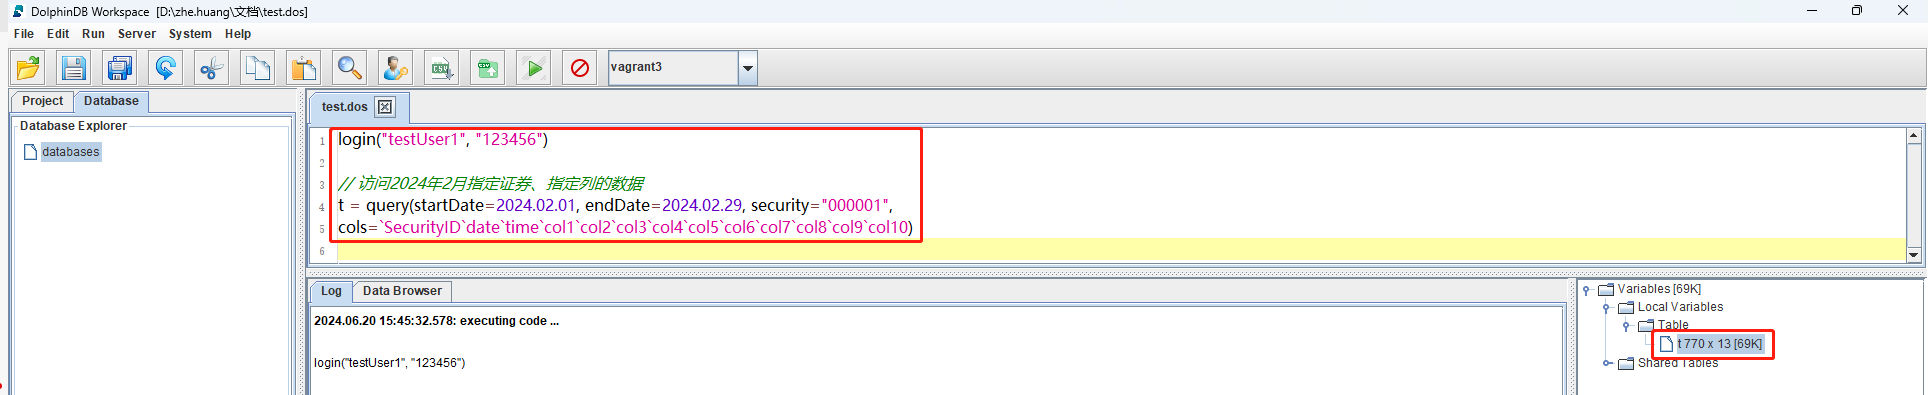
图4-5 在 DolphinDB GUI 客户端中查看数据

3.2 在 DolphinDB server 中访问数据
- 在 DolphinDB server 中登录用户 testUser1 的账号
login("testUser1", "123456")- 使用全表访问接口访问数据
// 访问全表数据
t = query(startDate=2015.01.01, endDate=2024.12.31)

// 访问2024年2月指定证券、指定列的数据
t = query(startDate=2024.02.01, endDate=2024.02.29, security="000001", cols=`SecurityID`date`time`col1`col2`col3`col4`col5`col6`col7`col8`col9`col10)- 使用行级别访问接口访问数据
// 访问近1年所有数据
t = queryRecentYear()

// 访问指定日期开始、指定列的数据
t = queryRecentYear(startDate=2023.07.10, cols=`SecurityID`date`time`col2`col3)
如果数据查询的时间范围超过最近1年,则会提示如下错误:
t = queryRecentYear(2023.07.01, , ["SecurityID","date","time","col2","col3"]) => queryRecentYear: throw "Not granted to read data before " + start => Not granted to read data before 2023.07.05- 使用列级别访问接口访问数据
// 访问2023年指定证券、允许访问的所有列的数据
t = queryFirst10Col(startDate=2023.01.01, endDate=2023.12.31, security=`000008`000009`000010)

// 访问2022年12月指定列的数据
t = queryFirst10Col(startDate=2022.12.01, endDate=2022.12.31, cols=`SecurityID`date`time`col4`col5`col6)- 使用行列级别访问接口访问数据
// 访问2021年1月允许访问的所有列的数据
t = queryCond(startDate=2021.01.01, endDate=2021.01.31)

// 访问2021年指定列的数据
t = queryCond(startDate=2021.01.01, endDate=2021.12.31, cols=`SecurityID`date`time`col47`col48`col49)
4. 在 API 中访问数据
DolphinDB 提供了丰富的 API,支持 Python, C++, Java, C#, Go, R, JavaScript 等,具体可以参考官方教程:连接器&API。本章节主要通过 Python API 介绍如何通过原生 API 接口进行二次封装,对外提供便捷数据访问接口的方法。
4.1 DolphinDB Python API 介绍
dolphindb 是 DolphinDB 的官方 Python API,用于连接 DolphinDB 服务端和 Python 客户端,从而实现数据的双向传输和脚本的调用执行。dolphindb 可以方便您在 Python 环境中调用 DolphinDB 进行数据的处理、分析和建模等操作,利用其优秀的计算性能和强大的存储能力来帮助您加速数据的处理和分析。
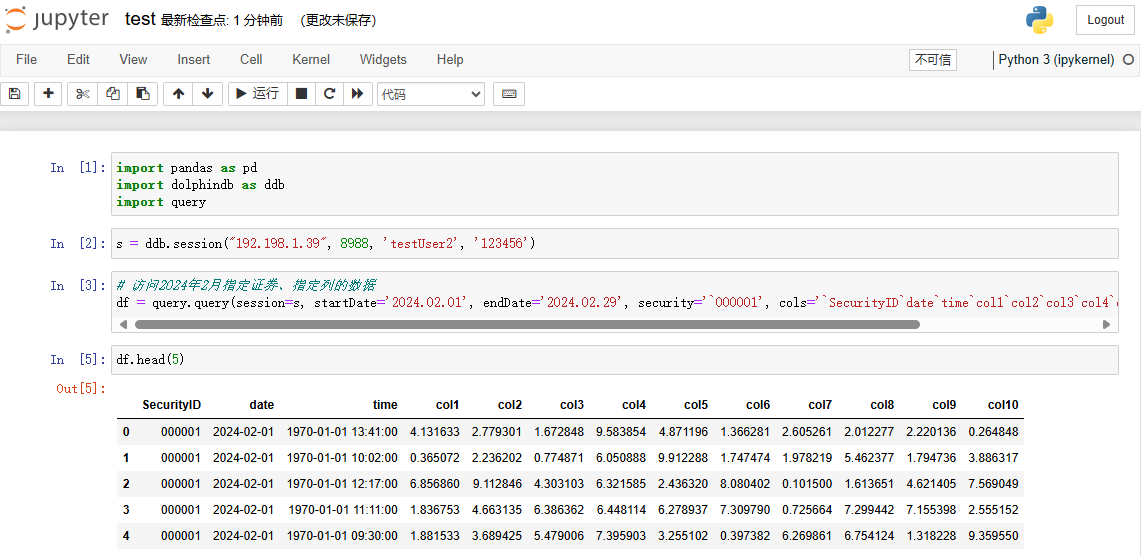
参考安装教程,安装 Python API。在 Jupyter Notebook 中新建一个* .ipynb *文件,可以在 Python API 中查看数据。
图5-1 在 Python API 中查看数据
4.2 原生 Python API 取数接口示例
dolphindb 提供了的 session() 和 run() 接口,可以快速实现 Python 和 DolphinDB server 的交互,方便用户调用教程第2章中通过函数视图封装的取数接口,下面的示例是基于原生 Python API 交互接口实现的。
在 Python API 中创建 session,登录用户 testUser2 的账号
import pandas as pd
import dolphindb as ddb

# 建立会话并登陆账号
s = ddb.session("192.198.1.38", 8200, 'testUser2', '123456')
使用全表访问接口访问数据
# 访问全表数据
startDate = np.datetime64("2015-01-01", "D")
endDate = np.datetime64("2024-12-31", "D")
cols = "*"
df = s.run("query", startDate, endDate, cols)
使用行级别访问接口访问数据
# 访问近1年所有数据
startDate = np.datetime64("2024-07-01", "D")
df = s.run("queryRecentYear", startDate)
使用列级别访问接口访问数据
# 访问2023年指定证券、允许访问的所有列的数据
startDate = np.datetime64("2023-01-01", "D")
endDate = np.datetime64("2023-12-31", "D")
cols = None
security = np.array(['000008', '000009', '000010'])
df = s.run("queryFirst10Col", startDate, endDate, cols, security)
使用行列级别访问接口访问数据
# 访问2021年指定列的数据
startDate = np.datetime64("2021-01-01", "D")
endDate = np.datetime64("2021-12-31", "D")
cols = np.array(['SecurityID', 'date', 'time', 'col47', 'col48', 'col49'])
df = s.run("queryCond", startDate, endDate, cols)
4.3 二次封装的 Python API 取数接口示例
为了提高取数接口的易用性,用户可以进一步在 Python 中对 dolphindb 提供的标准接口进行二次封装。本教程将提供一些简单的示例,旨在给读者提供一种二次封装的思路,提高读者的开发效率。
- query.py文件中是对 dolphindb 标准接口二次封装的简单示例,需要和查询代码* .py* 文件或* .ipynb* 文件放在同一目录下,以便调用
#!/usr/bin/env python
# coding: utf-8

def query(session, startDate, endDate, cols='"*"', security='NULL'):
    script = 'query({}, {}, {}, {})'.format(startDate, endDate, cols, security)
    return session.run(script)

def queryRecentYear(session, startDate='NULL', endDate='NULL', cols='"*"', security='NULL'):
    script = 'queryRecentYear({}, {}, {}, {})'.format(startDate, endDate, cols, security)
    return session.run(script)

def queryFirst10Col(session, startDate, endDate, cols='NULL', security='NULL'):
    script = 'queryFirst10Col({}, {}, {}, {})'.format(startDate, endDate, cols, security)
    return session.run(script)

def queryCond(session, startDate, endDate, cols='NULL', security='NULL'):
    script = 'queryCond({}, {}, {}, {})'.format(startDate, endDate, cols, security)
    return session.run(script)
接下来,给出一些结合 Python 客户端二次封装后的取数接口的示例。
在 Python API 中创建 session,登录用户 testUser2 的账号
import pandas as pd
import dolphindb as ddb
import query

# 建立会话并登陆账号
s = ddb.session("192.198.1.38", 8200, 'testUser2', '123456')
使用全表访问接口访问数据
# 访问全表数据
df = query.query(session=s, startDate='2015.01.01', endDate='2024.12.31')

# 访问2024年2月指定证券、指定列的数据
df = query.query(session=s, startDate='2024.02.01', endDate='2024.02.29', security='`000001', cols='`SecurityID`date`time`col1`col2`col3`col4`col5`col6`col7`col8`col9`col10')
使用行级别访问接口访问数据
# 访问近1年所有数据
df = query.queryRecentYear(session=s)

# 访问指定日期开始、指定列的数据
df = query.queryRecentYear(session=s, startDate='2024.07.01', cols='`SecurityID`date`time`col2`col3')
使用列级别访问接口访问数据
# 访问2023年指定证券、允许访问的所有列的数据
df = query.queryFirst10Col(session=s, startDate='2023.01.01', endDate='2023.12.31', security='`000008`000009`000010')

# 访问2022年12月指定列的数据
df = query.queryFirst10Col(session=s, startDate='2022.12.01', endDate='2022.12.31', cols='`SecurityID`date`time`col4`col5`col6')
使用行列级别访问接口访问数据
# 访问2021年1月允许访问的所有列的数据
df = query.queryCond(session=s, startDate='2021.01.01', endDate='2021.01.31')

# 访问2021年指定列的数据
df = query.queryCond(session=s, startDate='2021.01.01', endDate='2021.12.31', cols='`SecurityID`date`time`col47`col48`col49')
4.4 其它 API 取数接口示例
为了方便读者快速扩展该取数接口的设计方法,本教程提供了以下几种常用 API 语言的示例代码,通过 run(funcName, args...) 的规范 rpc 接口来调用,大家可以根据标准接口进行二次封装,对外提供更加便捷的数据访问接口。
C++ 示例
# 建立会话并登陆账号
DBConnection conn;
conn.connect("192.198.1.38", 8200, "testUser2", "123456");

# 访问全表数据
ConstantSP startDate = Util::createDate(2015, 1, 1);
ConstantSP endDate = Util::createDate(2024, 12, 31);
ConstantSP cols = Util::createString("*");
vector<ConstantSP> funcArgs = {startDate, endDate, cols};
auto tb = conn.run("query", funcArgs);
Java 示例
// 建立会话并登陆账号
DBConnection conn= new DBConnection();
conn.connect("192.198.1.38", 8200, "testUser2", "123456");

// 访问全表数据
BasicDate startDate = new BasicDate(LocalDate.of(2015,1,1));
BasicDate endDate = new BasicDate(LocalDate.of(2024,12,31));
BasicString cols = new BasicString("*");
List<Entity> funcArgs = Arrays.asList(startDate, endDate, cols);
BasicTable tb = (BasicTable)conn.run("query", funcArgs);
C# 示例
// 建立会话并登陆账号
DBConnection conn = new DBConnection();
conn.connect("192.198.1.38", 8200, "testUser2", "123456");

// 访问全表数据
BasicDate startDate = new BasicDate(new DateTime(2015, 1, 1));
BasicDate endDate = new BasicDate(new DateTime(2024, 12, 31));
BasicString cols = new BasicString("*");
List<IEntity> funcArgs = new List<IEntity> { startDate, endDate, cols };
BasicTable tb = (BasicTable)conn.run("query", funcArgs);
JavaScript 示例
// 建立会话并登陆账号
let ddb = new DDB('ws://192.198.1.38:8200', { username: 'testUser2', password: '123456' })
await ddb.connect()

// 访问全表数据
const start = '2015.01.01'
const end = '2024.12.31'
const tb = await ddb.execute(`query(${start}, ${end}, "*")`)
5. 总结
本教程适用于基于 DolphinDB 搭建数据中台,如何设计对外取数接口的场景。主要解决了数据访问权限和客户端取数接口封装的问题。
本教程主要提供了 Python 客户端二次封装取数接口的方法,该方法也适用于 C++、Java 和 C# 等 DolphinDB 支持的 API。
6. 常见问题解答(FAQ)
本章将针对教程使用过程中经常遇到的报错及相关问题做出解答,并提供对应的解决方案。
6.1 Not granted to read [xxx]
调用函数视图访问数据时报如下错误:
t = queryRecentYear(2023.06.01) => queryRecentYear: throw "Not granted to read data before " + start => Not granted to read data before 2023.06.28
t = queryFirst10Col(2023.01.01, 2023.12.31, ["SecurityID","date","time","col40","col50"]) => queryFirst10Col: throw "Not granted to read columns " + toStdJson(distinct(cols[notGranted])) => Not granted to read columns ["col50","col40"]
造成问题原因:
- 没有权限访问相关的行或列
解决方案:
- 修改相关参数,在权限内访问数据
t = queryRecentYear(startDate=2023.07.01)
t = queryFirst10Col(startDate=2023.01.01, endDate=2023.12.31, cols=`SecurityID`date`time`col5`col6`col7)
7. 附录
- DolphinDB 示例代码:数据接口开发.dos
- Python 示例代码:4.2 原生 Python API 取数接口示例.py query.py 4.3 二次封装的 Python API 取数接口示例.py
- C++ 示例代码:main.cpp
- Java 示例代码:Main.java
- C# 示例代码:Program.cs
- JavaScript 示例代码:example.html